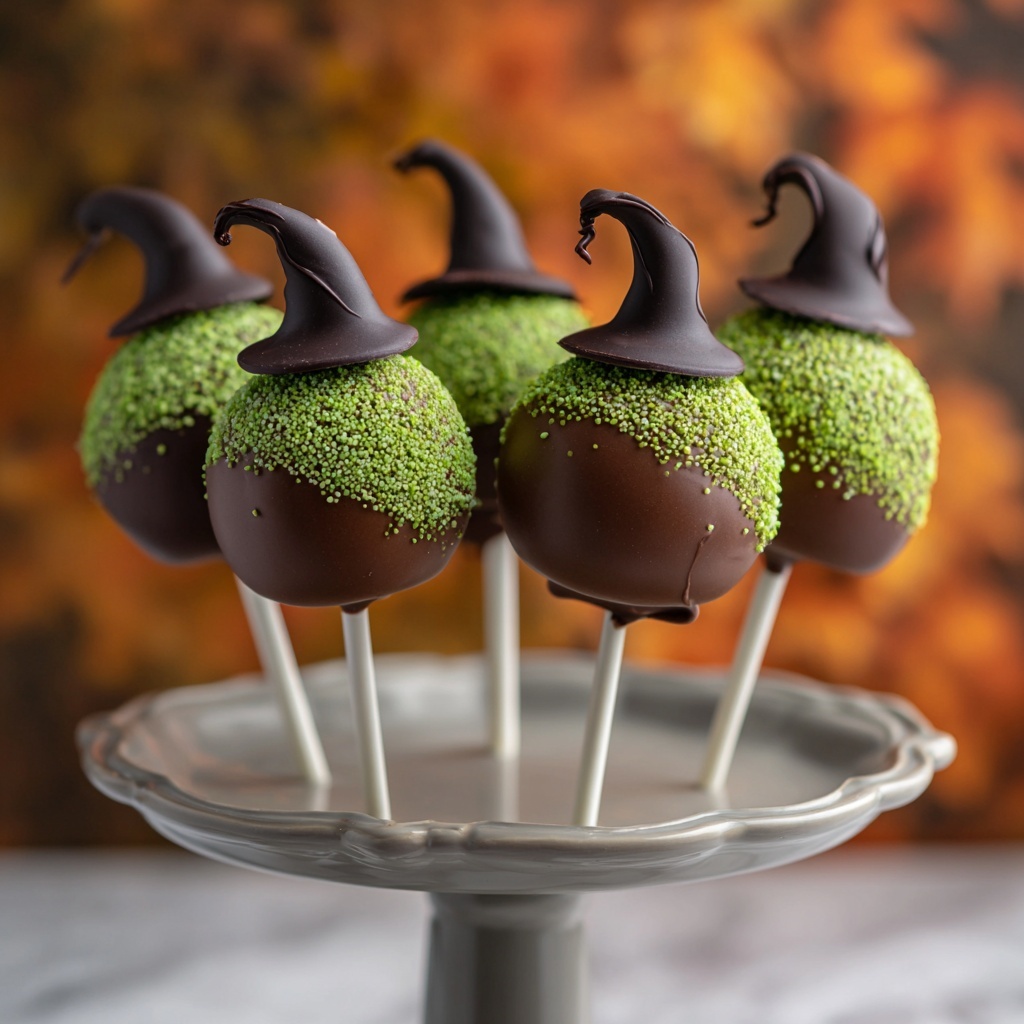
If you’re looking for a spooktacular treat that’s as fun to make as it is to eat, the Witch Hat Cake Pops Recipe is an absolute must-try. These adorable little cones of chocolatey goodness perfectly capture the festive spirit with their witchy shape and rich flavors, delivering a delightful combination of moist cake, creamy frosting, and crisp candy coating. Whether you’re preparing for a Halloween party or just want to impress friends with a magical snack, these cake pops bring charm, creativity, and a touch of whimsy to any occasion.
Ingredients You’ll Need
Gathering the right ingredients is the first step to making these charming Witch Hat Cake Pops. Each ingredient plays a vital role in providing the perfect texture, taste, and color to bring your little witch hats to life.
- Chocolate cake mix: The base of your cake pops, bringing rich chocolate flavor and a moist crumb that’s essential for shaping.
- Chocolate frosting: Acts as a binder to hold the cake crumbs together and adds extra creaminess.
- Black candy melts: These smooth, glossy melts are perfect for dipping and form the dark, shiny finish of the witch hat’s top.
- Green candy melts: Used to create the brim of the witch hats and add a vibrant pop of color for contrast.
- Lollipop sticks: Essential for holding your cake pops and giving that classic treat-on-a-stick feel.
- Edible glitter or sprinkles (optional): A fun touch to add sparkle or whimsy to your finished witch hats.
- Wax paper: Provides a non-stick surface for drying your dipped cake pops.
How to Make Witch Hat Cake Pops Recipe
Step 1: Bake the Chocolate Cake
Begin by preheating your oven according to the instructions on the box of chocolate cake mix. Bake the cake in a prepared pan until a toothpick inserted comes out clean. Baking this cake perfectly is the foundation of your Witch Hat Cake Pops Recipe; a moist, tender crumb ensures your pops hold their shape beautifully.
Step 2: Cool the Cake Completely
Once your cake is baked, transfer it to a wire rack and allow it to cool completely. This step is crucial because warm cake will make it difficult to crumble properly and bind with frosting.
Step 3: Crumble the Cake Into Fine Crumbs
Use your hands or a fork to break the cooled cake into tiny crumbs inside a large mixing bowl. Achieving fine crumbs will help the cake and frosting come together seamlessly.
Step 4: Mix with Chocolate Frosting
Add the cup of chocolate frosting to the cake crumbs and mix thoroughly until every crumb is coated and the mixture holds together when pressed. This luscious chocolatey blend is what makes shaping your Witch Hat Cake Pops Recipe both fun and easy.
Step 5: Shape Into Witch Hat Cones
Pinch a small handful of the cake mixture and mold it into a cone shape, mimicking a witch’s hat. Place each cone onto a piece of wax paper. This hands-on step lets your creativity shine as you form the signature hat shape for your cake pops.
Step 6: Dip in Black Candy Melts
Melt the black candy melts until smooth and glossy. Carefully dip each cake cone into the melted candy, letting the excess drip off to achieve an even, sleek coating that looks like shiny black chocolate. This finish gives the witch hat its enchanting appearance.
Step 7: Add the Green Candy Melts Brim
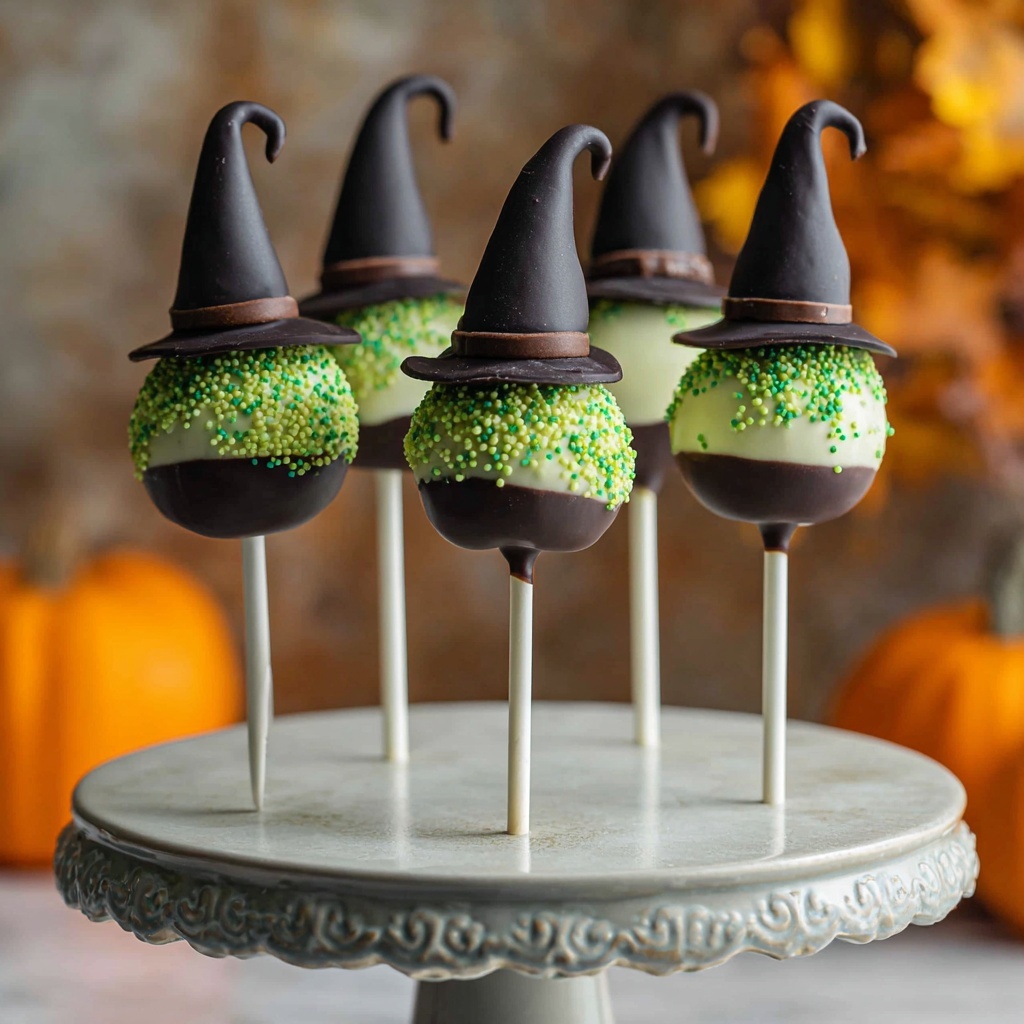
Melt the green candy melts and dip just the base of each cake pop to create the hat’s brim. This vibrant green band adds contrast and whimsy. If you wish, sprinkle edible glitter or fun decorations onto the wet candy melts for extra flair.
Step 8: Let the Candy Coating Harden
Set your dipped cake pops upright on wax paper at room temperature. Allow the candy coating to harden fully so the witch hats keep their shape and the coating stays crisp when handled.
How to Serve Witch Hat Cake Pops Recipe
Garnishes
To elevate your Witch Hat Cake Pops Recipe presentation, consider adding edible glitter, colored sugar, or festive sprinkles on the green brim before the candy sets. These little touches make the hats shimmer and add a magical, party-ready vibe.
Side Dishes
These cake pops pair beautifully with a creamy pumpkin spice latte, hot chocolate, or a crisp apple cider. Their chocolatey richness balances well with warm, spiced beverages, perfect for autumn gatherings or Halloween celebrations.
Creative Ways to Present
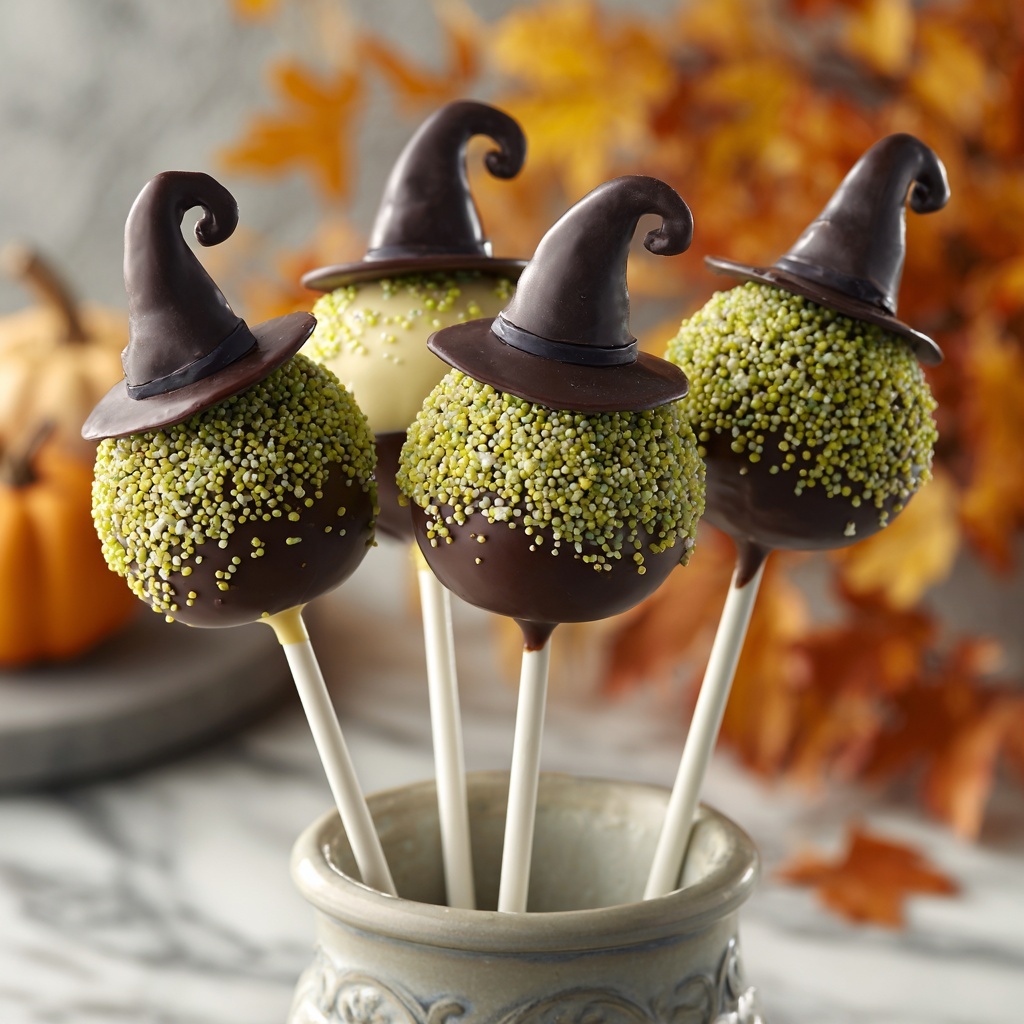
Arrange your Witch Hat Cake Pops upright in a decorated foam block wrapped with black or orange tissue paper for a striking centerpiece. For a whimsical twist, place them standing in small mini cauldrons or use a bundle of faux autumn leaves as a natural holder. Presentation is all about playful charm with these festive treats!
Make Ahead and Storage
Storing Leftovers
If you want to save some Witch Hat Cake Pops Recipe treats for later, store them in an airtight container at room temperature. They will stay fresh for a couple of days without losing that perfect balance of moist cake and crisp candy coating.
Freezing
For longer storage, freeze your cake pops by laying them flat on a baking sheet until solid, then transferring them to a freezer-safe container. Wrapped well, they maintain their flavor and texture for up to one month.
Reheating
When you’re ready to enjoy frozen cake pops, bring them to room temperature naturally. Avoid microwaving, as this can melt the candy coating or cause sogginess. Allowing them to thaw gently keeps their texture just right.
FAQs
Can I use a different cake flavor for this Witch Hat Cake Pops Recipe?
Absolutely! While chocolate cake pairs beautifully, you can experiment with vanilla, red velvet, or even pumpkin spice cake for unique twists. Just adjust frosting flavor accordingly to complement your choice.
What if I don’t have candy melts? Can I use chocolate chips instead?
Candy melts are ideal because they melt smoothly and harden with a glossy finish, but good-quality chocolate chips can work if tempered properly. Just be mindful that chocolate chips may not set as firmly or evenly as candy melts.
How do I make sure my cake pops don’t fall off the sticks?
Make sure the cake mixture is well-combined and dense enough to hold together. When dipping, dip the tip of the stick in melted candy before inserting it into the shaped cake cones—this acts as glue to secure it firmly.
Can I decorate the witch hats without edible glitter?
Definitely! You can use sprinkles, colored sugar, edible markers, or small candies. Each decoration adds its own flair and makes your Witch Hat Cake Pops Recipe uniquely yours.
What’s the best way to transport these cake pops to a party?
Keep them upright in a sturdy box lined with foam or a cake pop holder to avoid damage. Wrapping each pop individually in cellophane with a ribbon also helps keep them fresh and adds a cute touch.
Final Thoughts
Making the Witch Hat Cake Pops Recipe is a delightful way to celebrate a festive occasion with friends and family. These playful, chocolatey treats offer a perfect mix of flavor, creativity, and seasonal charm that’s sure to bring smiles all around. I can’t wait for you to try them and see how magical baking can be when you add a little imagination!
Print
Witch Hat Cake Pops Recipe
- Prep Time: 20 minutes
- Cook Time: 40 minutes
- Total Time: 1 hour
- Yield: 12 servings
- Category: Dessert
- Method: Baking
- Cuisine: American
- Diet: Vegetarian
Description
These Witch Hat Cake Pops are a festive and delicious treat perfect for Halloween or any spooky celebration. Made with moist chocolate cake mixed with chocolate frosting, shaped into witch hat cones, and dipped in rich black and green candy melts, these cake pops are both fun to make and delightful to eat. Decorate with edible glitter or sprinkles for a magical finishing touch.
Ingredients
Cake Base
- 1 box of chocolate cake mix
- Ingredients needed to prepare cake mix (usually eggs, oil, water) as per box instructions
- 1 cup of chocolate frosting
Coating and Decoration
- 12 oz of black candy melts
- 4 oz of green candy melts
- 12 lollipop sticks
- Edible glitter or sprinkles (optional)
- Wax paper for placing cake pops
Instructions
- Preheat and Bake: Preheat your oven according to the instructions on the chocolate cake mix box. Prepare the cake batter following package directions, pouring it into the appropriate pan, and bake until a toothpick inserted comes out clean.
- Cool the Cake: Remove the cake from the oven and allow it to cool completely on a wire rack to ensure it firms up for shaping.
- Crumble the Cake: Once cooled, crumble the cake into fine crumbs inside a large mixing bowl by breaking it apart thoroughly with your hands or a fork.
- Mix with Frosting: Add 1 cup of chocolate frosting to the crumbled cake. Mix thoroughly until the crumbs are fully coated and combined into a moldable dough-like consistency.
- Shape Cake Pops: Using your hands, shape the cake and frosting mixture into cone shapes that resemble witch hats. Place each shaped cone onto wax paper to keep them from sticking.
- Melt Black Candy Coating: Melt the black candy melts in a microwave-safe bowl using short intervals, stirring between to ensure smoothness. Dip each cake pop into the melted black candy, coating completely, and allow excess to drip off.
- Create the Brim: Melt the green candy melts similarly. Dip the base of each black-coated cake pop into the green candy melts to form the witch hat brim. Add edible glitter or sprinkles as decoration while the coating is still wet.
- Set the Coating: Let the cake pops sit at room temperature until the candy coating hardens completely, ensuring the decorations are set and the cake pops are firm.
Notes
- Make sure the cake is completely cool before crumbling to avoid a messy mixture.
- If the cake pop shapes are too soft or sticky, refrigerate them for 15-20 minutes before dipping to help firm them up.
- Use high-quality candy melts for smooth coating and best taste.
- Store finished cake pops in an airtight container at room temperature for up to 2 days or refrigerate for longer freshness.
- Be gentle when dipping cake pops to maintain the shape of the witch hats.


