If you love the classic Italian dessert but want a fun, bite-sized twist, this Mini Cannoli Cups Recipe is an absolute game changer. Imagine delicate, crispy pastry cups filled with a lusciously creamy ricotta filling, kissed with just the right amount of citrus zest and vanilla, then topped with chocolate chips or pistachios for extra texture and flavor. These mini treats come together quickly and look stunning on any dessert table, making them perfect for parties, family gatherings, or that special moment when you just want to indulge yourself with something truly delightful.
Ingredients You’ll Need
Each ingredient plays a starring role in crafting these irresistible Mini Cannoli Cups. From the creamy ricotta to the cinnamon-sugared crust, every element works together to create a harmony of flavor, texture, and visual appeal.
- Whole-milk ricotta cheese: Gives the filling a rich, creamy base that is smooth yet substantial.
- Powdered sugar: Sweetens and lightens the filling for that melt-in-your-mouth experience.
- Granulated sugar: Adds a gentle sweetness and helps balance the citrus zest.
- Orange or lemon zest: Provides a fresh, bright note that lifts the filling beautifully.
- Vanilla extract: Enhances the overall flavor with warm, aromatic depth.
- Refrigerated pie crusts: The foundation for the mini cups; buttery and flaky after baking.
- Turbinado sugar: Sprinkled on the crust to add a crunchy, caramelized sweetness.
- Ground cinnamon: Infuses the pastry with a subtle spicy warmth to complement the ricotta filling.
- Miniature semisweet chocolate chips or finely chopped pistachios: For that classic cannoli touch, adding crunch and bursts of flavor.
- Additional powdered sugar: Perfect for a delicate dusting just before serving to elevate presentation and sweetness.
How to Make Mini Cannoli Cups Recipe
Step 1: Prepare the Oven and Dough
Start by preheating your oven to 425 degrees Fahrenheit to ensure it’s at the perfect temperature for baking the crusts evenly and achieving a beautiful golden color. Lightly flour your workspace and unroll the refrigerated pie crusts. This step ensures your dough won’t stick and lets you roll it out smoothly.
Step 2: Add Sugar and Cinnamon to the Dough
Sprinkle the pie crusts generously with turbinado sugar and then dust with ground cinnamon. Gently roll over the dough with a rolling pin to press the mixture into it. This technique bakes the sugar and cinnamon right into the crust, creating a crisp, flavorful cup that’s anything but plain.
Step 3: Cut and Shape the Pastry Cups
Using a 2½-inch cookie cutter, cut rounds from the dough. Press each round into ungreased mini muffin cups, gently molding the dough to form mini cups. Don’t worry if you need to re-roll scraps to reach a total of 48 cups—every bit of dough is well worth it for these crowd-pleasers.
Step 4: Bake the Pastry Cups
Bake in your preheated oven for 10 minutes or until the crusts turn a lovely golden brown. Once baked, allow the cups to cool completely in the pans before carefully transferring them to a wire rack. This cooling step ensures they set perfectly and won’t break when you fill them.
Step 5: Prepare the Ricotta Filling
While the cups cool, beat together the ricotta cheese, powdered sugar, granulated sugar, citrus zest, and vanilla extract in a large bowl until smooth and creamy. The mixture should be light but hold its shape—this is the heart of your Mini Cannoli Cups Recipe. Transfer the filling to a zip-top bag and refrigerate until you’re ready to assemble, helping it firm up just right.
Step 6: Fill and Garnish Your Mini Cannoli Cups
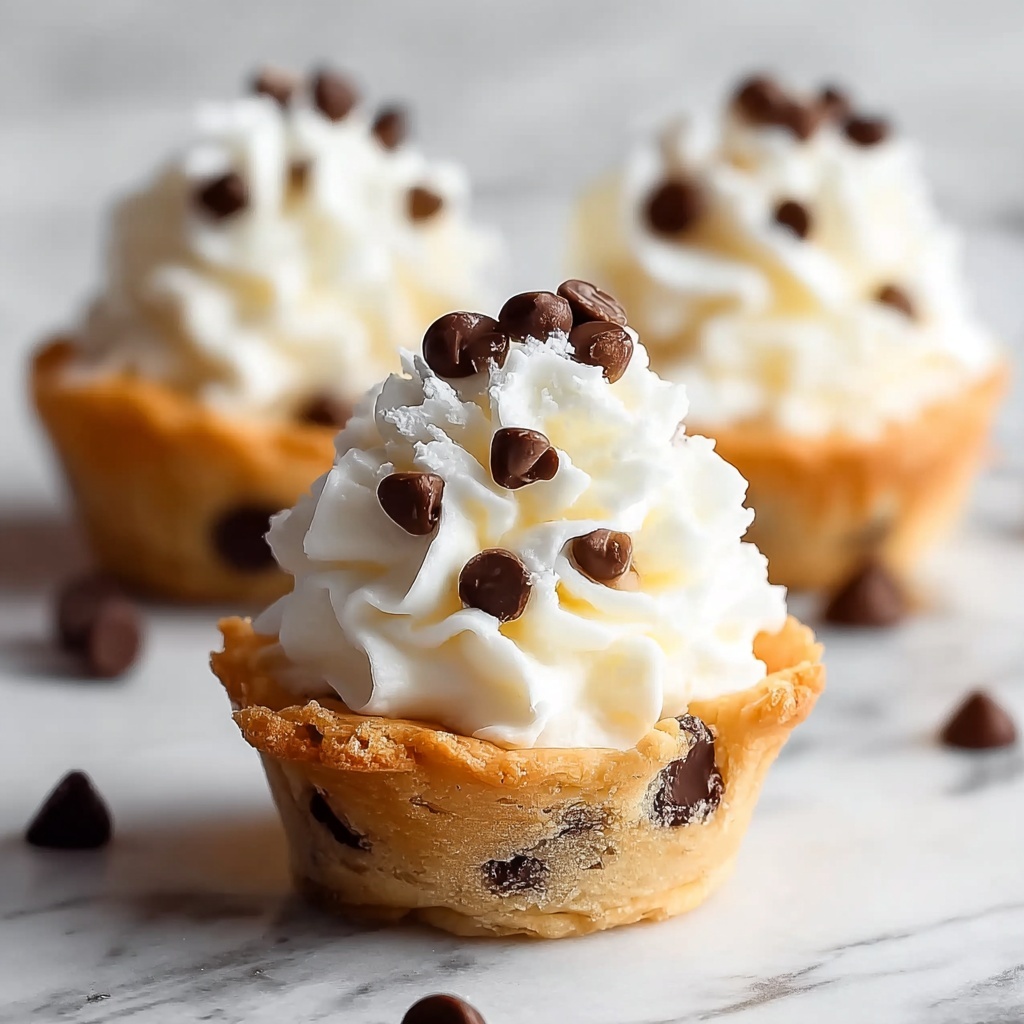
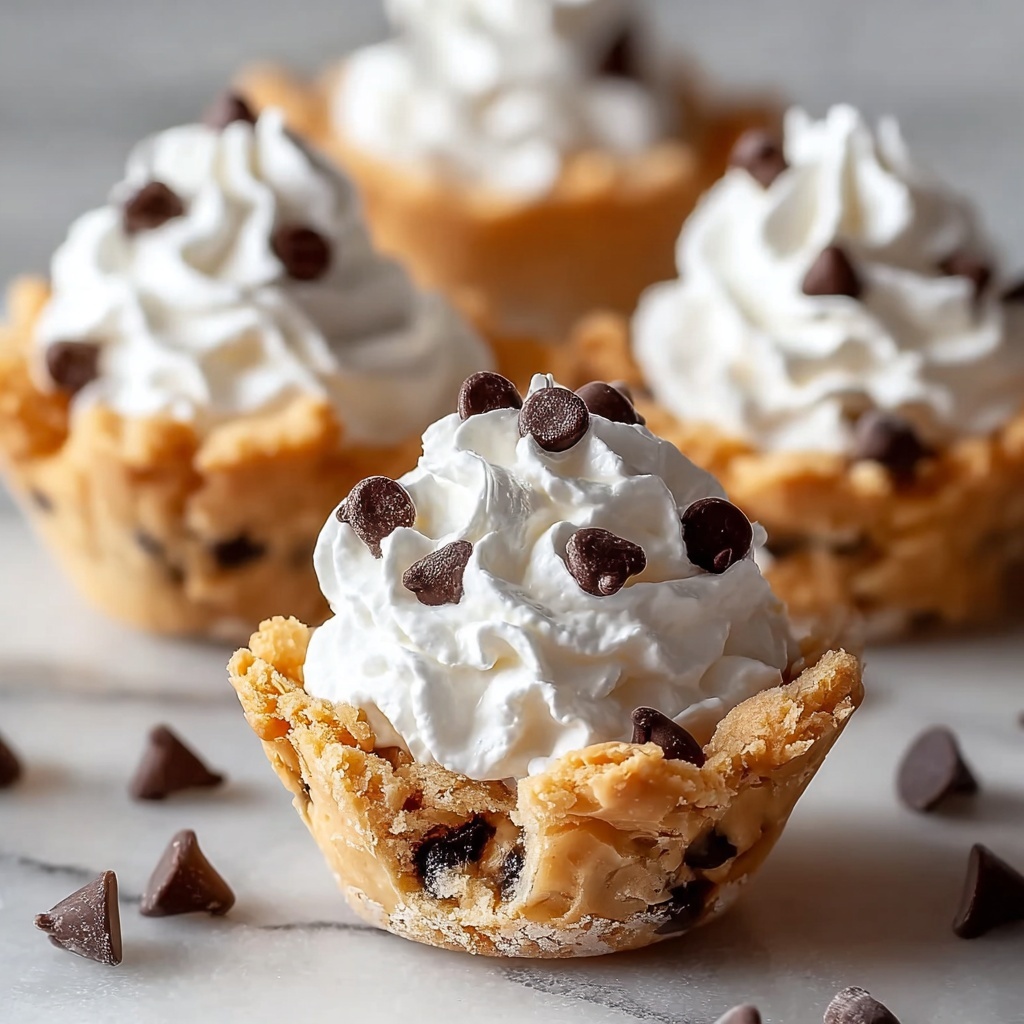
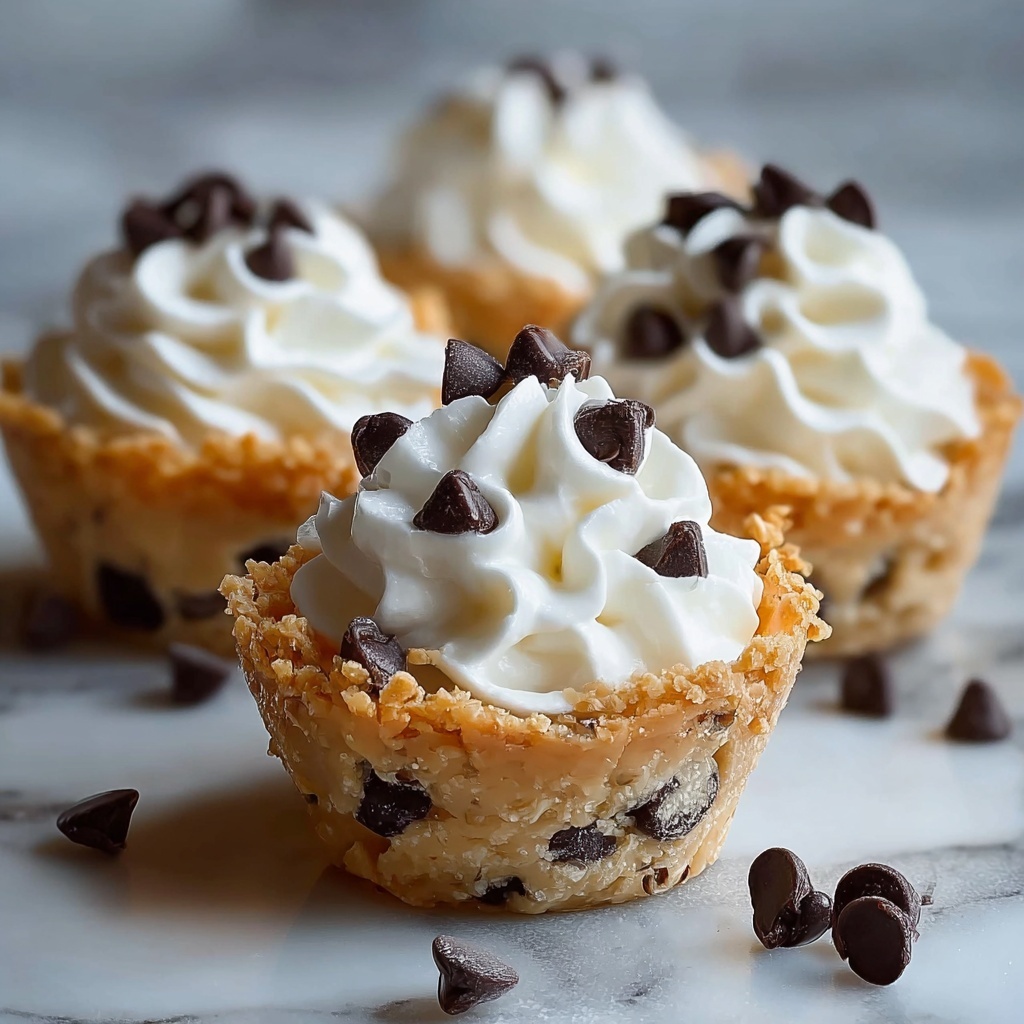
When the cups are fully cooled, snip a corner off the chilled zip-top bag and pipe the ricotta filling into each pastry shell. Then sprinkle with miniature chocolate chips or chopped pistachios for that final touch of texture and color. Finish by dusting with powdered sugar to give your mini cannoli cups a delicate, elegant look.
How to Serve Mini Cannoli Cups Recipe
Garnishes
Your garnishes can transform these treats from simple to spectacular. Mini chocolate chips add a classic sweetness and crunch, while finely chopped pistachios bring a vibrant green color and nutty flavor. Dusting with powdered sugar adds a soft, snowy finish that makes the cups visually irresistible.
Side Dishes
Since Mini Cannoli Cups are a sweet bite-sized dessert, they pair wonderfully with a cup of freshly brewed espresso or a chilled glass of dessert wine. For a festive spread, serve alongside fresh berries or a light fruit salad that complements but doesn’t overpower the ricotta filling’s luscious richness.
Creative Ways to Present
Presentation makes a big difference with these little delights. Arrange the mini cups on a pretty tiered stand for a party or line them up on a rustic wooden board for a casual gathering. Try placing edible flowers like violets or rose petals around the tray for an extra touch of whimsy and color to impress your guests.
Make Ahead and Storage
Storing Leftovers
If you’re lucky enough to have leftovers, store the assembled Mini Cannoli Cups in a single layer in an airtight container in the refrigerator. They stay fresh and creamy for up to two days, but be mindful that the pastry cups may lose some crispness over time once filled.
Freezing
For best results, freeze the unfilled baked cups in a sealed container for up to one month. When ready to serve, thaw them fully before adding the ricotta filling to maintain that perfect crisp texture and fresh flavor.
Reheating
Because these are best enjoyed fresh and crisp, avoid reheating once filled. However, if you want to warm the empty pastry cups, a quick 2 to 3 minutes in a 350-degree oven will refresh their crunchiness before filling.
FAQs
Can I use part-skim ricotta instead of whole milk?
While whole-milk ricotta gives the creamiest texture and richest flavor, part-skim ricotta can be used if you prefer a lighter filling, though it may be slightly less creamy.
Is there a substitute for refrigerated pie crust?
You can make your own pastry dough or even use phyllo dough sheets, but refrigerated pie crust is convenient and produces the ideal flaky texture for these cups.
How long can Mini Cannoli Cups sit out before serving?
Because of the dairy filling, it’s best to keep these refrigerated until just before serving and not leave them out at room temperature for more than two hours.
Can I make the filling ahead of time?
Absolutely! The ricotta filling can be made a day ahead and stored in the refrigerator, which actually helps the flavors meld beautifully.
Are there nut-free options for the garnish?
Yes, omit pistachios and opt for chocolate chips only or even small fruit pieces like finely chopped berries for a nut-free alternative.
Final Thoughts
There is something truly magical about these charming Mini Cannoli Cups Recipe that makes any occasion feel special. They are delightfully easy to whip up, endlessly customizable, and utterly delicious in every bite. I can’t wait for you to try making these yourself and watch your friends and family fall in love with this playful, elegant dessert. Happy baking!
Print
Mini Cannoli Cups Recipe
- Prep Time: 15 minutes
- Cook Time: 10 minutes
- Total Time: 25 minutes
- Yield: 48 mini cannoli cups
- Category: Dessert
- Method: Baking
- Cuisine: Italian
- Diet: Vegetarian
Description
These Mini Cannoli Cups are a delightful twist on the classic Italian dessert, featuring a crispy cinnamon-sugar pie crust filled with a creamy, sweet ricotta mixture. Perfectly bite-sized, they are ideal for parties or a sweet snack, offering the traditional flavors of cannoli in a convenient and easy-to-make format.
Ingredients
Filling
- 1 container (15 oz) whole-milk ricotta cheese
- 1/2 cup powdered sugar
- 2 tablespoons granulated sugar
- 1 teaspoon finely grated orange or lemon zest
- 1/2 teaspoon vanilla extract
Crust
- 1 box (2 count) refrigerated pie crusts, softened as directed on box
- 3 tablespoons turbinado sugar (raw sugar)
- 1 teaspoon ground cinnamon
Garnish
- 1/4 cup miniature semisweet chocolate chips or finely chopped pistachios
- Additional powdered sugar for dusting
Instructions
- Preheat the Oven: Preheat your oven to 425°F (220°C) to ensure it’s hot enough for the crust to become golden and crisp quickly.
- Prepare the Pie Crusts: Lightly flour a clean work surface and unroll the two refrigerated pie crusts. Evenly sprinkle the surface of the crusts with turbinado sugar and ground cinnamon. Using a rolling pin, gently roll over the crust to press the sugar and cinnamon mixture into the dough. This step adds sweetness and a lovely spiced flavor to the crust.
- Cut and Shape: Cut the crust into 2½-inch rounds using a cookie cutter or a similar-sized circular tool. Carefully press each dough round into ungreased mini muffin cups to form small cups. If you run out of dough, gather the scraps, reroll gently, and cut additional circles to make a total of 48 cups.
- Bake the Cups: Place the muffin pan with the shaped dough cups into the preheated oven and bake for about 10 minutes or until the edges turn golden brown. Once baked, allow the cups to cool completely in the pan before carefully transferring them to a wire rack to cool further. This ensures the cups hold their shape and remain crisp.
- Make the Filling: While the cups cool, combine the whole-milk ricotta cheese, powdered sugar, granulated sugar, finely grated orange or lemon zest, and vanilla extract in a large mixing bowl. Beat the ingredients until the mixture is smooth and creamy. Transfer the filling into a zip-top bag and refrigerate until ready to use; chilling helps the flavors meld.
- Assemble the Cannoli Cups: Before serving, snip a small hole at one corner of the chilled filling bag and pipe the creamy ricotta filling into each cooled pastry cup. Garnish each mini cup with either mini chocolate chips or finely chopped pistachios. Finish with a dusting of powdered sugar for an elegant touch.
Notes
- Make sure the pie crust is well chilled and the dough is not overworked to prevent shrinking during baking.
- For a nut-free version, use chocolate chips only for garnish instead of pistachios.
- Freshly grate the citrus zest just before mixing for maximum flavor.
- If you don’t have a cookie cutter, use the rim of a glass or a small bowl to cut circles.
- These mini cannoli cups are best served the same day for optimal crispness but can be stored in an airtight container in the refrigerator for up to two days.
