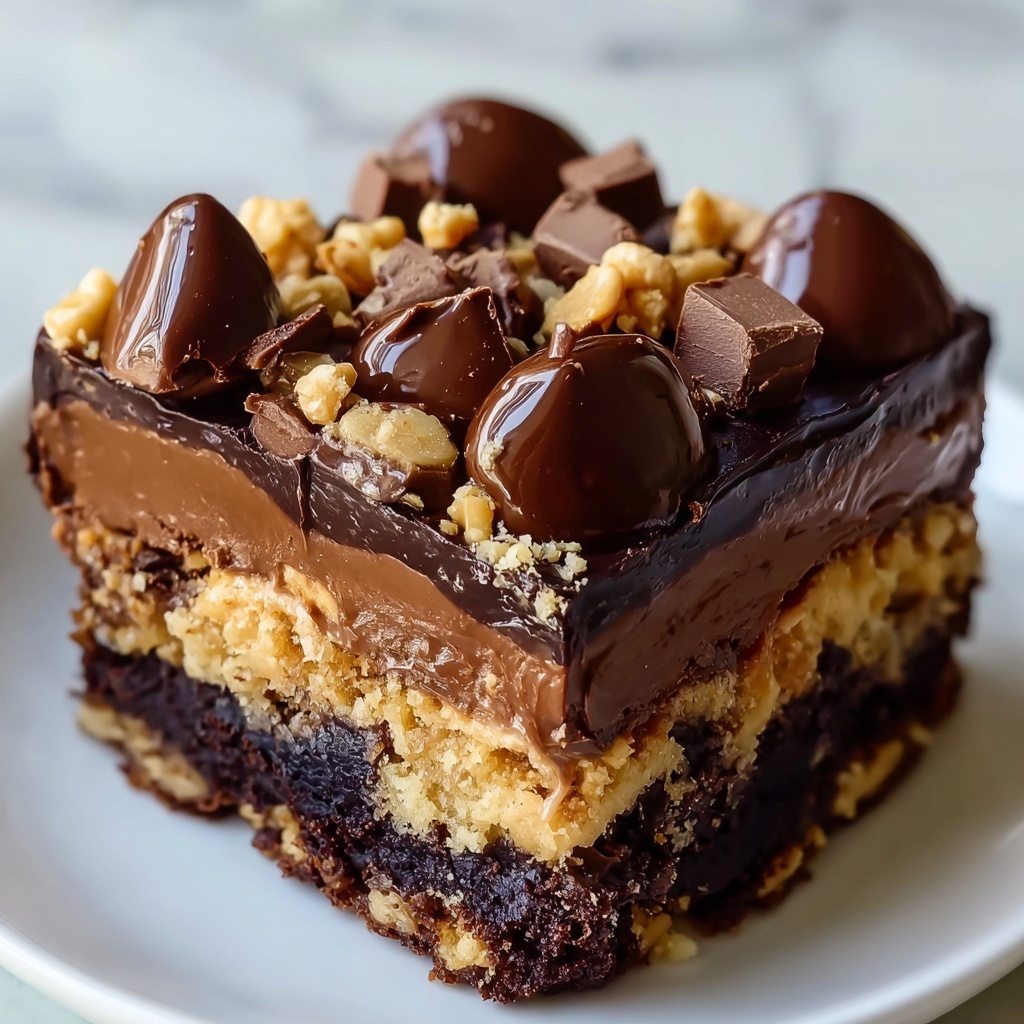
If you are on the hunt for a delightfully easy dessert that packs a punch of rich flavors and textures, the Peanut Butter Cup Dump Cake Recipe is here to steal your heart. This cake brings together the luscious creaminess of peanut butter, the deep chocolatey goodness of cake mix, and the irresistible crunch of chopped peanut butter cups, all layered effortlessly in one dish. It’s a simple yet spectacular way to satisfy any sweet tooth, perfect for celebrations or a cozy family treat.
Ingredients You’ll Need
Nothing fancy here — just straightforward ingredients that combine to create a dessert bursting with flavor and contrast. Each element plays a crucial role, whether it’s giving the cake its moist base, the rich peanut butter undertone, or those pockets of melty chocolate that make every bite a joy.
- Chocolate cake mix: The foundation of this dump cake, providing a rich chocolate flavor and the structure for all the toppings.
- Creamy peanut butter: Spread across the bottom for a smooth, nutty layer that complements the chocolate perfectly.
- Sweetened condensed milk: Adds sweetness and moisture, helping meld the layers together beautifully.
- Chopped peanut butter cups: Incorporated in layers and on top for bursts of peanut-chocolate goodness and delightful texture.
- Melted butter: Drizzled over the cake mix to ensure a golden, slightly crisp crust.
- Milk chocolate chips: Sprinkled on top to melt and add extra pockets of creamy chocolate throughout the cake.
- Optional toppings: Whipped cream or vanilla ice cream to elevate each serving to indulgent perfection.
How to Make Peanut Butter Cup Dump Cake Recipe
Step 1: Preheat and Prep Your Pan
Begin by setting your oven to 350°F (175°C) and generously grease a 9×13-inch baking dish. This ensures your cake doesn’t stick and can be easily served later. Starting with a well-prepared pan is a small step that makes a big difference in your final presentation!
Step 2: Create the Peanut Butter Layer
Spread the creamy peanut butter evenly over the bottom of the pan. This layer acts as a rich, velvety bed that anchors the dessert with its nutty flavor. Use the back of a spoon or spatula to smooth it out so each bite will have a consistent dose of peanut butter magic.
Step 3: Add the First Layer of Chopped Peanut Butter Cups and Sweetened Condensed Milk
Sprinkle half of your chopped peanut butter cups over the peanut butter layer, then gently pour the entire can of sweetened condensed milk on top. The candy bits add a delightful crunch and bursts of peanut butter-chocolate surprise, while the condensed milk guarantees luscious moisture and sweetness throughout the cake.
Step 4: Sprinkle the Chocolate Cake Mix
Evenly cover the condensed milk layer with the dry chocolate cake mix. This might feel a bit unusual since you aren’t mixing, but trust the process! The cake mix will absorb the liquid beneath as it bakes, creating a cakey texture with pockets of gooey goodness.
Step 5: Drizzle Butter and Add Remaining Toppings
Pour the melted butter evenly over the chocolate cake mix. Then, sprinkle the remaining chopped peanut butter cups and milk chocolate chips on top. These toppings will melt and become bubbling, irresistible gems of texture and flavor once baked.
Step 6: Bake to Perfection
Place your baking dish in the oven and bake for 35 to 40 minutes, or until the top is beautifully bubbly and slightly crisp. The smell wafting through your kitchen will be enough to have everyone gathering around the oven door in anticipation!
Step 7: Cool and Serve
Allow the dessert to cool for 10 to 15 minutes after baking. This waiting time helps everything set just enough to serve neat slices. For an extra touch of decadence, scoop on some whipped cream or vanilla ice cream to complement the gooey, rich flavors of the cake.
How to Serve Peanut Butter Cup Dump Cake Recipe
Garnishes
Keep it simple yet stunning by garnishing with extra chopped peanut butter cups sprinkled over each serving. A dollop of whipped cream or a scoop of creamy vanilla ice cream adds a cool contrast to the warm, melty cake and complements the peanut butter’s richness perfectly.
Side Dishes
This dessert speaks for itself, but if you want to round out your menu, consider serving it with fresh berries or a light fruit salad. The fresh, tart flavors help balance the cake’s sweetness and richness, making every bite delightfully balanced.
Creative Ways to Present
For a festive touch, serve this dump cake in a trifle bowl layered with extra peanut butter cups and chocolate chips, or portion it into individual ramekins to impress guests with personalized servings. You can also drizzle warm caramel or chocolate sauce on top for an extra indulgent finish.
Make Ahead and Storage
Storing Leftovers
Leftover Peanut Butter Cup Dump Cake Recipe can be stored in an airtight container in the refrigerator for up to four days. The chilled cake tastes great and even benefits from the flavors melding more deeply overnight.
Freezing
If you want to keep it longer, freeze individual portions wrapped tightly in plastic wrap and foil. This dessert freezes well for up to three months. Thaw in the fridge overnight before reheating gently to preserve the moist, decadent texture.
Reheating
For the best experience, reheat leftover servings in the microwave for 30 to 45 seconds or until warmed through. If you have time, a brief stint in a 350°F oven for 10 to 15 minutes also revives the crisp topping beautifully without drying it out.
FAQs
Can I use crunchy peanut butter instead of creamy?
Yes, you can! Crunchy peanut butter will add a little more texture to the base layer, which some may love for an extra crunch, but creamy peanut butter melts more smoothly and evenly.
Is it necessary to use sweetened condensed milk?
Sweetened condensed milk adds not only sweetness but also moisture that keeps the cake gooey and rich. While you could experiment with alternatives, it’s a key ingredient for that signature melt-in-your-mouth texture in this dump cake.
Can I substitute the chocolate cake mix with something else?
You can try using a devil’s food cake mix or even a brownie mix. However, the texture and baking time might change slightly, so watch it closely to avoid overbaking.
How do I prevent the top from burning while baking?
If you notice your cake is browning too quickly, tent it loosely with foil after about 25 minutes to protect the top while allowing the inside to finish baking.
Is this recipe gluten-free?
The traditional recipe uses regular cake mix, which contains gluten. For a gluten-free version, look for a certified gluten-free chocolate cake mix and confirm all other ingredients meet your dietary needs.
Final Thoughts
This Peanut Butter Cup Dump Cake Recipe is one of those irresistible desserts that feels special yet requires minimal effort to make. Its layers of creamy peanut butter, rich chocolate, and gooey sweetness are a guaranteed crowd-pleaser any time you crave a decadent treat. So grab your ingredients, preheat that oven, and prepare to fall in love with every spoonful of this wonderfully easy and delicious cake!
Print
Peanut Butter Cup Dump Cake Recipe
- Prep Time: 10 minutes
- Cook Time: 35 minutes
- Total Time: 45 minutes
- Yield: 12 servings
- Category: Dessert
- Method: Baking
- Cuisine: American
Description
This Peanut Butter Cup Dump Cake is an indulgent, easy-to-make dessert featuring layers of creamy peanut butter, chopped peanut butter cups, sweetened condensed milk, and chocolate cake mix baked to perfection. Topped with chocolate chips and an optional garnish of whipped cream or vanilla ice cream, this rich and fudgy cake is perfect for peanut butter and chocolate lovers looking for a quick and delicious treat.
Ingredients
Base Layer
- 1 cup creamy peanut butter
- 1 ½ cups chopped peanut butter cups (plus extra for garnish)
- 1 can (14 oz) sweetened condensed milk
Cake Layer
- 1 box chocolate cake mix
- ½ cup melted butter
- 1 cup milk chocolate chips
Optional Toppings
- Whipped cream for serving
- Vanilla ice cream for serving
Instructions
- Preheat Oven: Preheat your oven to 350°F (175°C) and grease a 9×13-inch baking dish to prevent sticking and ensure easy serving.
- Layer Ingredients: Spread the creamy peanut butter evenly across the bottom of the prepared baking dish. Sprinkle half of the chopped peanut butter cups over the peanut butter layer, then pour the sweetened condensed milk evenly over the candy layer to add sweetness and moisture.
- Add Cake Mix: Sprinkle the dry chocolate cake mix uniformly over the sweetened condensed milk layer, covering the entire surface to form the cake base.
- Add Butter and Chocolate Chips: Drizzle the melted butter evenly over the cake mix to moisten it during baking. Then, sprinkle the remaining chopped peanut butter cups along with the milk chocolate chips on top to create a rich chocolate-peanut topping.
- Bake: Place the baking dish in the preheated oven and bake for 35 to 40 minutes, or until the top layer becomes bubbly and slightly crisp, indicating the cake is cooked through.
- Serve: Allow the cake to cool for 10 to 15 minutes before serving. For an extra indulgent experience, serve warm with whipped cream or a scoop of vanilla ice cream.
Notes
- Ensure the peanut butter layer is evenly spread for uniform flavor.
- You can substitute milk chocolate chips with dark or semi-sweet chocolate chips if preferred.
- Letting the cake cool slightly helps it set and makes it easier to slice.
- Store leftovers covered at room temperature for up to 2 days or refrigerate for up to 5 days.
- This cake does not require mixing or beating batter, making it quick and easy to prepare.
