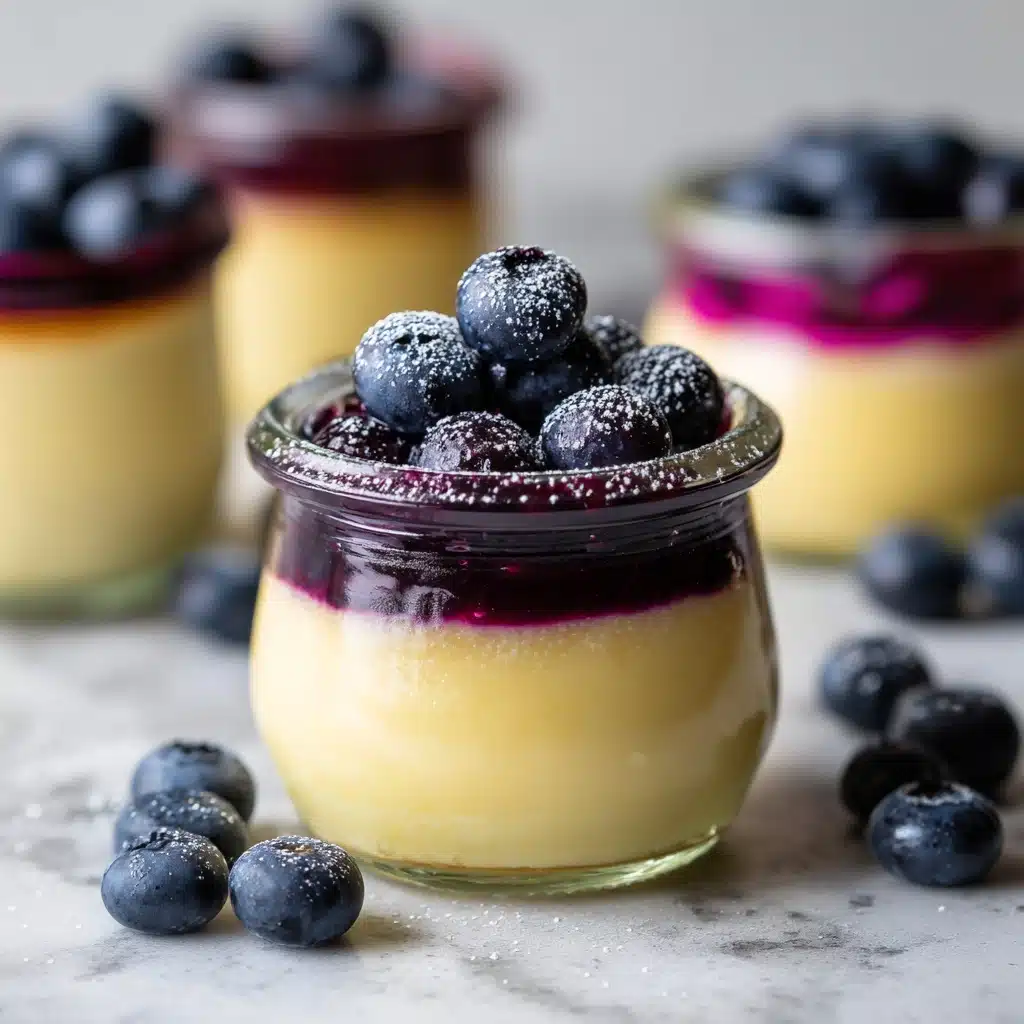
High Protein Cheesecake Jars Recipe
If you’re searching for a treat that’s as nourishing as it is delicious, these High Protein Cheesecake Jars are about to become your new favorite go-to dessert! Creamy, tangy, and layered with just the right amount of crunch and fresh berries, they check every box for taste, nutrition, and pure fun. Not only do they come together in a flash, but you can also prep them ahead for a week of healthy indulgence. Whether you’re feeding a crowd, meal-prepping for yourself, or just need a sweet pick-me-up, these jars will satisfy your cravings and fuel your body at the same time.
Ingredients You’ll Need
Let’s talk ingredients: each one in these High Protein Cheesecake Jars is simple yet essential, working together to create that perfect balance of creamy, crunchy, sweet, and fresh. Here’s what you’ll need and why you’ll love each part.
- Plain Greek yogurt (2% or whole milk): Adds protein, tang, and creamy texture—go for a thicker yogurt for the dreamiest filling.
- Light cream cheese, softened: Gives that classic cheesecake flavor and luscious mouthfeel without being too heavy.
- Honey or maple syrup: A touch of natural sweetness to bring everything together—feel free to adjust for your taste buds!
- Vanilla extract: Just a teaspoon transforms the whole dish, adding warmth and depth to the flavor.
- Vanilla protein powder (optional): For an extra protein punch, this is your secret weapon—use a flavored powder if you’re feeling adventurous.
- Crushed graham crackers or high-protein granola: The bottom crunch that makes each bite pop with texture; granola adds even more protein!
- Fresh berries (strawberries, blueberries, raspberries): Bursts of color and juicy freshness—mix and match your favorites.
- Extra berries or graham crumbs for topping: Because a little flourish on top makes them irresistible and picture-perfect.
How to Make High Protein Cheesecake Jars
Step 1: Whip the Cream Cheese
Start by placing your softened light cream cheese into a medium bowl. Using a hand mixer (or a determined arm with a sturdy whisk!), beat the cream cheese until it’s completely smooth and free of any lumps. This step is key for a velvety, cloud-like filling, so don’t rush it—think of it as building the dreamy base for your High Protein Cheesecake Jars.
Step 2: Mix in the Yogurt and Flavorings
Now, add the Greek yogurt, honey or maple syrup, vanilla extract, and the optional scoop of protein powder. Mix everything together until the mixture is creamy, uniform, and slightly fluffy. At this stage, feel free to sneak a taste—this is where you can tweak the sweetness or vanilla level to suit your mood!
Step 3: Layer Up the Jars
Grab four small jars or sturdy cups and get ready to build beautiful layers. Start with a spoonful of crushed graham crackers or high-protein granola at the bottom of each jar. Next, add a generous layer of your cheesecake filling, followed by a handful of fresh berries. If your jars are tall enough, feel free to repeat the layers for extra decadence!
Step 4: Top and Chill
Finish by sprinkling a few extra berries or a dusting of graham crumbs on top for that perfect finishing touch. Pop the jars into the refrigerator for at least 30 minutes to let the flavors meld and the filling set. Trust me—the wait is totally worth it!
How to Serve High Protein Cheesecake Jars

Garnishes
A dollop of whipped cream, a drizzle of honey, or a sprinkle of toasted nuts can take your High Protein Cheesecake Jars from delightful to downright dreamy. For a pop of color, add a mint leaf or a few extra fresh berries right before serving.
Side Dishes
Pair these jars with a crisp fruit salad, a hot cup of coffee, or even a small glass of sparkling water with lemon. Their rich yet light texture makes them a perfect finish to any meal, or even a protein-packed snack on their own!
Creative Ways to Present
Go beyond the classic jar—try layering your cheesecake mixture in small wine glasses, ramekins, or even shot glasses for a party. For a picnic, pack them in lidded mason jars for a grab-and-go treat that’s as pretty as it is practical. Kids especially love building their own layers!
Make Ahead and Storage
Storing Leftovers
These High Protein Cheesecake Jars are a meal prep dream! Simply cover each jar tightly and store them in the refrigerator for up to three days. The flavors actually deepen and meld as they sit, making them even more delicious the next day.
Freezing
While it’s best to enjoy these jars fresh, you can freeze them if needed. Seal tightly and freeze for up to one month—just note that the texture may become slightly more icy and less creamy after thawing. Let them thaw overnight in the fridge before eating.
Reheating
No need to reheat—these jars are meant to be enjoyed chilled, straight from the fridge. If you’ve frozen them, just let them come to refrigerator temperature before serving for the best creamy consistency.
FAQs
Can I use non-dairy yogurt or cream cheese?
Absolutely! Swap in your favorite plant-based Greek-style yogurt and dairy-free cream cheese to make vegan-friendly High Protein Cheesecake Jars. You may need to adjust sweetness and texture slightly, but the result will still be delicious.
Is it possible to make these jars without protein powder?
Definitely. The Greek yogurt and cream cheese already make these jars high in protein, so the protein powder is just an optional bonus. Feel free to leave it out or replace it with a bit more vanilla for flavor.
What other toppings work well?
The sky’s the limit! Try shaved dark chocolate, slivered almonds, a swirl of nut butter, or even a spoonful of fruit compote for variety. Each one offers a new flavor twist on your High Protein Cheesecake Jars.
How can I make these jars lower in sugar?
Use an unsweetened Greek yogurt and opt for a sugar-free sweetener like stevia or monk fruit in place of honey or maple syrup. You can also reduce the amount of graham crackers or use a no-sugar-added granola.
Are these jars suitable for breakfast?
Why not? With their high protein content, whole food ingredients, and just enough sweetness, these jars are a fantastic breakfast option (or post-workout snack) that feels indulgent but fuels your day.
Final Thoughts
Whether you’re making them for meal prep, a special gathering, or just because you deserve a treat, these High Protein Cheesecake Jars are bound to become a staple in your kitchen. Give them a try and see just how easy, customizable, and crave-worthy healthy desserts can be!
Print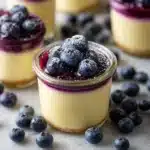
High Protein Cheesecake Jars Recipe
- Total Time: 10 minutes
- Yield: 4 jars 1x
- Diet: Non-Vegetarian
Description
These High Protein Cheesecake Jars are a delicious and nutritious no-bake dessert perfect for a healthy treat or meal prep. Made with creamy Greek yogurt, light cream cheese, and optional vanilla protein powder, they provide a satisfying boost of protein with every bite. Layered with crushed graham crackers or granola and fresh berries, these jars combine creamy texture with fruity freshness for a balanced and indulgent snack or dessert.
Ingredients
Cheesecake Filling
- 1 cup plain Greek yogurt (2% or whole milk)
- 8 oz light cream cheese, softened
- 2 tablespoons honey or maple syrup
- 1 teaspoon vanilla extract
- 1/2 scoop vanilla protein powder (optional, for extra boost)
Layer and Toppings
- 1/2 cup crushed graham crackers or high-protein granola
- 1/2 cup fresh berries (strawberries, blueberries, raspberries)
- Extra berries or graham crumbs for topping
Instructions
- Prepare the Cheesecake Filling: In a medium bowl, beat the softened light cream cheese using a mixer or whisk until smooth and creamy. Add the Greek yogurt, honey or maple syrup, vanilla extract, and vanilla protein powder if using. Mix all ingredients thoroughly until the mixture is smooth and evenly combined.
- Layer Ingredients in Jars: Take 4 small jars or cups and spoon an even layer of crushed graham crackers or high-protein granola into the bottom of each. This will serve as the base and provide a crunchy texture.
- Add Cheesecake Filling: Spoon a thick layer of the prepared cheesecake filling over the graham cracker or granola layer in each jar. Smooth the filling gently to create even layers.
- Top with Fresh Berries: Add a spoonful of fresh mixed berries on top of the cheesecake filling to add a burst of freshness and natural sweetness. You may repeat the layering process if desired for taller jars.
- Finish with Garnish: Sprinkle extra crushed graham crackers or berries on top to garnish the jars and enhance presentation.
- Chill Before Serving: Refrigerate the jars for at least 30 minutes to allow the cheesecake filling to set and the flavors to meld. Serve chilled for the best texture and taste.
Notes
- You can customize the flavor by using flavored protein powder or flavored yogurt instead of plain Greek yogurt.
- Store the cheesecake jars in the refrigerator for up to 3 days, making them ideal for meal prep or grab-and-go snacks.
- For a lower sugar option, reduce or omit the honey or maple syrup and choose a no-sugar-added granola.
- If you do not have graham crackers, substitute with crushed digestive biscuits or your favorite crunchy cereal.
- Prep Time: 10 minutes
- Cook Time: 0 minutes
- Category: Dessert
- Method: No-Bake
- Cuisine: American
Nutrition
- Serving Size: 1 jar
- Calories: 210
- Sugar: 11g
- Sodium: 140mg
- Fat: 9g
- Saturated Fat: 4g
- Unsaturated Fat: 4g
- Trans Fat: 0g
- Carbohydrates: 20g
- Fiber: 1g
- Protein: 14g
- Cholesterol: 25mg


