Santa Hat Brownies Recipe
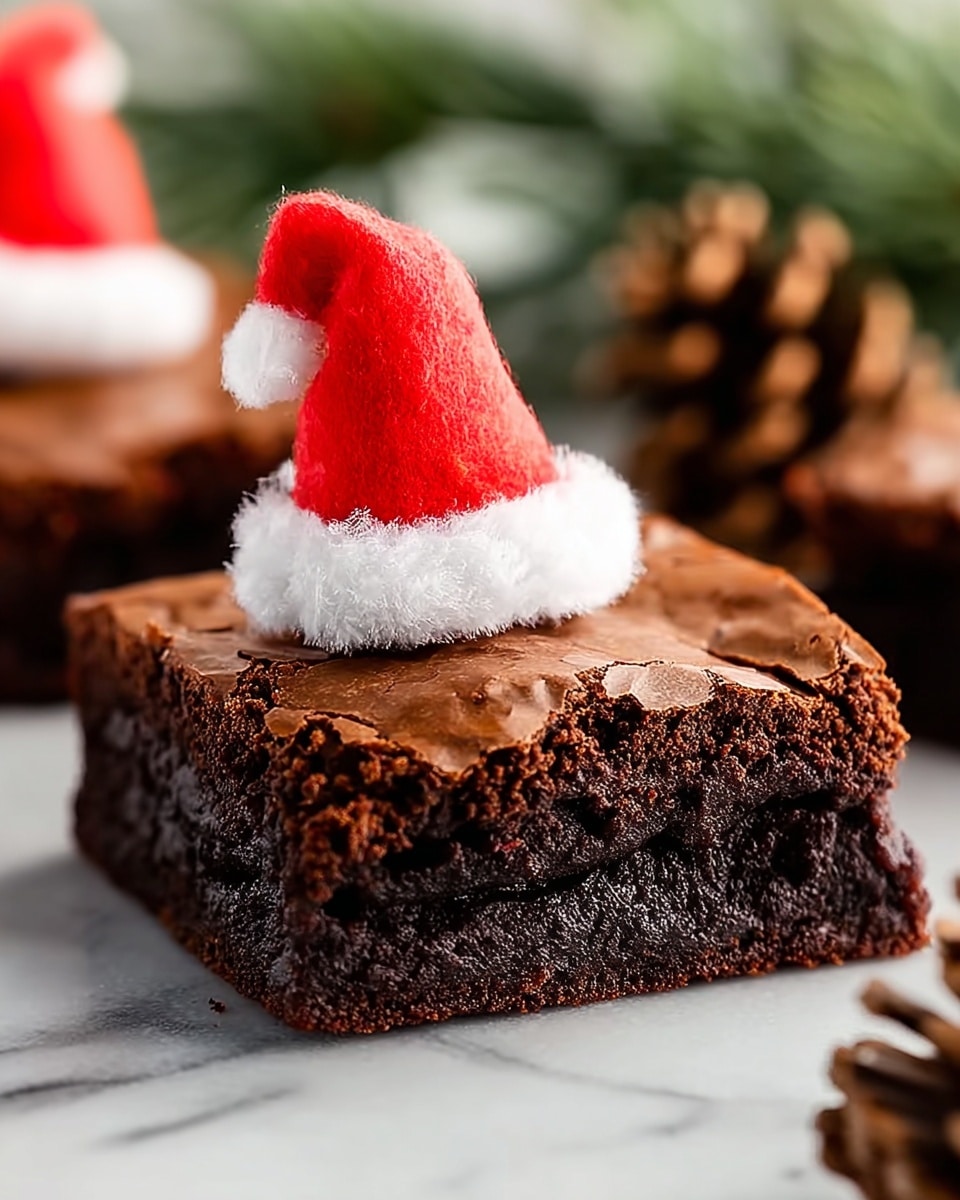
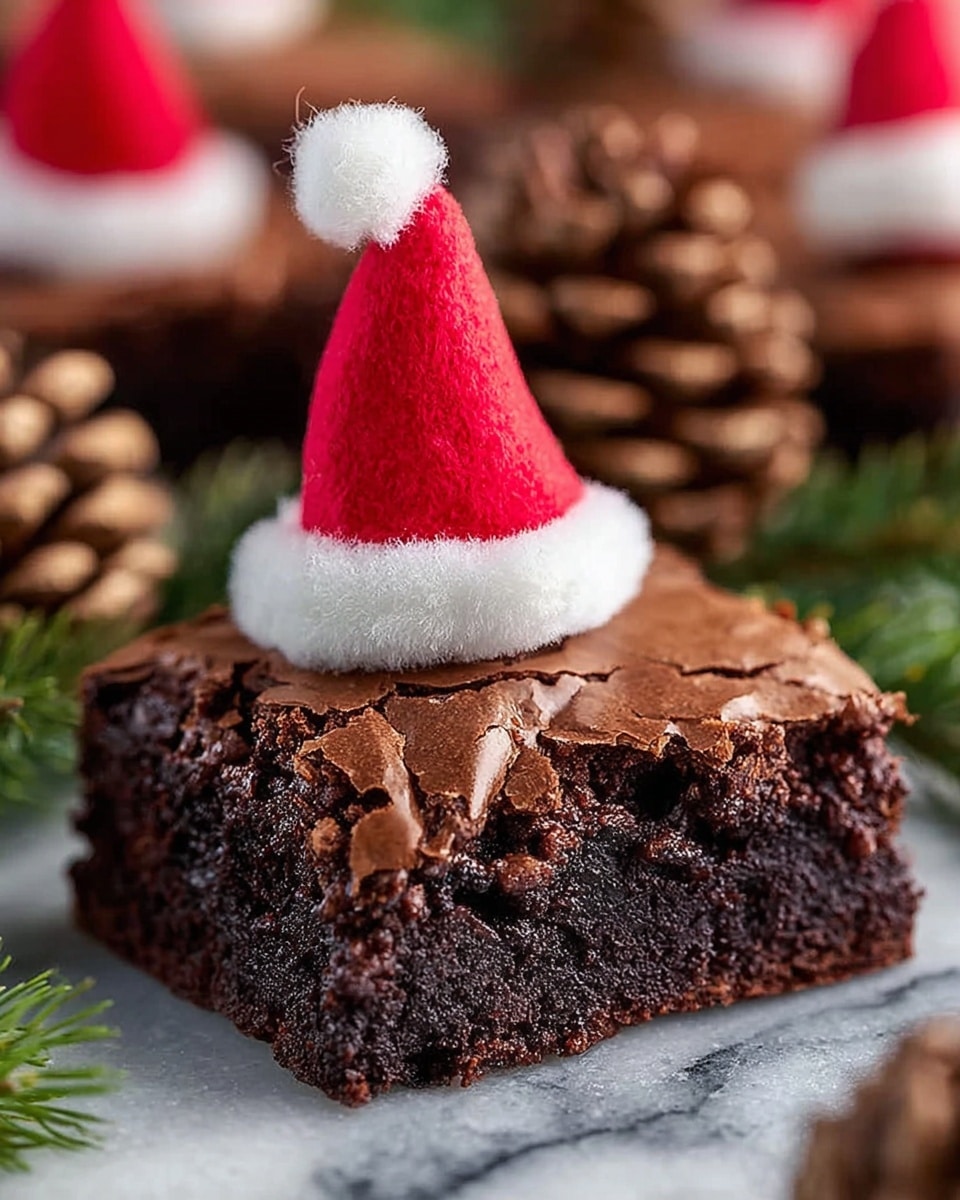
If you’re looking to wow your friends and family this holiday season with a festive, fun, and absolutely delicious treat, look no further than this Santa Hat Brownies Recipe. These delightful little brownies combine rich, fudgy chocolate with the bright freshness of strawberries and a whimsical swirl of vanilla frosting. They’re super easy to make but look like you spent hours in the kitchen, making them perfect for holiday parties or cozy nights in. Plus, the way the strawberry and frosting mimic a Santa hat adds that cheerful holiday spirit everyone will adore.
Ingredients You’ll Need
Keeping this Santa Hat Brownies Recipe simple yet special relies on a handful of staples that each bring something important to the table. From the all-purpose flour giving structure to the brownies, to the melty chocolate chips providing that deep cocoa flavor, every ingredient is essential for achieving the perfect balance of texture and taste.
- 3/4 cup all-purpose flour: The base that holds your brownie together with just the right density.
- 1/2 teaspoon salt: Enhances the chocolate flavor and balances the sweetness.
- 1/4 teaspoon baking soda: Adds just enough lift without losing the fudgy feel.
- 2 large eggs: Acts as a binder and adds richness to the brownies.
- 3/4 cup light brown sugar: Imparts moisture and a subtle caramel note.
- 3/4 cup vegetable oil: Keeps the brownies lush and tender.
- 2 tablespoons water: Helps achieve the perfect batter consistency.
- 1 teaspoon vanilla extract: Adds a warm, inviting aroma and flavor depth.
- 1 1/2 cups semi-sweet chocolate chips, divided: Melting most in the batter and folding the rest in gives lovely pockets of chocolate throughout.
- 1/2 cup vanilla frosting: The creamy white “fur” of the Santa hats, perfect for decorating.
- 9 fresh strawberries, stems removed: The bright red “hats” that bring color and fruity freshness.
How to Make Santa Hat Brownies Recipe
Step 1: Preheat Your Oven and Prepare the Pan
Start by preheating your oven to 350°F (175°C) so it’s nice and hot when your batter is ready to bake. Line an 8 by 8-inch baking pan with parchment paper—this will help you lift the brownies out easily once baked without any sticky mess.
Step 2: Mix the Dry Ingredients
In a small bowl, whisk together the flour, salt, and baking soda. This ensures everything is evenly distributed, so each bite has the perfect texture and balance of flavors.
Step 3: Whisk Together the Wet Ingredients
In a large mixing bowl, combine eggs, light brown sugar, and vegetable oil. Whisk them together vigorously for about 2 minutes until the mixture becomes smooth and glossy. This step helps create a silky batter that bakes into fudgy brownies.
Step 4: Add Water and Vanilla Extract
Next, whisk in the water and vanilla extract to the wet mixture. These small additions take the flavor up a notch and improve the batter’s consistency, making it easier to blend with the dry ingredients.
Step 5: Combine Wet and Dry Ingredients
Gradually add the flour mixture to the wet ingredients, whisking gently until just combined. Overmixing can lead to cakey texture, so be careful to stop once the batter looks smooth and no flour streaks remain.
Step 6: Melt and Mix the Chocolate Chips
Melt 1 cup of the semi-sweet chocolate chips in the microwave using 30-second intervals, stirring between each. Once melted, whisk the chocolate into the brownie batter until smooth and shiny. Fold in the remaining 1/2 cup chocolate chips to add bursts of chocolatey goodness in every bite.
Step 7: Bake the Brownies
Pour the batter into your prepared pan, smoothing the top with a spatula. Pop it in the oven for 50 to 55 minutes, or until a toothpick inserted into the center comes out clean. Your kitchen will be filled with that irresistible chocolate aroma—an early gift to yourself.
Step 8: Cool and Cut
Once out of the oven, allow the brownies to cool completely on a wire rack. This step is key for the brownies to set and make them easier to cut into neat squares for your next decorating step.
Step 9: Assemble Your Santa Hats
Now for the fun part that really brings the Santa Hat Brownies Recipe to life! Cut the brownies into nine squares. Use vanilla frosting to pipe a small circle on top of each brownie. Then, gently place a strawberry, stem side down, onto each frosting dollop to create the “hat.” Finish it by piping a tiny frosting dot on each strawberry tip—voila! Your festive Santa hat is complete.
How to Serve Santa Hat Brownies Recipe
Garnishes
Beyond the classic vanilla frosting and strawberry, you can get creative with garnishes. Dust lightly with powdered sugar for a snowy effect or add a sprinkle of finely chopped pistachios along the frosting edges for a colorful crunch that looks amazing and tastes divine.
Side Dishes
Santa Hat Brownies make a fantastic holiday dessert on their own, but pairing them with a scoop of vanilla ice cream or a dollop of whipped cream really takes the indulgence up a notch. You might also serve them alongside festive mulled wine or a warm cup of peppermint hot chocolate for a cozy winter treat.
Creative Ways to Present
Display these festive brownies on a pretty holiday platter with some pine sprigs or holly for an extra seasonal touch. For a party centerpiece, arrange them in a circle to mimic a Christmas wreath, or stack them in tiers on a cake stand for an eye-catching dessert display that invites everyone to dig in.
Make Ahead and Storage
Storing Leftovers
Once decorated, these brownies can be stored in an airtight container in the refrigerator for up to 3 days. Keep them chilled to maintain the texture of the frosting and strawberry freshness, and bring to room temperature before serving for the best flavor.
Freezing
If you want to make your Santa Hat Brownies Recipe in advance, you can freeze the unfrosted brownies tightly wrapped for up to 2 months. Frost and decorate them after thawing gently in the fridge overnight to keep the strawberries looking fresh and vibrant.
Reheating
To enjoy your brownies warm, remove the frosting before briefly microwaving a slice for 15-20 seconds, then add the frosting and strawberry afterward. This keeps the frosting from melting and ensures every bite is luscious and melt-in-your-mouth.
FAQs
Can I use frozen strawberries for the Santa hats?
Fresh strawberries are best because they hold their shape and have that juicy crispness that balances the rich brownie. Frozen strawberries release extra moisture and can make the frosting soggy, so they’re not recommended for this recipe.
What if I don’t have vanilla frosting on hand?
No worries! You can quickly whip up a simple vanilla frosting using powdered sugar, butter, a splash of milk, and vanilla extract. Whisk until smooth and fluffy to create the perfect “fur” for your Santa hats.
Can I make these brownies gluten-free?
Yes, you can substitute the all-purpose flour with a gluten-free baking blend, but be sure it includes xanthan gum for structure. Texture might be slightly different, but the flavor will remain just as festive and delicious.
How long do these brownies keep fresh?
Decorated brownies are best enjoyed within 3 days when kept refrigerated. The unfrosted brownies will last up to a week stored in an airtight container at room temperature, but the strawberry freshness is key to the overall taste experience!
Can I double the recipe for a larger batch?
Absolutely! Just double all the ingredients and bake in a 9×13-inch pan, adjusting the baking time to about 45-50 minutes. Keep an eye on them to avoid overbaking, as times may vary depending on your oven.
Final Thoughts
This Santa Hat Brownies Recipe is one of those special treats that brings joy with every bite and sparkle to your holiday table. It’s simple enough to whip up anytime, yet impressive enough to make your gatherings truly memorable. Give it a try, share the fun of decorating with loved ones, and enjoy the magic these festive brownies bring!
Print
Santa Hat Brownies Recipe
- Total Time: 1 hour 10 minutes
- Yield: 9 servings 1x
Description
These festive Santa Hat Brownies combine rich, fudgy chocolate brownies with fresh strawberries and creamy vanilla frosting to create a delightful holiday treat that looks as good as it tastes. Perfect for Christmas parties or any winter celebration, these brownies feature moist, chocolate-rich squares topped with strawberry ‘hats’ accented by dollops of sweet vanilla frosting.
Ingredients
Dry Ingredients
- 3/4 cup all-purpose flour
- 1/2 teaspoon salt
- 1/4 teaspoon baking soda
Wet Ingredients
- 2 large eggs
- 3/4 cup light brown sugar
- 3/4 cup vegetable oil
- 2 tablespoons water
- 1 teaspoon vanilla extract
Chocolate
- 1 1/2 cups semi-sweet chocolate chips, divided
Toppings
- 1/2 cup vanilla frosting (store-bought or homemade)
- 9 fresh strawberries, stems removed
Instructions
- Preheat the Oven: Preheat your oven to 350°F (175°C). Line an 8×8-inch baking pan with parchment paper to prevent sticking and set it aside.
- Mix Dry Ingredients: In a small bowl, whisk together the all-purpose flour, salt, and baking soda until evenly combined. Set this mixture aside for later incorporation.
- Whisk Wet Ingredients: In a large mixing bowl, whisk together the eggs, light brown sugar, and vegetable oil vigorously for about 2 minutes until the mixture is smooth and well blended.
- Add Water and Vanilla: Add the water and vanilla extract to the wet mixture and whisk until fully incorporated and the batter is uniform.
- Combine with Dry Ingredients: Gradually add the dry flour mixture into the wet ingredients while whisking gently just until the ingredients come together. Avoid overmixing to keep the brownies tender.
- Melt Chocolate Chips: Place 1 cup of the semi-sweet chocolate chips in a microwave-safe bowl. Microwave in 30-second intervals, stirring between each, until the chocolate is completely melted and smooth, approximately 60 seconds total.
- Mix Melted Chocolate: Whisk the melted chocolate into the brownie batter until it is fully incorporated and smooth. Next, fold in the remaining 1/2 cup of chocolate chips to add texture and bursts of chocolate.
- Bake: Pour the brownie batter evenly into the prepared baking pan, smoothing the top with a spatula. Bake in the preheated oven for 50-55 minutes, or until a toothpick inserted into the center comes out clean or with just a few moist crumbs.
- Cool: Remove the brownies from the oven and transfer the baking pan to a wire rack. Let the brownies cool completely in the pan before cutting to ensure clean edges.
- Assemble the Santa Hats: Once cooled, cut the brownies into 9 equal squares. Using a piping bag or a spoon, place a small circle of vanilla frosting on top of each brownie. Position a fresh strawberry, stem side down, onto the frosting so it resembles a Santa hat. Finish by piping a small dollop of frosting on the tip of each strawberry to complete the festive look.
Notes
- Use fresh, firm strawberries for best results when assembling the Santa hats to ensure they hold their shape.
- If you don’t have vanilla frosting, you can make a quick frosting by mixing powdered sugar, a little milk, and vanilla extract.
- For a fudgier brownie, reduce baking time slightly, but be careful not to underbake.
- Make sure to cool brownies completely before decorating to avoid melting the frosting.
- The brownies can be stored in an airtight container at room temperature for up to 3 days or refrigerated for up to a week.
- Prep Time: 15 minutes
- Cook Time: 55 minutes
- Category: Dessert
- Method: Baking
- Cuisine: American
