Baked Apple Pie Rice Paper Rolls Recipe
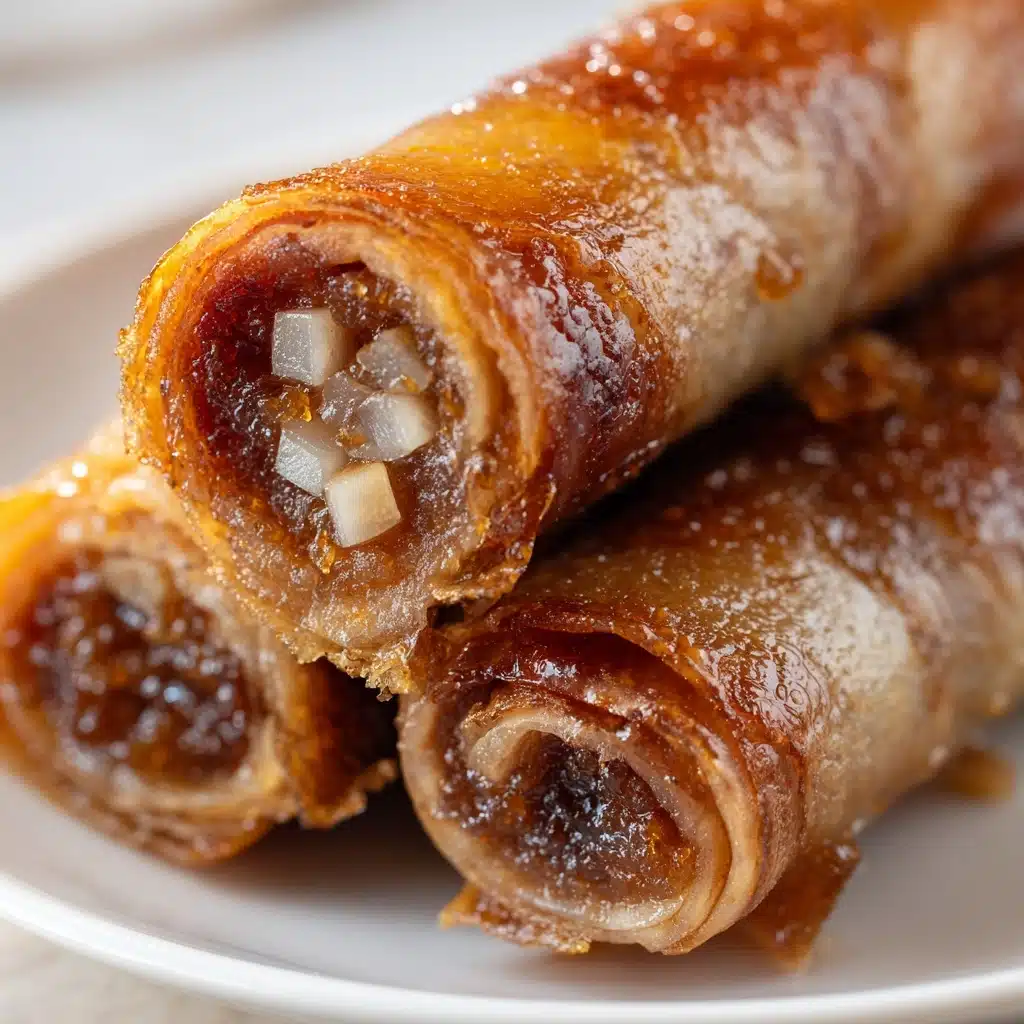
If you love the cozy flavors of apple pie but crave something just a little bit different (and maybe a tad healthier), you’ve got to try these Baked Apple Pie Rice Paper Rolls. Imagine tender, cinnamon-kissed apples wrapped in crisp rice paper, baked to golden perfection—the result is a dessert that’s fun to make, lighter than the classic pie, and incredibly satisfying. They’re perfect for sharing, dunking, or savoring all to yourself, delivering the sweet nostalgia of apple pie in an irresistibly crunchy format.

Ingredients You’ll Need
The magic of Baked Apple Pie Rice Paper Rolls is in the simple ingredients! Each one brings key flavors, textures, and colors to this treat, ensuring you get the apple pie experience in every bite with an added delight of crunch. Let’s break down what you’ll need:
- Apples: Choose crisp, tart varieties like Granny Smith or sweet Honeycrisp for the best filling texture and flavor.
- Unsalted Butter: Adds rich, classic apple pie flavor and helps the apples cook to tender, syrupy perfection.
- Brown Sugar: Brings sweetness and a caramel-like depth that’s the signature of any great pie.
- Ground Cinnamon: Infuses the filling with warming spice that everyone expects from apple desserts.
- Ground Nutmeg: Just a hint elevates the flavor, adding a little autumnal magic to each bite.
- Cornstarch (mixed with water): Thickens the apple filling so it stays tucked neatly inside the rolls instead of leaking out.
- Rice Paper Wrappers: These make for crisp, golden exteriors—think of them as a lighter, gluten-free crust substitute.
- Neutral Oil Spray: Helps achieve that beautifully golden finish in the oven without extra heaviness.
- Optional: Powdered Sugar or Caramel Sauce: For a finishing touch that gilds the lily—because who doesn’t love a little extra sweetness?
How to Make Baked Apple Pie Rice Paper Rolls
Step 1: Prepare the Apple Filling
Start by melting the butter in a skillet over medium heat. Toss in your finely diced apples and let them sizzle, stirring occasionally, for about 3–4 minutes until they begin to soften. Sprinkle over the brown sugar, cinnamon, and nutmeg, stirring so everything melts together and the apples get delightfully coated. Give it another couple of minutes, then pour in your cornstarch slurry. This will transform the juices into a lovely, thick syrup that hugs each apple piece. Remove from the heat, and let it cool just enough so you can handle the filling without burning your fingers.
Step 2: Soften and Fill the Rice Paper Wrappers
Here’s where the fun really begins! Dip each rice paper wrapper into a bowl of warm water for about 5 seconds. They’ll go from brittle to flexible surprisingly fast. Carefully transfer the softened wrapper onto a clean surface, then spoon around 2 tablespoons of your apple mixture onto the bottom third. Fold the sides in over the apples and roll everything up tightly, just like a spring roll. This step is a little meditative—a time to appreciate the warm, spiced aroma wafting through your kitchen.
Step 3: Roll and Bake
Line up your filled rice paper rolls on a baking sheet lined with parchment paper, placing them seam-side down to keep them snugly closed. Give each roll a light mist (or gentle brush) with neutral oil—this is the secret to getting that crispy, golden look without frying. Pop them into a preheated 375°F (190°C) oven and bake for 18–22 minutes. Remember to turn them once about halfway through baking, ensuring they crisp up evenly. For extra crunch, you can finish them under the broiler for 1–2 minutes—but keep a close eye, as they go from perfect to too dark quickly!
Step 4: Serve and Enjoy!
Once the Baked Apple Pie Rice Paper Rolls are golden brown and irresistibly crisp, let them cool for a few minutes before serving. Just enough so you won’t burn your tongue, but not so long that you lose the joy of that first steamy bite. If you’re feeling fancy, dust them with powdered sugar or zigzag some caramel sauce on top. Now, get ready for plenty of smiles around your table!
How to Serve Baked Apple Pie Rice Paper Rolls
Garnishes
Dress up your Baked Apple Pie Rice Paper Rolls with a light snowfall of powdered sugar, a drizzle of warm caramel sauce, or even a little cinnamon sugar sprinkled on top. If you want to lean into decadence, a scoop of vanilla ice cream or a dollop of whipped cream alongside makes every bite a celebration.
Side Dishes
These rolls pair wonderfully with a cozy mug of chai, hot apple cider, or even a cold glass of milk. If you’re making a dessert platter, surround them with fresh fruit, candied pecans, or mini cheese wedges—perfect for balancing sweetness and adding some variety.
Creative Ways to Present
Try stacking the Baked Apple Pie Rice Paper Rolls on a tiered platter for a festive party display, or slice each roll at a diagonal and arrange them like pie wedges on individual plates. For an interactive dessert experience, create a “dipping bar” with bowls of chocolate sauce, caramel, and spiced yogurt—so everyone can customize their own bite.
Make Ahead and Storage
Storing Leftovers
Any leftover Baked Apple Pie Rice Paper Rolls should cool to room temperature before you pop them into an airtight container. Store in the fridge for up to three days. While they may lose a bit of their initial crunch, a quick reheat brings them right back to life.
Freezing
To freeze, place the fully baked and cooled rolls in a single layer on a baking sheet until solid, then transfer to a zip-top bag or airtight container. They’ll keep well for up to two months, making it easy to satisfy a dessert craving at a moment’s notice. Be sure to separate layers with parchment to prevent sticking.
Reheating
The best way to refresh that just-baked crispiness is to reheat your Baked Apple Pie Rice Paper Rolls in a 350°F (175°C) oven or air fryer for 5–8 minutes. Skip the microwave if you can—while it warms them up, the rice paper tends to get chewy rather than crispy.
FAQs
Can I use a different fruit filling?
Absolutely! Pears work beautifully, as do peaches or even a berry blend. Just adjust the sugar and spices to taste, and thicken the filling as you would for apples.
My rice paper turned sticky. How can I get them crispier?
A light coating of oil before baking is crucial. Also, make sure not to soak the wrappers too long—just a quick dip in warm water will do. Finishing under the broiler can boost crispiness as well.
Are these gluten-free?
Yes, as long as you use gluten-free rice paper and double-check that your cornstarch and any toppings are certified gluten-free, this recipe fits the bill for gluten-free dessert lovers.
Can I prepare them ahead of time?
You can make the apple filling in advance and store it in the fridge. Assemble and bake the Baked Apple Pie Rice Paper Rolls right before you plan to serve for the freshest texture.
What’s the best apple variety to use?
A combination of tart and sweet apples (like Granny Smith and Fuji) offers the best balance. The texture holds up well while baking, and the flavor shines through the crispy shell.
Final Thoughts
There’s something so comforting and fun about Baked Apple Pie Rice Paper Rolls, and I truly hope you’ll give them a try. Whether you’re treating yourself or sharing them with friends and family, these rolls capture everything we love about apple pie—just in a crispy, grab-and-go package. Can’t wait to hear how they turn out in your kitchen!
Print
Baked Apple Pie Rice Paper Rolls Recipe
- Total Time: 40 minutes
- Yield: 8 rolls 1x
- Diet: Vegetarian
Description
These Baked Apple Pie Rice Paper Rolls are a delightful fusion dessert combining the flavors of traditional apple pie with the convenience of a handheld roll. Crispy on the outside and sweet, cinnamon-spiced apples on the inside, these rolls are a perfect treat for fall or any time of year.
Ingredients
Apple Filling:
- 2 medium apples, peeled, cored, and finely diced
- 1 tablespoon unsalted butter
- 2 tablespoons brown sugar
- 1 teaspoon ground cinnamon
- 1/4 teaspoon ground nutmeg
- 1 teaspoon cornstarch mixed with 1 tablespoon water
Additional:
- 8 rice paper wrappers
- Optional: powdered sugar or caramel sauce for serving
- Neutral oil spray for baking
Instructions
- Preheat the oven: Preheat the oven to 375°F (190°C) and line a baking sheet with parchment paper.
- Cook the apple filling: In a skillet over medium heat, melt butter and add diced apples. Cook until softened, then stir in brown sugar, cinnamon, and nutmeg. Add the cornstarch slurry, stir until thickened, and let cool slightly.
- Prepare the rolls: Soften rice paper wrappers, place apple filling, fold the sides, and roll up tightly. Repeat with remaining wrappers and filling.
- Bake: Place rolls on baking sheet, spray with oil, and bake for 18–22 minutes until golden and crisp. Let cool slightly before serving, dust with powdered sugar or drizzle with caramel if desired.
Notes
- To make them extra crispy, finish under the broiler for 1–2 minutes.
- These rolls are best enjoyed warm and pair well with vanilla ice cream or whipped cream.
- Prep Time: 20 minutes
- Cook Time: 20 minutes
- Category: Dessert
- Method: Baking
- Cuisine: Fusion
Nutrition
- Serving Size: 1 roll
- Calories: 120
- Sugar: 10g
- Sodium: 40mg
- Fat: 3g
- Saturated Fat: 2g
- Unsaturated Fat: 1g
- Trans Fat: 0g
- Carbohydrates: 22g
- Fiber: 2g
- Protein: 1g
- Cholesterol: 5mg
