Crispy Chicken Katsu with Homemade Katsu Sauce and Classic Sides Recipe
“`html
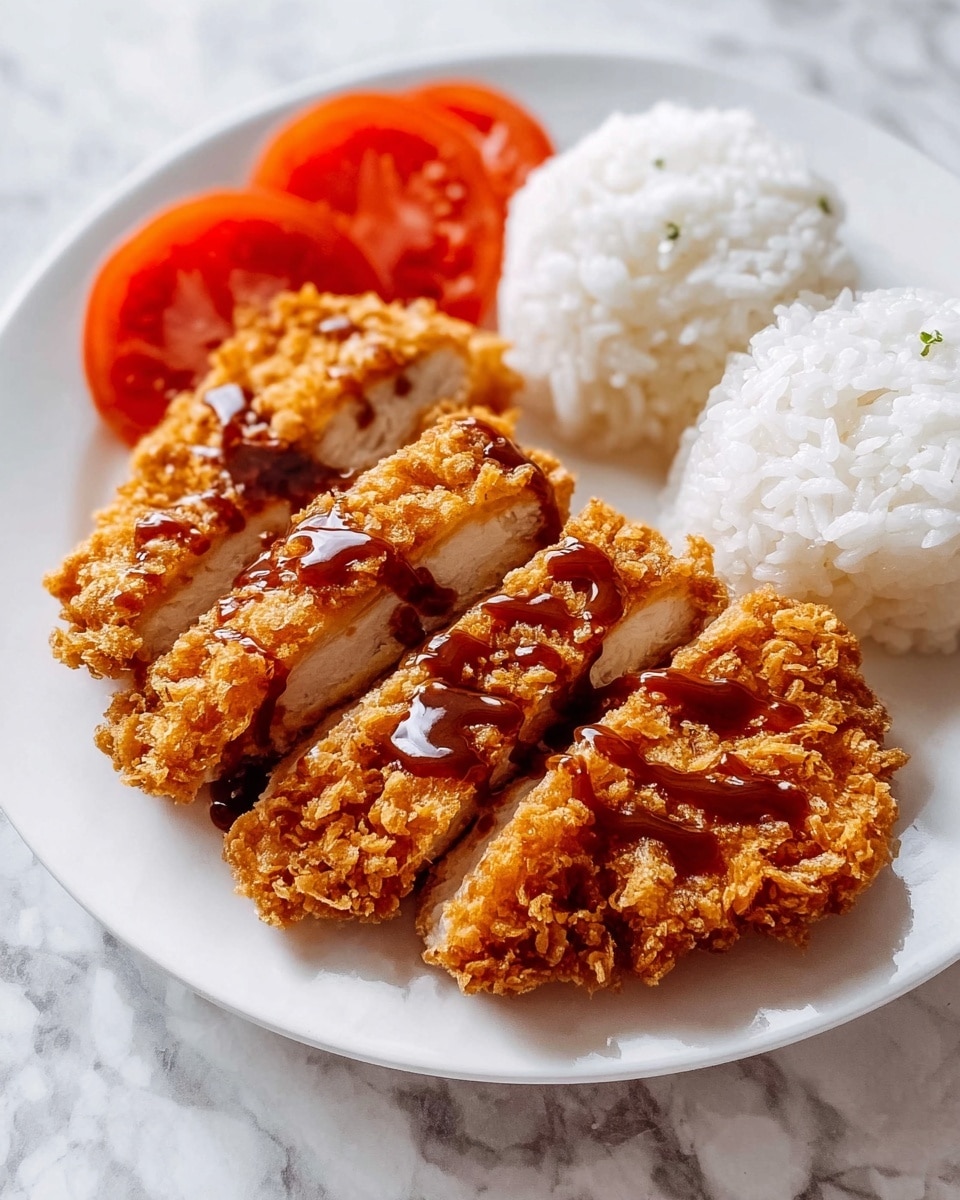
If you have been craving a dish that perfectly balances crunchy, juicy, and savory flavors, then the Crispy Chicken Katsu with Homemade Katsu Sauce and Classic Sides Recipe is here to steal your heart. This beloved Japanese comfort food is made special by its golden, crisp exterior and tender chicken inside, paired with a tangy, sweet, and umami-packed homemade katsu sauce. The classic sides like shredded cabbage salad, sticky sushi rice, and macaroni salad round out the meal, delivering a complete experience that’s both satisfying and comforting. Trust me, once you try this recipe, it will become a go-to favorite for family dinners or impressing friends with something a little different but entirely delicious.
Ingredients You’ll Need
Getting started on your Crispy Chicken Katsu with Homemade Katsu Sauce and Classic Sides Recipe means gathering a few simple, yet incredibly important ingredients. Each one plays a key role in creating that perfect balance of flavor, texture, and color that makes this dish so unforgettable.
- Boneless, skinless chicken thighs: These ensure juicy, tender meat with just the right thickness after pounding.
- Coarse salt and freshly ground black pepper: Essential for seasoning and bringing out the natural flavors of the chicken.
- All-purpose flour: Helps the egg adhere better to the chicken during breading for a crispy crust.
- Large egg and vegetable oil: The egg wash, lightened with oil, binds the panko crumbs while keeping the breading light.
- Panko Japanese breadcrumbs: The secret to that irresistible, ultra-crispy outer crunch.
- Vegetable oil for frying: Necessary for deep frying to achieve a golden, crispy finish.
- Ketchup, Worcestershire sauce, low-sodium soy sauce, mirin, granulated and brown sugar, garlic powder, and ground ginger: This flavorful blend forms the luscious homemade katsu sauce that’s perfectly tangy, sweet, and savory.
- Cooked sticky sushi rice: Classic and fluffy, a perfect neutral base to complement the rich chicken.
- Shredded cabbage salad, macaroni salad, and sliced tomatoes: Classic sides that offer freshness, creaminess, and acidity to balance the dish.
How to Make Crispy Chicken Katsu with Homemade Katsu Sauce and Classic Sides Recipe
Step 1: Make Katsu Sauce
Start by whisking together ketchup, Worcestershire sauce, soy sauce, mirin, both sugars, garlic powder, and ground ginger in a bowl. This combination creates a beautifully balanced sauce that delivers sweet, tangy, and umami-rich notes—an essential pairing for the crispy chicken. Keep this sauce aside for now as the flavors mingle.
Step 2: Prepare the Chicken
Trim away excess fat from your chicken thighs and gently pound them to an even thickness of about half an inch. This step is crucial for even cooking and ensuring tenderness. Next, season both sides generously with coarse salt and freshly ground black pepper to bring out the savory depth of the meat.
Step 3: Bread the Chicken
Set up your breading station with three shallow bowls: flour in the first, a whisked egg mixed with vegetable oil in the second, and panko breadcrumbs in the third. Dip each chicken piece first into the flour to coat lightly, then into the egg wash to help the crumbs stick, and finish by pressing firmly into the panko. This triple layer builds the crunchy exterior every Chicken Katsu needs.
Step 4: Deep Fry to Perfection
Heat about three cups of vegetable oil in a deep pot to 340°F (170°C). Fry the breaded chicken in batches so the oil temperature stays stable. Cook each piece until it’s golden brown, crispy, and cooked through to an internal temperature of 165°F (74°C). Drain the chicken on paper towels to remove excess oil, preserving that perfect crunch.
Step 5: Rest and Slice
Before serving, allow the chicken to rest for a couple of minutes. This helps retain juiciness and prevents the breading from becoming soggy. Then slice the chicken into one-inch strips so it’s easy to pick up and dip into that delicious homemade katsu sauce.
How to Serve Crispy Chicken Katsu with Homemade Katsu Sauce and Classic Sides Recipe
Garnishes
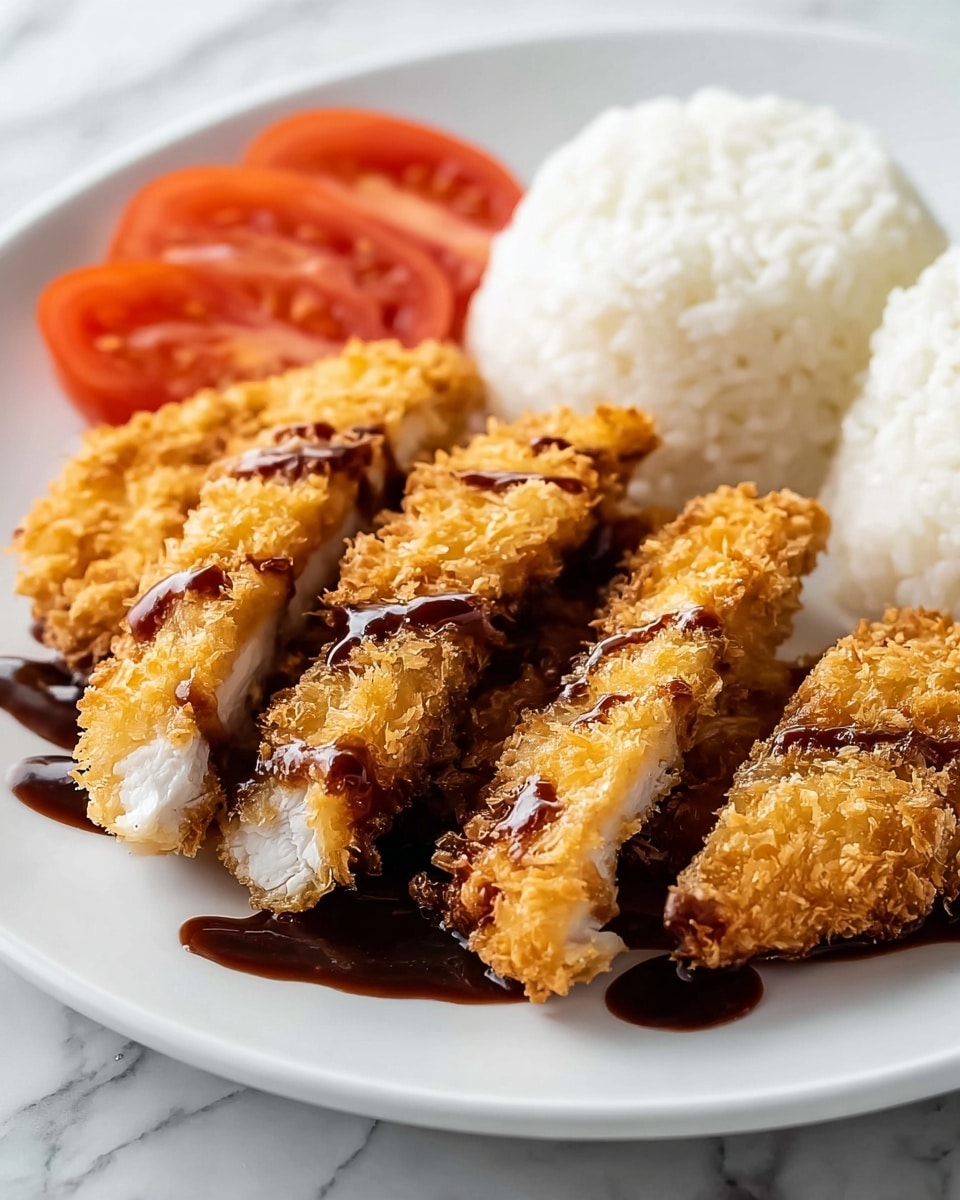
Simple garnishes elevate your presentation and add delightful textures. A mound of finely shredded cabbage salad offers a crisp, refreshing bite that contrasts the fried chicken. A few slices of ripe tomatoes bring a juicy, slightly acidic pop that brightens the whole plate. And of course, generous spoonfuls of the homemade katsu sauce pool alongside for dipping, adding layers of flavor with every bite.
Side Dishes
Complement your Crispy Chicken Katsu with Homemade Katsu Sauce and Classic Sides Recipe by serving classic sticky sushi rice. Its subtle sweetness and chewiness are perfect to soak up any extra sauce. Macaroni salad adds a cool, creamy element that balances the warmth and crispness of the chicken beautifully. These sides are traditional, comforting, and provide a rounded meal experience.
Creative Ways to Present
To impress your friends or family, try arranging the sliced chicken atop a bed of seasoned rice with the cabbage salad neatly fanned out on the side. Drizzle some of the katsu sauce artistically over the chicken strips or serve it in small dipping bowls for everyone to customize their flavor. Adding a sprinkle of toasted sesame seeds or chopped green onions can also add a pop of color and subtle nuttiness, making the dish truly Instagram-worthy.
Make Ahead and Storage
Storing Leftovers
If you have any leftovers from your Crispy Chicken Katsu with Homemade Katsu Sauce and Classic Sides Recipe, place the chicken in an airtight container and store it in the refrigerator. It’s best enjoyed within 2 days for optimal freshness and crispness, as the breading tends to soften over time.
Freezing
To freeze, wrap each piece of cooled, breaded chicken tightly in plastic wrap and then place them in a freezer-safe bag or container. This method protects against freezer burn and helps the chicken keep its texture. Frozen chicken katsu can last for up to one month. When you want to enjoy it again, thaw it overnight in the fridge.
Reheating
Reheating properly is key to maintaining that signature crunch. The best method is to use an oven or air fryer at 350°F (175°C) until the chicken is heated through and crisp again, about 10 to 15 minutes. Avoid microwaving if possible, as it can make the breading soggy.
FAQs
Can I use chicken breasts instead of thighs?
Absolutely! Chicken breasts can be used if you prefer leaner meat. Just be sure to pound them evenly to about half an inch thickness and monitor cooking closely, as breasts can dry out faster than thighs.
What if I don’t have mirin for the sauce?
If mirin isn’t available, you can substitute with a mix of rice vinegar and a pinch of sugar or simply leave it out. The sauce will still be delicious, though mirin adds a subtle sweetness and depth.
How do I get extra crispy breading?
The key is using panko breadcrumbs and frying at the right oil temperature (around 340°F/170°C). Don’t overcrowd the pan so the temperature doesn’t drop, and make sure to press the breadcrumbs firmly onto the chicken to create a thick coating.
What sides pair best with Chicken Katsu?
Classic shredded cabbage salad, sticky white rice, macaroni salad, and sliced tomatoes are the traditional pairings. They provide a balance of textures and flavors that complement the richness and crispiness of the chicken.
Can I bake instead of fry the chicken?
Yes, for a lighter option, bake the breaded chicken at 425°F (220°C) on a baking sheet lined with parchment paper, flipping halfway through, until golden and cooked through. The crunch won’t be quite the same but still very tasty.
Final Thoughts
Trying the Crispy Chicken Katsu with Homemade Katsu Sauce and Classic Sides Recipe is like inviting a little celebration to your dinner table. The harmony of crispy breading, juicy chicken, and that deeply flavorful sauce paired with nostalgic, comforting sides makes this dish a joy to make and even more delightful to eat. So why wait? Dive into this recipe, and watch your loved ones ask for seconds before the first bite is even finished!
“`
Print
Crispy Chicken Katsu with Homemade Katsu Sauce and Classic Sides Recipe
- Total Time: 29 minutes
- Yield: 4 servings 1x
Description
Chicken Katsu is a crispy Japanese-style fried chicken cutlet, perfectly breaded with panko breadcrumbs and served with a tangy homemade tonkatsu sauce. This recipe features juicy chicken thighs, deep-fried to golden perfection, paired with classic sides like sticky sushi rice, shredded cabbage salad, and macaroni salad, making it a delicious and satisfying meal ready in under 30 minutes.
Ingredients
For the Tonkatsu Sauce:
- ¼ cup ketchup
- 1 tablespoon Worcestershire sauce
- ½ tablespoon low-sodium soy sauce
- ½ tablespoon mirin (sweet rice wine)
- ½ tablespoon granulated sugar
- 1 teaspoon brown sugar
- ¼ teaspoon garlic powder
- ⅛ teaspoon ground ginger
For the Chicken:
- 4 boneless, skinless chicken thighs (5 ounces each)
- ½ teaspoon coarse salt
- ¼ teaspoon freshly ground black pepper
- 1 large egg
- ½ tablespoon vegetable oil
- ¼ cup all-purpose flour
- 1 ⅓ cups panko Japanese breadcrumbs
- 3 cups vegetable oil, for deep frying
For Serving:
- Katsu sauce (from above)
- Cooked sticky white sushi rice
- Shredded cabbage salad
- Macaroni salad
- Sliced tomatoes
Instructions
- Make Katsu Sauce: In a bowl, whisk together ketchup, Worcestershire sauce, low-sodium soy sauce, mirin, granulated sugar, brown sugar, garlic powder, and ground ginger until well combined. Taste and adjust seasoning as needed. Set the sauce aside to allow flavors to meld.
- Prepare Chicken: Trim any excess fat from the chicken thighs. Using a meat mallet or rolling pin, pound each piece evenly to about ½-inch thickness to ensure even cooking. Season both sides with coarse salt and freshly ground black pepper.
- Bread Chicken: Set up three shallow bowls in a row—one with all-purpose flour, second with a beaten egg mixed with ½ tablespoon vegetable oil, and the third with panko breadcrumbs. Dredge each chicken thigh first in the flour, shaking off excess, then dip into the egg mixture, and finally coat thoroughly with panko breadcrumbs, pressing lightly to adhere.
- Deep Fry: Heat 3 cups of vegetable oil in a heavy-bottomed pot or deep fryer to 340°F (170°C). Fry the breaded chicken thighs in batches, being careful not to overcrowd the pot. Cook each piece until golden brown and crispy, about 4-5 minutes, or until the internal temperature reaches 165°F (74°C). Remove and drain on paper towels.
- Rest and Slice: Let the fried chicken rest for 2 minutes to allow juices to redistribute. Slice each cutlet into 1-inch strips for serving.
- Serve: Plate the sliced chicken katsu with a generous drizzle of the tonkatsu sauce, a side of cooked sticky sushi rice, shredded cabbage salad, macaroni salad, and sliced tomatoes for a classic Japanese comfort meal.
Notes
- For a leaner option, chicken breasts can be used instead of thighs; pound to an even thickness and adjust frying time accordingly to avoid drying out.
- Ensure oil temperature stays consistent at 340°F (170°C) for crispy cutlets that are cooked through.
- Use panko breadcrumbs for the best crunchy texture compared to regular breadcrumbs.
- Resting the chicken briefly after frying helps retain moisture and makes slicing easier.
- Leftover tonkatsu sauce can be refrigerated in an airtight container for up to one week.
- Prep Time: 10 minutes
- Cook Time: 19 minutes
- Category: Main Course
- Method: Frying
- Cuisine: Japanese
