“`html
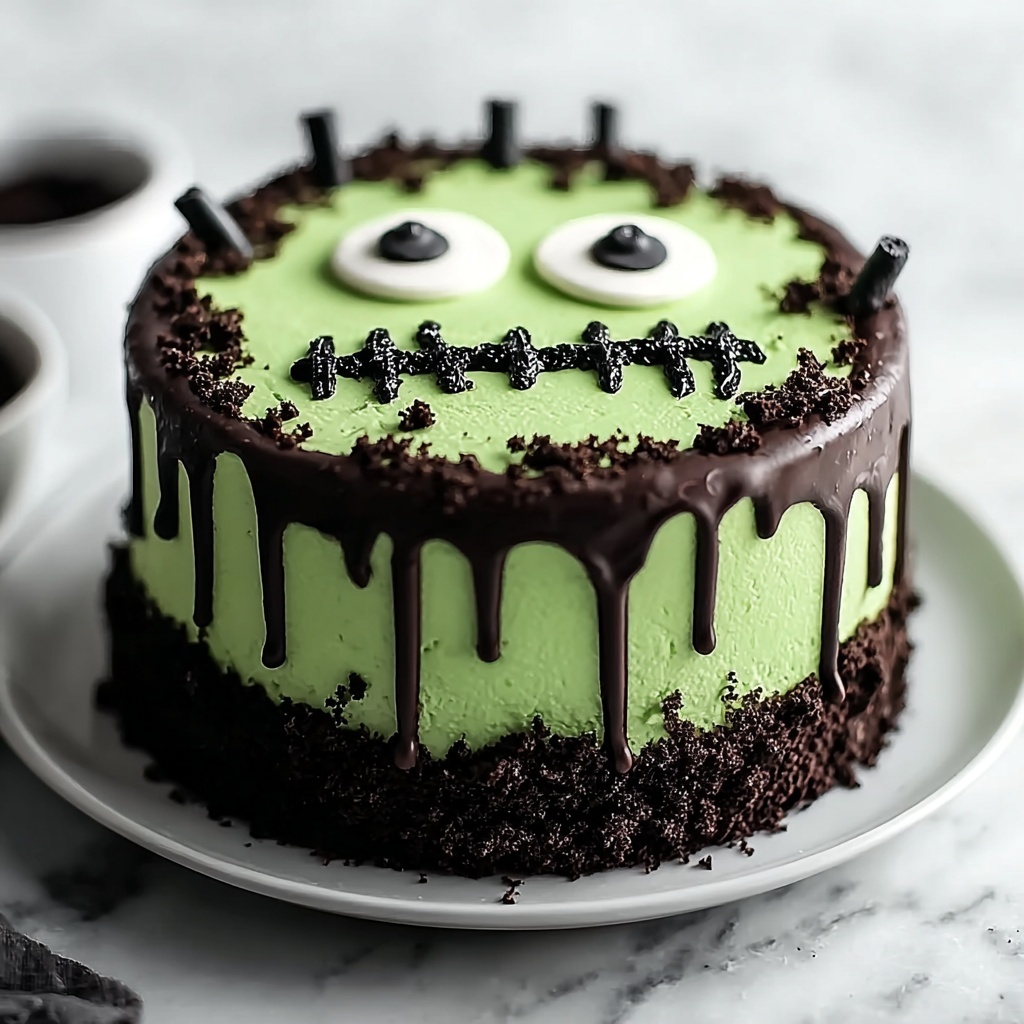
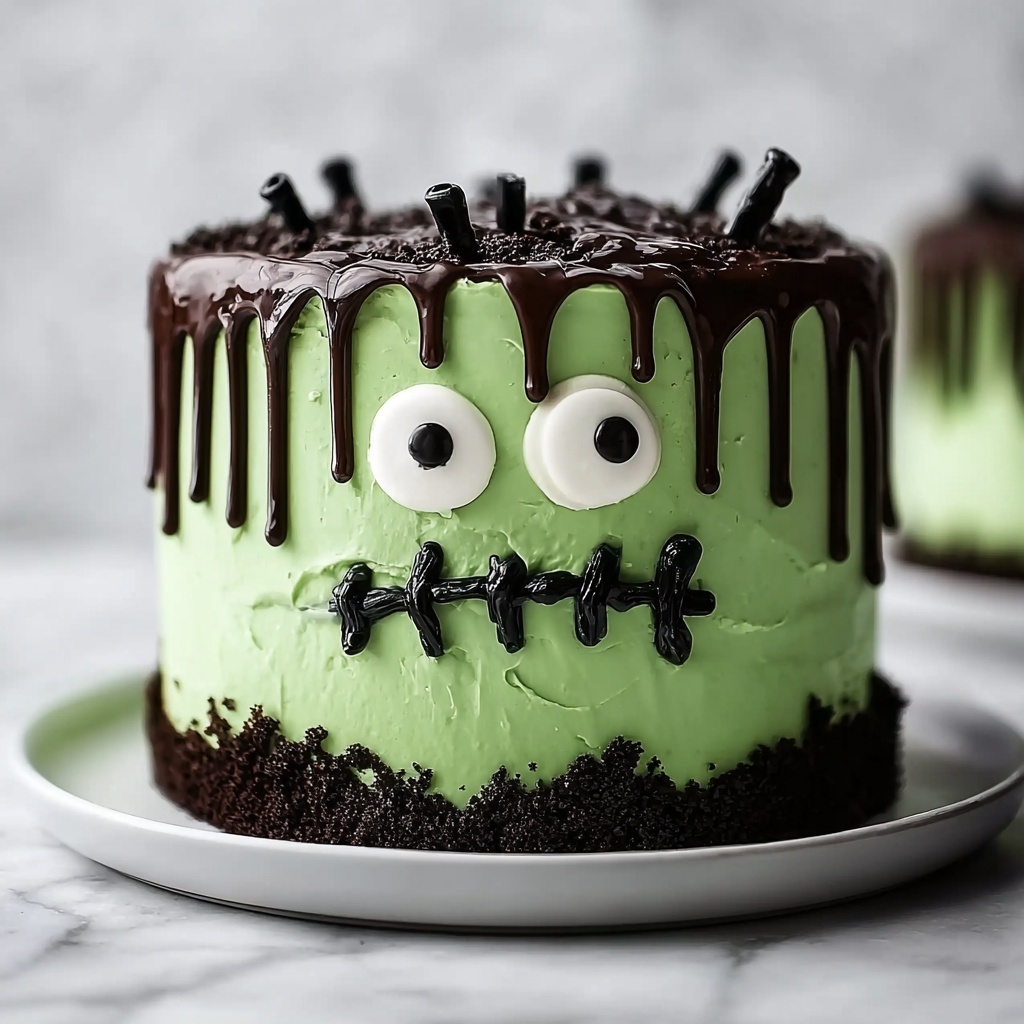
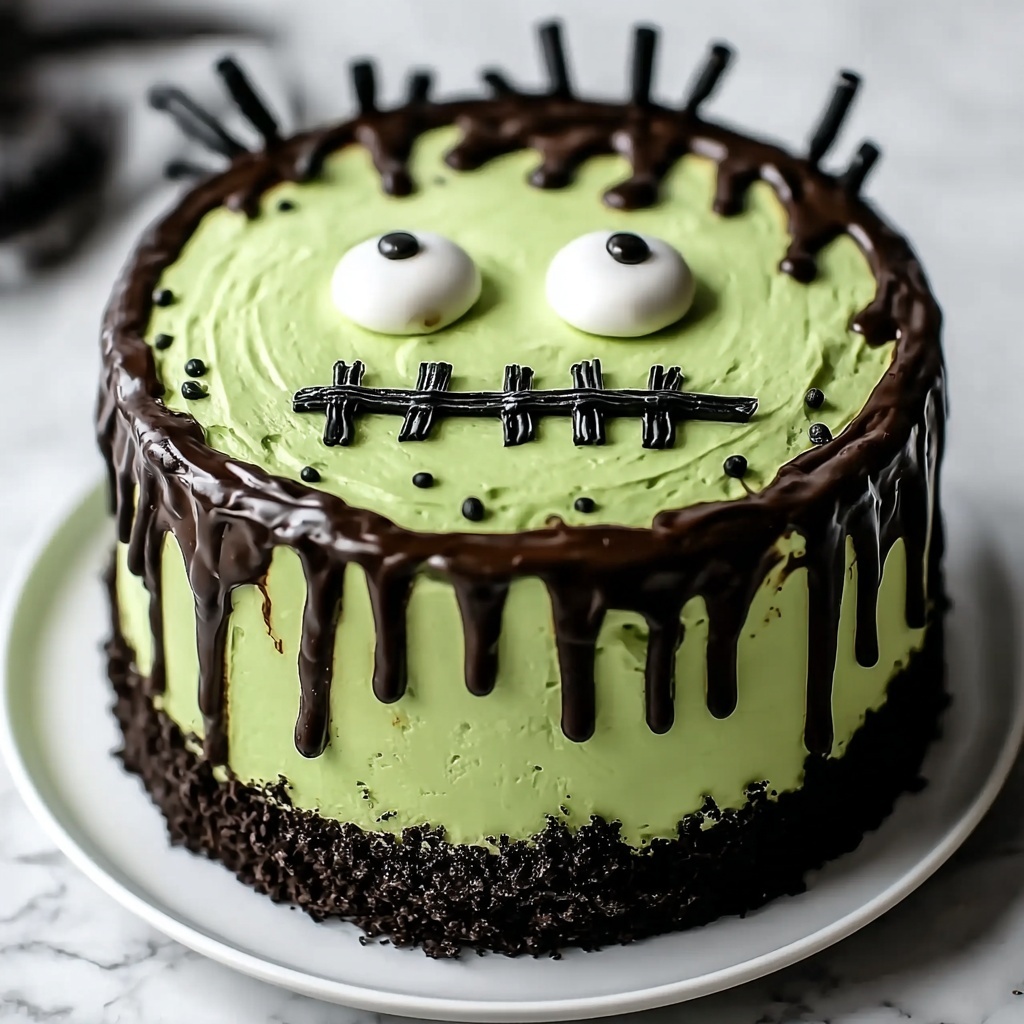
If you’re looking to wow your Halloween guests with a dessert that’s as fun as it is delicious, then the Frankenstein Cheesecake: A Spooky Halloween Treat Recipe is exactly what you need. This cheesecake combines a rich, creamy texture with a delightfully spooky presentation, turning a classic favorite into an unforgettable centerpiece. The vibrant green filling, chocolate cookie crust, and playful candy eyes bring Frankenstein’s monster to life, making every bite a perfect balance of flavor and festive fun.
Ingredients You’ll Need
Putting together this Frankenstein Cheesecake is simpler than you might think. Each ingredient plays a vital role in creating the perfect texture, flavor, and iconic look that makes this dessert stand out during Halloween festivities.
- Chocolate cookie crumbs: Forms a crunchy, chocolatey crust that complements the creamy cheesecake filling beautifully.
- Unsalted melted butter: Helps bind the cookie crumbs into a firm base while keeping flavors balanced.
- Cream cheese: The star ingredient for that classic, smooth cheesecake texture; softened for effortless blending.
- Sugar: Sweetens the cheesecake, but you can swap for Stevia if you prefer a lower-sugar option.
- Large eggs: Provide structure and richness; using room temperature eggs ensures a silky batter.
- Vanilla extract: Adds warm, familiar notes, or try almond extract for a unique twist.
- Green gel food coloring: Brings Frankenstein’s monster to life with an eye-catching, vibrant hue.
- Candy eyes: The charming finishing touch that gives the cheesecake its character and festive appeal.
- Black gel icing: Perfect for drawing spooky facial features for a truly personalized Halloween dessert.
How to Make Frankenstein Cheesecake: A Spooky Halloween Treat Recipe
Step 1: Prepare Your Pan and Crust
Start by preheating your oven to 325°F (160°C) and greasing a 9-inch springform pan. This pan is ideal because it allows you to remove the cheesecake easily, keeping the crust intact. Next, combine the chocolate cookie crumbs with melted butter until they’re completely mixed. Press this flavorful mixture evenly into the bottom of your greased pan. This forms a sturdy, delicious base that balances the creamy filling with a slight crunch.
Step 2: Whip Up the Cheesecake Batter
In a large mixing bowl, beat the softened cream cheese until it’s smooth and creamy. Add in the sugar, vanilla extract, and the green gel food coloring—this magic touch transforms your cheesecake into Frankenstein’s signature color. Incorporate these until everything is evenly blended and vibrant. Then, one by one, add the eggs, mixing gently after each addition to maintain a smooth texture without overworking the batter.
Step 3: Bake to Perfection
Pour your luscious green batter over the prepared crust, smoothing the top with a spatula for an even finish. Place the pan in your preheated oven and bake for 50 to 55 minutes. You’ll want to watch for the edges to set firmly, while the center remains slightly jiggly. This ensures the cheesecake stays creamy and not overly dense once cooled.
Step 4: Chill and Decorate
Allow the cheesecake to cool on a wire rack for about an hour, then pop it into the refrigerator for at least four hours, or ideally overnight. The chilling time lets the flavors meld and the texture firm up perfectly. Now the fun part: use the candy eyes and black gel icing to create Frankenstein’s face. Let your creativity run wild adding stitches, a toothy grin, or bolts for that signature spooky look.
How to Serve Frankenstein Cheesecake: A Spooky Halloween Treat Recipe
Garnishes
Apart from candy eyes and gel icing, consider sprinkling crushed chocolate cookies around the edges for an earthier “graveyard” effect. A dollop of whipped cream on the side can add a light contrast to the rich cheesecake, and a few fresh mint leaves can enhance the green theme while adding a refreshing twist.
Side Dishes
This Frankenstein Cheesecake pairs wonderfully with classic fall treats like caramel apples or roasted pumpkin seeds. For a refreshing balance, serve it alongside a citrusy cranberry sauce or a small bowl of spiced berries—both additions can highlight the rich, creamy flavor of the cheesecake while amplifying the Halloween vibe.
Creative Ways to Present
To elevate the spooky presentation, serve your cheesecake on a dark slate platter or a rustic wooden board to create a dramatic contrast. You might even use edible dry ice or place Halloween-themed decorations nearby to fully immerse your guests in the festive mood. Individual mini cheesecakes can also be made using muffin tins for a fun party platter that lets everyone enjoy a personalized Frankenstein face.
Make Ahead and Storage
Storing Leftovers
Because cheesecake is best enjoyed fresh but also holds up well, keep any leftovers tightly covered with plastic wrap or in an airtight container in the refrigerator. This will maintain its moisture and prevent it from absorbing any fridge odors. Your Frankenstein Cheesecake: A Spooky Halloween Treat Recipe will stay delicious for up to 4 days.
Freezing
If you want to prepare this spooky treat well in advance, freezing is a fantastic option. Wrap the cheesecake securely in plastic wrap and foil to protect it from freezer burn, then place it in the freezer. When frozen properly, it can last up to 2 months. Let it thaw in the refrigerator overnight before serving for the best texture and flavor.
Reheating
Because cheesecake is best served chilled, reheating is usually not necessary. If you prefer your dessert slightly warmer, allow the cheesecake to sit at room temperature for about 15 to 20 minutes before serving. Avoid microwaving as this can cause cracks and an unpleasant texture.
FAQs
Can I make this cheesecake gluten-free?
Absolutely! Simply swap the chocolate cookie crumbs for gluten-free cookie crumbs, and you’ll maintain the delicious crust without any gluten worries.
What if I don’t have green food coloring?
You can use natural alternatives like spinach or matcha powder to get a green hue, but keep in mind the flavor might change slightly. Otherwise, green gel food coloring gives you the bold and vibrant shade perfect for Frankenstein.
Can I use other extracts instead of vanilla?
Yes! Almond extract is a popular alternative that adds a nutty depth, and even mint extract can be interesting if you want a refreshing twist to your Frankenstein Cheesecake: A Spooky Halloween Treat Recipe.
How long does it take to chill the cheesecake properly?
For the best texture and flavor, allow your cheesecake to chill in the refrigerator for at least 4 hours, but overnight chilling is preferred for optimal setting and taste.
What can I use instead of candy eyes?
If you can’t find candy eyes, small chocolate chips or edible eyeball decorations from baking stores work great. You can even craft eyes from white and dark chocolate or icing to personalize your spooky creation.
Final Thoughts
Making Halloween extra special with a homemade dessert doesn’t get easier or more fun than this. The Frankenstein Cheesecake: A Spooky Halloween Treat Recipe combines rich flavors, playful decoration, and festive spirit all in one slice. Whether you’re hosting a party or just want to treat your family, this cheesecake will bring smiles, compliments, and maybe even a little delightful shiver. Give it a try this season—you won’t regret the spooky sweet magic it brings to your dessert table!
“`
Print
Frankenstein Cheesecake: A Spooky Halloween Treat Recipe
- Prep Time: 20 minutes
- Cook Time: 55 minutes
- Total Time: 5 hours 10 minutes
- Yield: 8 servings
- Category: Dessert
- Method: Baking
- Cuisine: American
- Diet: Vegetarian
Description
Celebrate Halloween with this fun and spooky Frankenstein Cheesecake that combines a rich chocolate cookie crust with a vibrant green cream cheese filling. Perfectly creamy and decorated with candy eyes and black gel icing to bring your holiday dessert table to life.
Ingredients
Crust
- 1 ½ cups chocolate cookie crumbs (gluten-free cookies can be used for gluten-free version)
- ½ cup melted butter (unsalted preferred)
Filling
- 16 oz cream cheese, softened
- 1 cup sugar (or Stevia as a lower-sugar alternative)
- 3 large eggs, room temperature
- 1 tsp vanilla extract (almond extract as a twist option)
- 2 tbsp green gel food coloring
Decoration
- 1 cup candy eyes
- 1 tube black gel icing
Instructions
- Preheat and prepare pan: Preheat your oven to 325°F (160°C). Lightly grease a 9-inch springform pan to ensure the cheesecake releases easily after baking.
- Make the crust: In a small bowl, combine the chocolate cookie crumbs and melted butter. Mix until the crumbs are evenly coated. Press this mixture firmly into the bottom of the prepared springform pan to create an even crust layer.
- Prepare the filling: In a large mixing bowl, beat the softened cream cheese, sugar, vanilla extract, and green gel food coloring together until the mixture becomes smooth and creamy, ensuring a vibrant green color.
- Add eggs: Add the eggs one at a time into the cream cheese mixture, gently mixing after each addition to avoid overmixing and to maintain a silky batter.
- Assemble and bake: Pour the green cheesecake batter over the prepared crust in the springform pan. Smooth the top with a spatula to create an even surface. Bake in the preheated oven for 50-55 minutes, or until the edges are set but the center still jiggles slightly when gently shaken.
- Cool the cheesecake: Remove from the oven and allow the cheesecake to cool on a wire rack for about 1 hour to room temperature.
- Chill: Once cooled, refrigerate the cheesecake for at least 4 hours or overnight to set completely.
- Decorate: Before serving, decorate your chilled cheesecake with candy eyes placed evenly to resemble Frankenstein’s face. Use the black gel icing tube to create mouth, scars, and other facial features for a spooky finish.
Notes
- Using room temperature eggs helps achieve a smooth, even batter.
- Gel food coloring is recommended for vibrant and non-watery color in the filling.
- For a gluten-free version, substitute chocolate cookie crumbs with gluten-free alternatives.
- Allow the cheesecake to chill thoroughly for the best texture and ease of decorating.
- The cheesecake is best consumed within 3-4 days for optimal freshness.
