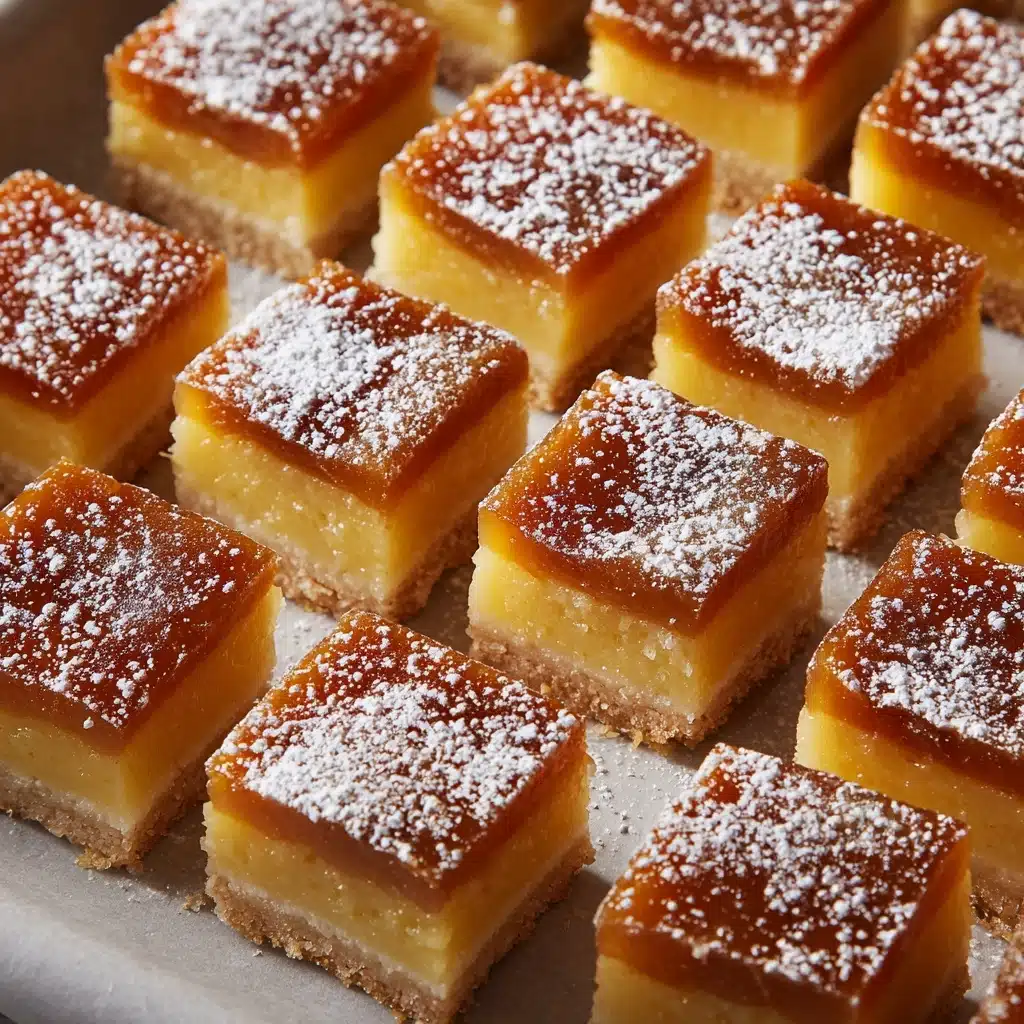
Hawaiian Butter Mochi Recipe
If you’re craving something sweet, chewy, and a little bit tropical, look no further than Hawaiian Butter Mochi. This classic treat is a beloved part of local Hawaiian dessert culture for good reason: it’s perfectly buttery, delightfully springy from sweet rice flour, and laced with coconutty goodness in every bite. With nostalgic, bake-sale charm and impossibly easy prep, this is one recipe you’ll come back to again and again—whether you’re serving it at a big gathering or just enjoying a cozy afternoon pick-me-up at home.
Ingredients You’ll Need
Every ingredient in this recipe is carefully chosen for maximum impact. The combination of simple pantry staples and a few Hawaiian essentials creates that unmistakable flavor and chewy texture unique to Hawaiian Butter Mochi.
- Mochiko Sweet Rice Flour: The star of the show! This glutinous rice flour is the secret to the mochi’s signature chewiness.
- Granulated Sugar: Adds just the right amount of sweetness to balance the buttery richness and coconut notes.
- Baking Powder: Gives the batter a bit of lift, ensuring your mochi is soft but not dense.
- Salt: A pinch of salt heightens every other flavor in the pan, making the coconut and butter really sing.
- Eggs: Hold everything together, giving structure while keeping the crumb tender.
- Vanilla Extract: Infuses a fragrant warmth that blends perfectly with coconut and butter flavors.
- Coconut Milk: Bring the tropical vibes! Full-fat coconut milk gives richness and that distinct, mellow flavor.
- Whole Milk: Adds creaminess and keeps the batter smooth, so you get a lovely, even bake.
- Unsalted Butter (melted): The “butter” in butter mochi—this brings depth, moisture, and a golden, irresistible crust.
How to Make Hawaiian Butter Mochi
Step 1: Preheat and Prepare Your Pan
Set your oven to 350°F so it’s nice and ready. Lightly grease a 9×13-inch baking dish with butter or nonstick spray. This step means you’ll be rewarded with easy slices and no sticking later!
Step 2: Mix the Dry Ingredients
Grab a large mixing bowl and whisk together the mochiko flour, sugar, baking powder, and salt. Don’t rush this step—it ensures that everything is evenly distributed and your Hawaiian Butter Mochi will have perfect texture all the way through.
Step 3: Combine the Wet Ingredients
In a separate bowl, beat the eggs, then stir in the vanilla extract, coconut milk, whole milk, and your melted (but slightly cooled) butter. Stir gently but thoroughly so everything is well combined and silky.
Step 4: Bring It All Together
Gradually pour the wet ingredients into the dry mixture, whisking as you go. You want a smooth, lump-free batter. This guarantees your mochi is light and bouncy, not dense or patchy.
Step 5: Bake to Golden Perfection
Pour the batter into your prepared baking dish, smoothing out the top. Pop it in the oven and bake for about 1 hour, or until the surface is beautifully golden and the center is set. Your kitchen will smell like absolute heaven! Once done, let it cool completely in the pan—this helps the mochi settle into its signature texture before slicing.
How to Serve Hawaiian Butter Mochi

Garnishes
Elevate each square with a sprinkle of shredded coconut before baking for extra crunch, or dust with a touch of powdered sugar just before serving. Sliced fresh fruit or a dollop of whipped cream also work magic for special occasions.
Side Dishes
Pair slices of Hawaiian Butter Mochi with coffee or hot tea for a simple snack, or set it alongside a scoop of tropical ice cream at dessert. It’s also perfect on a buffet with fresh pineapple, berries, or a tangy fruit salad to cut the richness.
Creative Ways to Present
Try cutting the mochi into fun shapes using cookie cutters, or stack squares in alternating layers for a playful take on dessert bars. For gatherings, serve them on palm leaves or a platter lined with banana leaves to bring out that true island feel.
Make Ahead and Storage
Storing Leftovers
Butter mochi keeps beautifully! Store leftovers in an airtight container at room temperature for up to three days. The texture stays chewy and moist—just the way it should be.
Freezing
You can absolutely freeze your Hawaiian Butter Mochi. Wrap individual squares tightly in plastic wrap and place in an airtight container or zip bag. They’ll stay fresh for up to two months; just thaw at room temperature before serving.
Reheating
If you like your mochi a little warm, pop a square in the microwave for about 10 to 15 seconds. This restores some of that just-baked softness and intensifies the buttery aroma. Avoid over-microwaving, as it can turn the mochi tough.
FAQs
Can I use a different type Dessert
For classic Hawaiian Butter Mochi, mochiko sweet rice flour is essential. Regular rice flour or all-purpose flour won’t give you nearly the same chewy, stretchy texture that makes this dessert so unique.
Is this dessert gluten-free?
Yes! Mochiko flour is made from glutinous rice but contains no gluten, making Hawaiian Butter Mochi the perfect gluten-free treat for parties or friends with dietary restrictions.
Can I make this ahead for a party?
Absolutely! This mochi gets even better as it sits. Bake it a day ahead, let it cool completely, then cover well. Slice just before serving for fresh, moist squares.
How do I tell when my butter mochi is done baking?
The top should be glossy and golden, and a toothpick inserted in the center should come out mostly clean (a little stickiness is normal!). Don’t overbake, or you’ll lose that signature chew.
Can I add mix-ins or flavor variations?
Definitely! Shredded coconut, a handful of chocolate chips, or even diced mango add lovely flavor and texture twists to your Hawaiian Butter Mochi. Just remember to keep the balance so it doesn’t get too dense.
Final Thoughts
Get ready to fall in love with the irresistibly chewy, coconutty magic of Hawaiian Butter Mochi. This is one homemade treat that will transport you straight to the islands, whether you’re sharing it with friends or sneaking a piece with your afternoon coffee. Give it a try—you might just find your new favorite dessert!
Print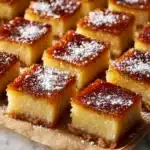
Hawaiian Butter Mochi Recipe
- Total Time: 1 hour 10 minutes
- Yield: 24 squares 1x
- Diet: Vegetarian
Description
Indulge in the tropical flavors of Hawaii with this delicious Hawaiian Butter Mochi recipe. This chewy and sweet rice cake is made with mochiko flour, coconut milk, and a hint of vanilla, creating a delightful treat that is perfect for any occasion.
Ingredients
Dry Ingredients:
- 1 box (16 ounces) mochiko sweet rice flour
- 2 cups granulated sugar
- 2 teaspoons baking powder
- 1/2 teaspoon salt
Wet Ingredients:
- 4 large eggs
- 2 teaspoons vanilla extract
- 1 can (13.5 ounces) coconut milk
- 1 cup whole milk
- 1/2 cup unsalted butter, melted and slightly cooled
Instructions
- Preheat and Prepare: Preheat the oven to 350°F and lightly grease a 9×13-inch baking dish.
- Mix Dry Ingredients: In a large bowl, whisk together mochiko flour, sugar, baking powder, and salt.
- Combine Wet Ingredients: In another bowl, beat the eggs, then mix in the vanilla extract, coconut milk, whole milk, and melted butter.
- Blend Batter: Gradually pour the wet ingredients into the dry ingredients, whisking until the batter is smooth and lump-free.
- Bake: Pour the batter into the prepared baking dish and bake for 1 hour, or until the top is golden and the center is set.
- Cool and Serve: Let it cool completely in the pan before slicing into squares and serving.
Notes
- For extra flavor, sprinkle shredded coconut on top before baking.
- Butter mochi can be stored at room temperature for up to 3 days or refrigerated for up to a week.
- Prep Time: 10 minutes
- Cook Time: 60 minutes
- Category: Dessert
- Method: Baking
- Cuisine: Hawaiian
Nutrition
- Serving Size: 1 square
- Calories: 190
- Sugar: 16g
- Sodium: 95mg
- Fat: 7g
- Saturated Fat: 5g
- Unsaturated Fat: 2g
- Trans Fat: 0g
- Carbohydrates: 29g
- Fiber: 0g
- Protein: 2g
- Cholesterol: 35mg


