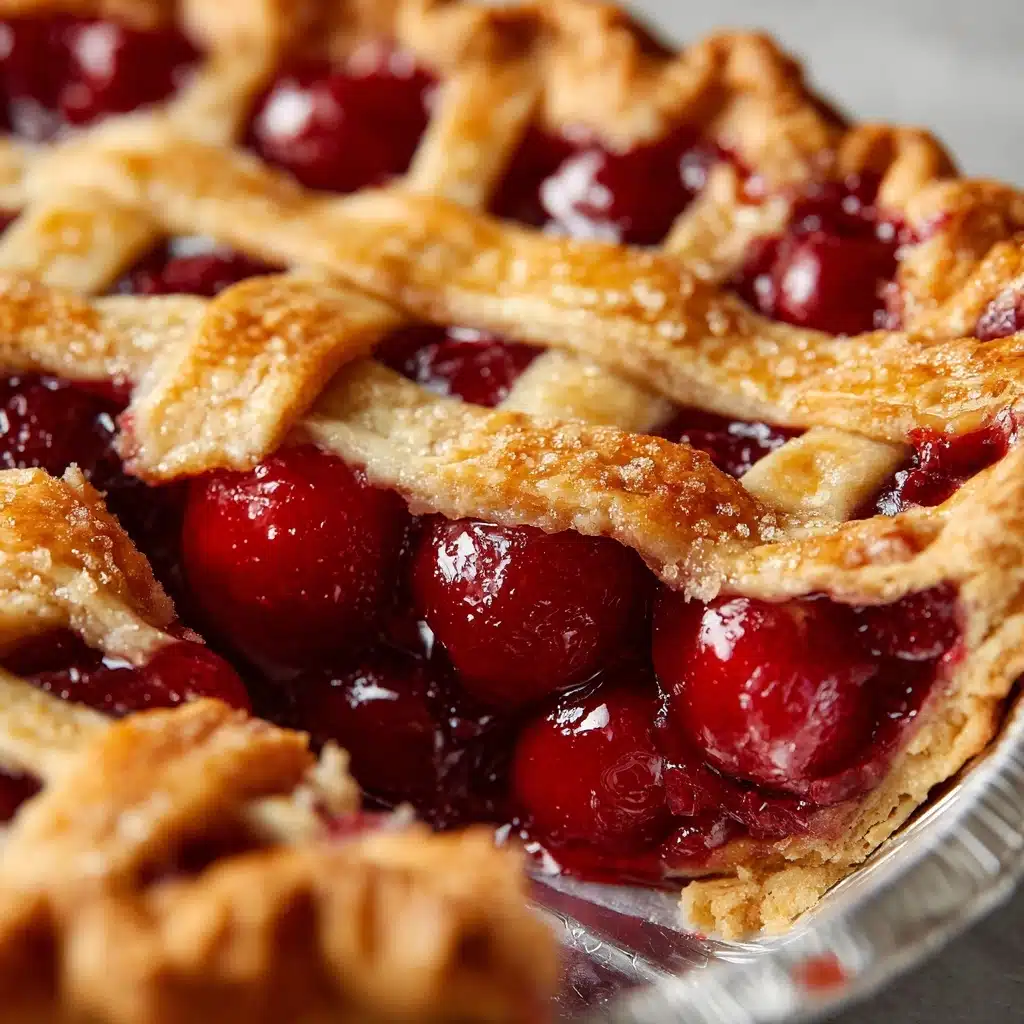
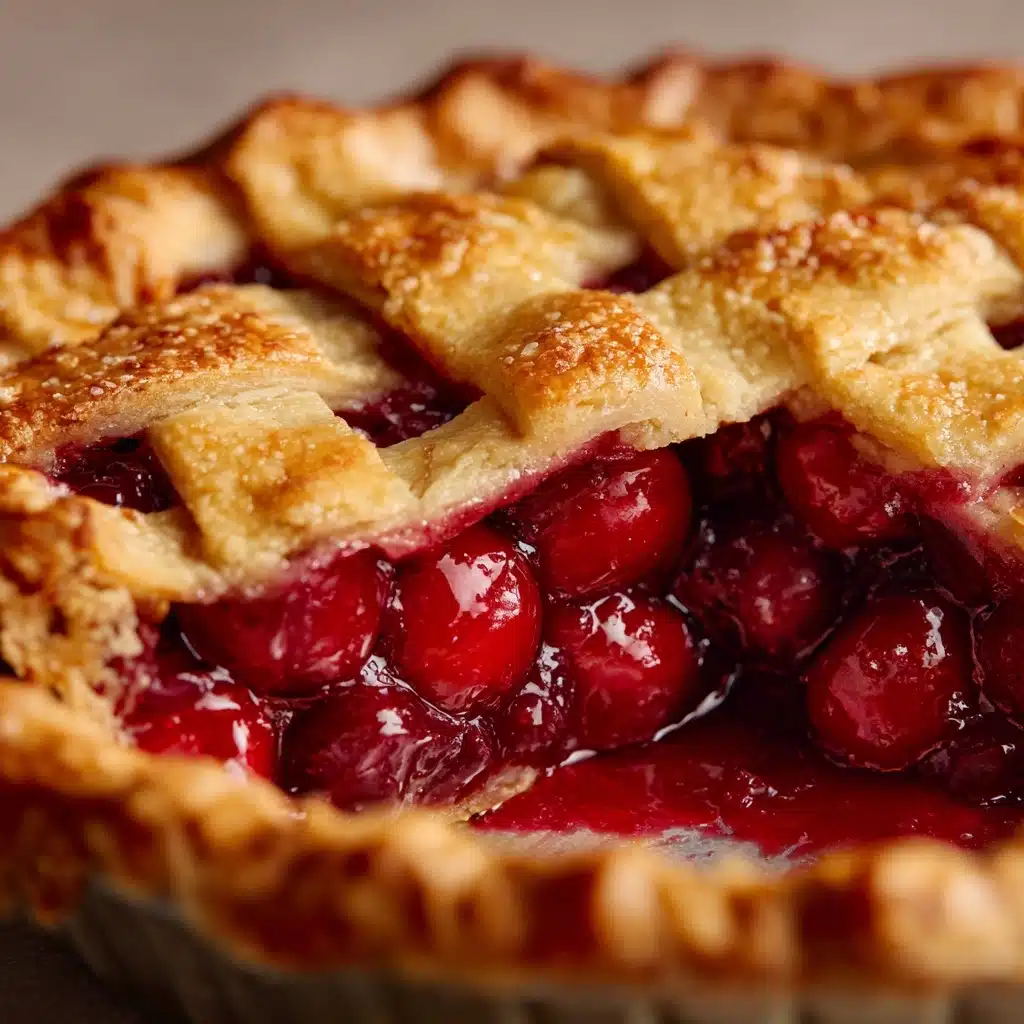
Homemade Cherry Pie Recipe
If you’re searching for a showstopping dessert that’s equal parts nostalgic comfort and juicy, sweet-tart flavor, look no further than the Homemade Cherry Pie. With its vibrant ruby filling nestled between layers of flaky, golden crust, every slice feels like a joyful celebration of summer—even if you’re baking in the middle of winter! This classic recipe balances simple, wholesome ingredients with unbeatable flavor, making it perfect for both seasoned bakers and everyday pie-lovers exploring their kitchen creativity. Whether you’re gathering with loved ones or treating yourself to something special, Homemade Cherry Pie is always the right answer.
Ingredients You’ll Need
-
For the Cherry Filling:
- 2 (14.5 oz) cans tart red cherries in water (drained with 1/2 cup juice reserved)
- 1 cup granulated sugar
- 1/4 cup cornstarch
- 1/4 teaspoon almond extract
- 1/4 teaspoon vanilla extract
- 1 tablespoon lemon juice
- 1 tablespoon butter
For the Pie Crust:
- 1 package (14 oz) refrigerated pie crusts (2 crusts)
- 1 egg beaten (for egg wash)
- 1 tablespoon coarse sugar (optional for topping)
How to Make Homemade Cherry Pie
Step 1: Prepare the Cherry Filling
Grab a medium saucepan and pour in the reserved 1/2 cup of cherry juice. Whisk in the granulated sugar and cornstarch until the mixture is smooth. Cook this over medium heat, stirring constantly, until it thickens and turns bubbly—usually about 5 to 7 minutes. This step transforms the juice into a luscious, jammy base. Once thick, remove from heat and stir in the almond extract, vanilla extract, lemon juice, and all those plump, drained cherries. The aroma at this stage is worth the price of admission alone!
Step 2: Prepare the Pie Crust
Unroll one pie crust and gently ease it into your 9-inch pie dish, pressing it evenly along the bottom and up the sides. Make sure there are no air pockets, as you want a sturdy foundation to hold all that glorious cherry filling. This ready-made crust saves time without sacrificing the homemade touch.
Step 3: Assemble the Pie
Pour your cherry filling (now thick, glossy, and loaded with fruit) into the crust, then dot the mixture with small pieces of butter. This helps the flavors mingle and adds silkiness to every bite. For the top crust, choose your adventure: keep it classic by placing the whole crust on top and cutting a few slits for steam, or embrace creativity by slicing the crust into strips and weaving a beautiful lattice pattern. Either way, seal the edges all around and crimp them for that bakery-look finish.
Step 4: Add Finishing Touches
For a golden, shiny result, brush the top crust with a beaten egg. If you like a little sparkle and crunch, sprinkle the crust with coarse sugar. This touch is optional but brings your Homemade Cherry Pie to bakery perfection.
Step 5: Bake
Bake the pie in your preheated oven at 425°F for 35 to 40 minutes, or until the crust is deeply golden and the cherry filling is bubbling gently through the vents or lattice. Set a baking sheet under the pie to catch any bubbling juices for an easy cleanup. The smell in your kitchen will be absolutely irresistible!
Step 6: Cool and Set
This is the toughest part: patience! Let your Homemade Cherry Pie cool for at least 2 hours at room temperature. This allows the filling to set, so when you slice in, you get neat wedges and all the sweet, jammy cherry goodness in every bite.
How to Serve Homemade Cherry Pie
Garnishes
A classic dollop of freshly whipped cream is always a winner with Homemade Cherry Pie. For extra flair, try a scoop of vanilla ice cream, a dusting of powdered sugar, or a sprinkle of toasted sliced almonds—each enhances the pie’s fruitiness and adds a little luxury to every slice.
Side Dishes
Keep it simple alongside this iconic dessert: serve Homemade Cherry Pie with a crisp green salad for balance, or a plate of fresh berries to echo the pie’s fruity notes. For celebrations, pair with a glass of cold milk, light rosé, or even sparkling water with a cherry twist.
Creative Ways to Present
Want to make Homemade Cherry Pie the centerpiece? Cut it into squares and serve on a rustic wooden platter, miniaturize it with individual tartlets, or layer warm slices in parfait glasses with vanilla yogurt for a showy dessert twist. However you serve it, every bite is pure happiness.
Make Ahead and Storage
Storing Leftovers
Wrap leftover Homemade Cherry Pie tightly with plastic wrap or aluminum foil and refrigerate for up to 4 days. The crust may soften a bit, but a quick warm-up in the oven restores that irresistible flaky texture. Store directly in the pie dish for easy reheating and serving.
Freezing
Homemade Cherry Pie freezes beautifully. Let the baked pie cool completely, then wrap it in a double layer of plastic wrap followed by aluminum foil. Freeze for up to 3 months. When it’s time to enjoy, thaw the pie overnight in the fridge and warm it in the oven before serving—the flavor is just as fresh and bright as day one.
Reheating
To enjoy that just-baked taste, reheat slices of Homemade Cherry Pie in a 325°F oven for about 10 to 15 minutes. This revives the crust’s crispness and brings the fruit filling gently back to life. For a quicker fix, microwave individual slices for 20–30 seconds, but the oven is always best for keeping the crust flaky.
FAQs
Can I use fresh or frozen cherries instead of canned?
Absolutely! Substitute about 5 cups of fresh or frozen pitted cherries. If using these, taste your filling before baking and adjust the sugar as needed, since fresh cherries can vary in sweetness and tartness.
Why is my cherry pie filling runny?
The cornstarch in this recipe should thicken the filling nicely, but if your pie is runny, it may not have cooked long enough on the stove, or needed a longer cooling time after baking. Be sure to let the pie cool fully so the filling sets for neat slices.
What’s the difference between lattice and regular pie crust topping?
Lattice crusts offer a beautiful, woven look and allow the vibrant cherry filling to peek through, while a whole top crust is classic and easier to prepare. Both taste delicious with this Homemade Cherry Pie—choose whichever makes you happiest in the kitchen!
How do I keep the bottom crust from getting soggy?
Avoid soggy crust by making sure the cherry filling is properly thickened before adding it to the pie, and starting the pie in a hot oven. Placing the pie on a lower rack also helps crisp up the base beautifully.
Can I make Homemade Cherry Pie ahead of time?
Yes! In fact, Homemade Cherry Pie is even better after a few hours or a day. Bake it in advance, let it cool, then store it covered at room temperature or in the fridge. A little advance planning means even less stress and more time to savor dessert!
Final Thoughts
There’s just something magical about a Homemade Cherry Pie, from the sparkle of the crust to each jammy cherry bite. It’s a recipe close to my heart, and always my go-to when I want to share a little extra love from the kitchen. So roll up your sleeves, gather your ingredients, and let your oven work its magic—you’re about to create a pie that’s every bit as joyful to bake as it is to eat.
Print
Homemade Cherry Pie Recipe
- Total Time: 1 hour
- Yield: 8 slices 1x
- Diet: Vegetarian
Description
Indulge in the sweet and tangy flavors of a classic Homemade Cherry Pie with a buttery, flaky crust and a delicious cherry filling. Perfect for any occasion, this pie is sure to impress your family and friends!
Ingredients
For the Cherry Filling:
- 2 (14.5 oz) cans tart red cherries in water (drained with 1/2 cup juice reserved)
- 1 cup granulated sugar
- 1/4 cup cornstarch
- 1/4 teaspoon almond extract
- 1/4 teaspoon vanilla extract
- 1 tablespoon lemon juice
- 1 tablespoon butter
For the Pie Crust:
- 1 package (14 oz) refrigerated pie crusts (2 crusts)
- 1 egg beaten (for egg wash)
- 1 tablespoon coarse sugar (optional for topping)
Instructions
- Preheat the oven: Preheat the oven to 425°F.
- Prepare the Cherry Filling: In a medium saucepan, combine the reserved cherry juice, sugar, and cornstarch. Cook until thickened and bubbly. Remove from heat and add almond extract, vanilla extract, lemon juice, and cherries.
- Assemble the Pie: Line a pie dish with one crust, pour in the cherry filling, top with butter, add the second crust, and seal. Brush with egg wash and sprinkle with sugar.
- Bake: Bake for 35–40 minutes until golden brown and bubbly. Let cool before serving.
Notes
- If using fresh or frozen cherries, adjust sugar to taste.
- Place a baking sheet under the pie while baking to catch drips.
- Prep Time: 20 minutes
- Cook Time: 40 minutes
- Category: Dessert
- Method: Baking
- Cuisine: American
Nutrition
- Serving Size: 1 slice
- Calories: 370
- Sugar: 26 g
- Sodium: 240 mg
- Fat: 17 g
- Saturated Fat: 7 g
- Unsaturated Fat: 9 g
- Trans Fat: 0 g
- Carbohydrates: 52 g
- Fiber: 2 g
- Protein: 3 g
- Cholesterol: 25 mg


