
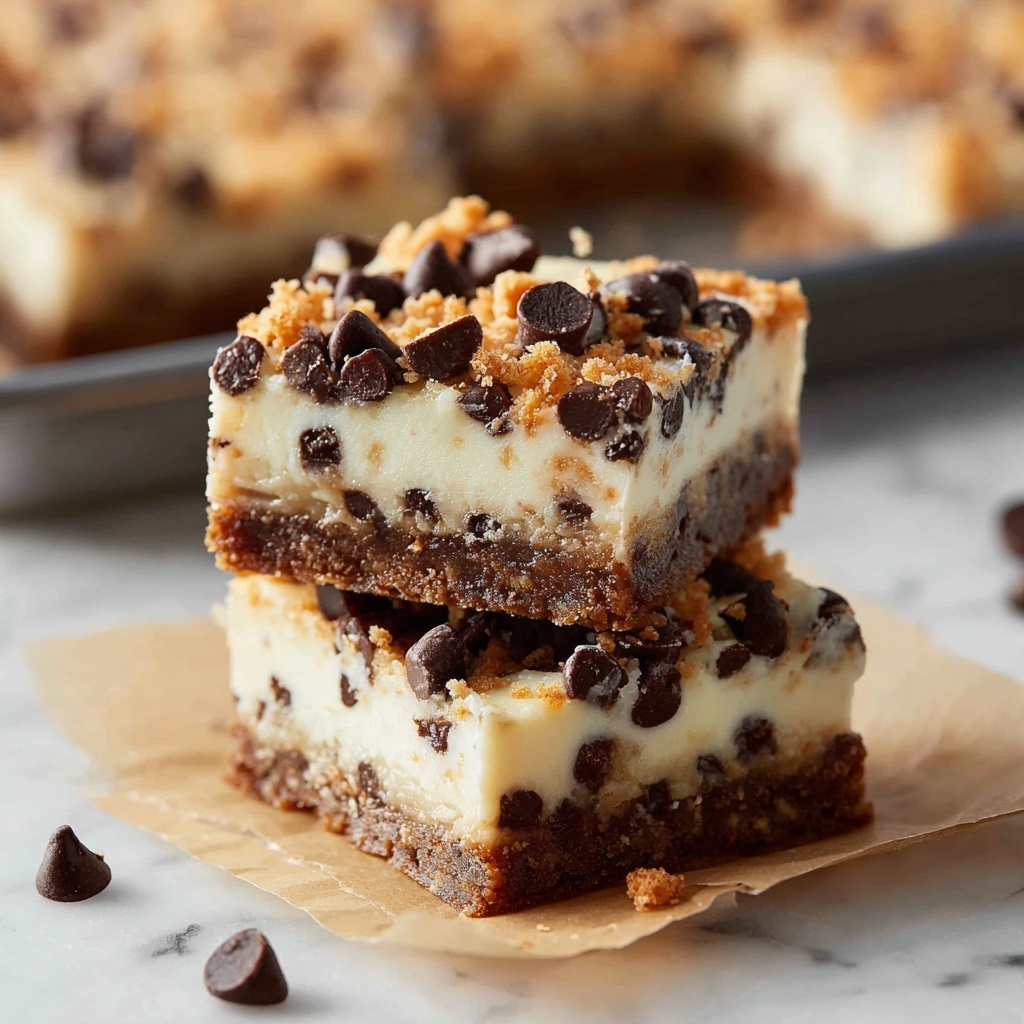
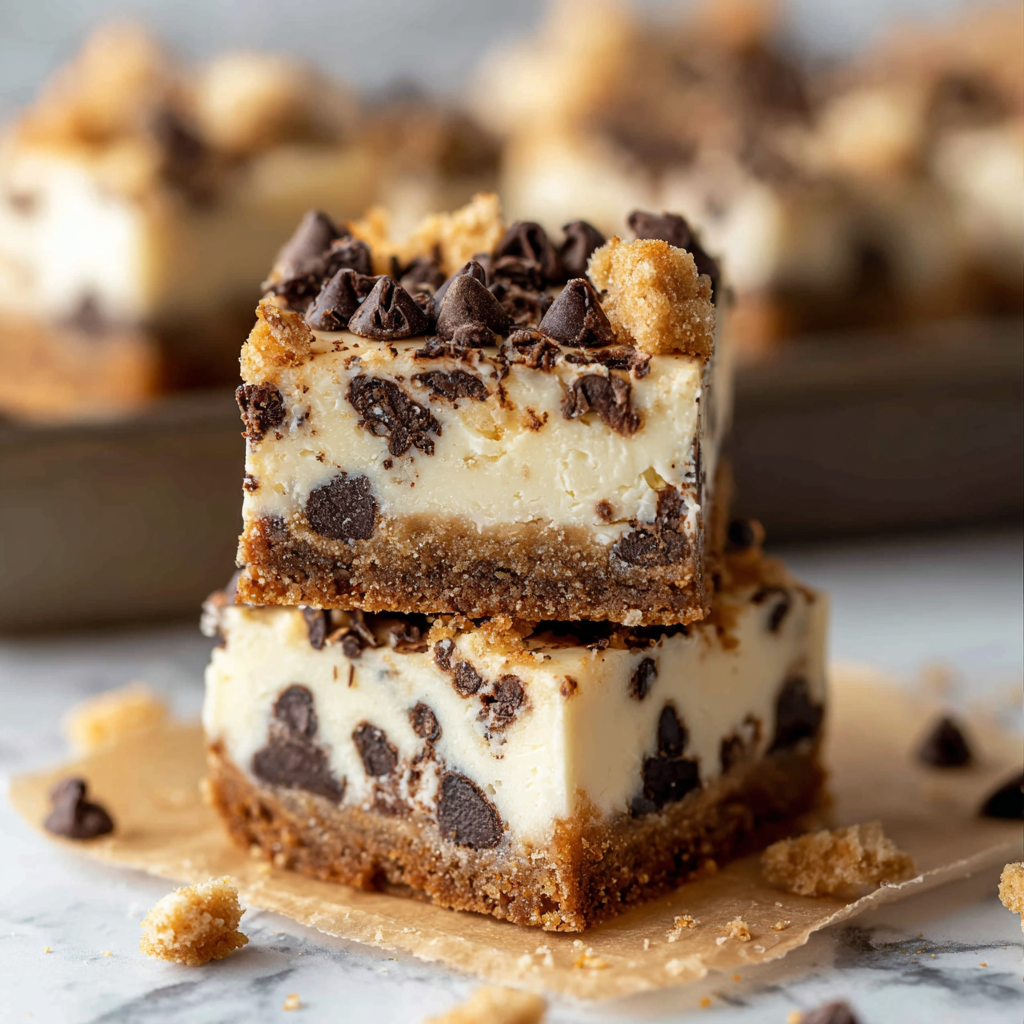
If you have a sweet tooth and love the rich, creamy goodness of cheesecake combined with the irresistible fun of cookie dough, then you are absolutely going to adore this No-Bake Cookie Dough Cheesecake Bars Recipe. It’s a dreamy dessert that brings together a soft, buttery cookie dough base topped with a luscious no-bake cheesecake layer, studded generously with chocolate chips. The best part? You don’t even have to turn on your oven! These bars are perfect for those warm days or any time you want an indulgent treat without the fuss of baking. Trust me, once you dive into this recipe, it will quickly become a favorite to make again and again.
Ingredients You’ll Need
This recipe keeps things delightfully simple but delivers incredible flavor and texture thanks to each carefully chosen ingredient. Each component plays a key role, from the buttery cookie dough base to the creamy cheesecake topping and the final chocolate chip pop.
- Unsalted butter, 1/2 cup, softened: Adds richness and helps bind the cookie dough layer perfectly.
- Brown sugar, 1/2 cup: Brings a deep molasses flavor and moisture to the cookie dough.
- Granulated sugar, 3/4 cup total: Sweetens both the cookie dough and cheesecake layers evenly.
- Milk, 2 tablespoons: Moistens the dough for a soft, pliable texture.
- Vanilla extract, 2 teaspoons total: Enhances the flavor with a warm, fragrant note.
- All-purpose flour, 1 cup: Provides structure to the cookie dough base while keeping it tender.
- Salt, 1/4 teaspoon: Balances sweetness and intensifies all the lovely flavors.
- Mini chocolate chips, 1 cup total: Adds bursts of sweet, melty chocolate throughout the dessert.
- Cream cheese, 16 ounces softened: The creamy heart of the cheesecake layer, smooth and tangy.
- Whipped cream or whipped topping, 1 cup: Lightens the cheesecake filling for a luscious, airy texture.
How to Make No-Bake Cookie Dough Cheesecake Bars Recipe
Step 1: Prepare the Cookie Dough Layer
Start by creaming together your softened butter, both the brown sugar and granulated sugar, milk, and vanilla extract until you get a smooth, fluffy mixture. This step is crucial because it ensures your dough is moist and flavorful. Then, add the flour and salt gradually, mixing until the mixture becomes a smooth dough. Gently fold in half the mini chocolate chips so every bite will have those gooey chocolate moments. Press this cookie dough evenly into your baking dish to create a sturdy, tasty base for your bars.
Step 2: Make the Cheesecake Layer
Next, beat together the softened cream cheese, sugar, and vanilla extract until silky and smooth — no lumps allowed! Folding in the whipped cream or whipped topping is key here; it transforms the cheesecake layer into a light and creamy dream, preventing it from becoming too dense. Once perfectly combined, spread this luscious cheesecake mixture evenly over your cookie dough base, creating that classic two-layer beauty.
Step 3: Add Topping and Chill
Sprinkle the remaining mini chocolate chips generously over the cheesecake layer for a delightful finishing touch. Now the hardest part: chilling. Pop your bars in the refrigerator for at least four hours to let everything set—this waiting time helps the layers meld and ensures that perfect sliceable texture for your bars. Patience really pays off with this incredible dessert!
How to Serve No-Bake Cookie Dough Cheesecake Bars Recipe
Garnishes
To take these bars from fantastic to show-stopping, consider topping with a few extra chocolate chips or even a drizzle of chocolate or caramel sauce for added decadence. A sprinkle of flaky sea salt can also elevate the flavors by balancing the sweetness. A dollop of fresh whipped cream right on top just before serving adds an extra creamy touch.
Side Dishes
Pair your dessert bars with fresh berries to add brightness and a touch of natural tartness that cuts through the richness. A simple scoop of vanilla ice cream can also be a delightful companion, creating a classic dessert duo that’s hard to beat. For a party, a cup of coffee or a creamy latte will complement the flavors beautifully.
Creative Ways to Present
For a fun twist, cut the bars into small squares and serve on a dessert platter with a sprinkle of edible glitter or colored sprinkles for a festive vibe. You could also layer the bars in individual cups topped with whipped cream for easy grab-and-go treats. Or experiment by adding crushed nuts or cookie crumbles on top to bring extra texture and flair to the presentation.
Make Ahead and Storage
Storing Leftovers
Once you’ve made this No-Bake Cookie Dough Cheesecake Bars Recipe, leftovers store wonderfully in an airtight container in the refrigerator for up to 4 days. Keeping them chilled ensures they retain their perfect texture and flavor, and the chocolate chips stay beautifully melty yet intact.
Freezing
You can absolutely freeze these bars if you want to prepare in advance or store them longer. Wrap the bars tightly with plastic wrap and then place in a freezer-safe container. They will keep well for up to 3 months. Just thaw in the refrigerator overnight before serving to preserve the creamy texture.
Reheating
Since these bars are best served chilled, reheating is generally not recommended. However, if you prefer them slightly softened, letting them sit at room temperature for about 15 minutes before serving will give you that lovely melt-in-your-mouth feel without losing their form.
FAQs
Can I use regular chocolate chips instead of mini chocolate chips?
Absolutely! Regular chocolate chips work just fine. They might be a bit chunkier, which gives a slightly different texture, but the flavor stays fantastic.
Is it safe to eat raw flour in this recipe?
Since this recipe uses raw flour, it’s important to use heat-treated flour to avoid any risk of foodborne illness. You can buy it pre-treated or treat the flour at home by spreading it on a baking sheet and baking at 350°F for 5 minutes.
Can I substitute the whipped cream with Greek yogurt?
Greek yogurt will change the texture and tanginess of the cheesecake layer, making it denser and less creamy. If you want a healthier twist, try using whipped coconut cream instead for a similar airy texture.
How do I ensure the bars firm up well?
Make sure your cream cheese is fully softened before mixing, and be patient with the chilling step. The 4-hour refrigeration is essential for the bars to set properly and be easy to cut.
Can I add nuts to this recipe?
Of course! Mixing chopped nuts into the cookie dough layer or sprinkling on top adds a lovely crunch and flavor contrast. Just make sure to adjust quantities so the bars don’t get too dense.
Final Thoughts
Making the No-Bake Cookie Dough Cheesecake Bars Recipe is one of those fun, rewarding kitchen adventures that feels like a treat every time. It’s a perfect blend of creamy, chocolatey, and buttery goodness without the hassle of baking. I truly hope this recipe finds a happy home in your kitchen and that it soon becomes a dessert you love making as much as devouring.
Print
No-Bake Cookie Dough Cheesecake Bars Recipe
- Prep Time: 20 minutes
- Cook Time: 0 minutes
- Total Time: 4 hours 20 minutes
- Yield: 16 servings
- Category: Dessert
- Method: No-Cook
- Cuisine: American
Description
These No-Bake Cookie Dough Cheesecake Bars combine the irresistible flavors of classic cookie dough with a creamy cheesecake layer. Easy to make and perfect for any occasion, these bars are chilled until firm, resulting in a rich, smooth dessert with delightful chocolate chip bursts in every bite.
Ingredients
Cookie Dough Layer
- 1/2 cup unsalted butter, softened
- 1/2 cup brown sugar
- 1/4 cup granulated sugar
- 2 tablespoons milk
- 1 teaspoon vanilla extract
- 1 cup all-purpose flour
- 1/4 teaspoon salt
- 1/2 cup mini chocolate chips
Cheesecake Layer
- 16 ounces cream cheese, softened
- 1/2 cup granulated sugar
- 1 teaspoon vanilla extract
- 1 cup whipped cream or whipped topping
- 1/2 cup mini chocolate chips (for topping)
Instructions
- Prepare the Cookie Dough Layer: In a large bowl, cream together the softened butter, brown sugar, granulated sugar, milk, and vanilla extract until the mixture is smooth and creamy.
- Add Dry Ingredients: Gradually incorporate the all-purpose flour and salt into the creamed mixture, mixing until a smooth cookie dough forms without any dry spots.
- Fold in Chocolate Chips: Gently fold in the 1/2 cup of mini chocolate chips to distribute them evenly throughout the cookie dough. Then evenly press this cookie dough mixture into the bottom of a prepared baking dish to form the base layer.
- Make the Cheesecake Layer: In a separate bowl, beat the softened cream cheese, sugar, and vanilla extract together until completely smooth and free of lumps.
- Fold in Whipped Cream: Carefully fold the whipped cream or whipped topping into the cream cheese mixture to lighten the texture. Spread this cheesecake layer evenly over the cookie dough base in the baking dish.
- Add Topping and Chill: Sprinkle the remaining 1/2 cup mini chocolate chips evenly over the cheesecake layer. Place the dish in the refrigerator and chill for at least 4 hours until the bars are firm and set.
Notes
- Ensure the cream cheese and butter are softened to room temperature for easier mixing and a smoother texture.
- Do not substitute the all-purpose flour with raw flour; use heat-treated flour if possible to avoid any health risks.
- For a firmer texture, chill the bars overnight.
- These bars can be stored covered in the refrigerator for up to 5 days.
- To serve, cut into squares and use a warm knife for clean cuts.


