
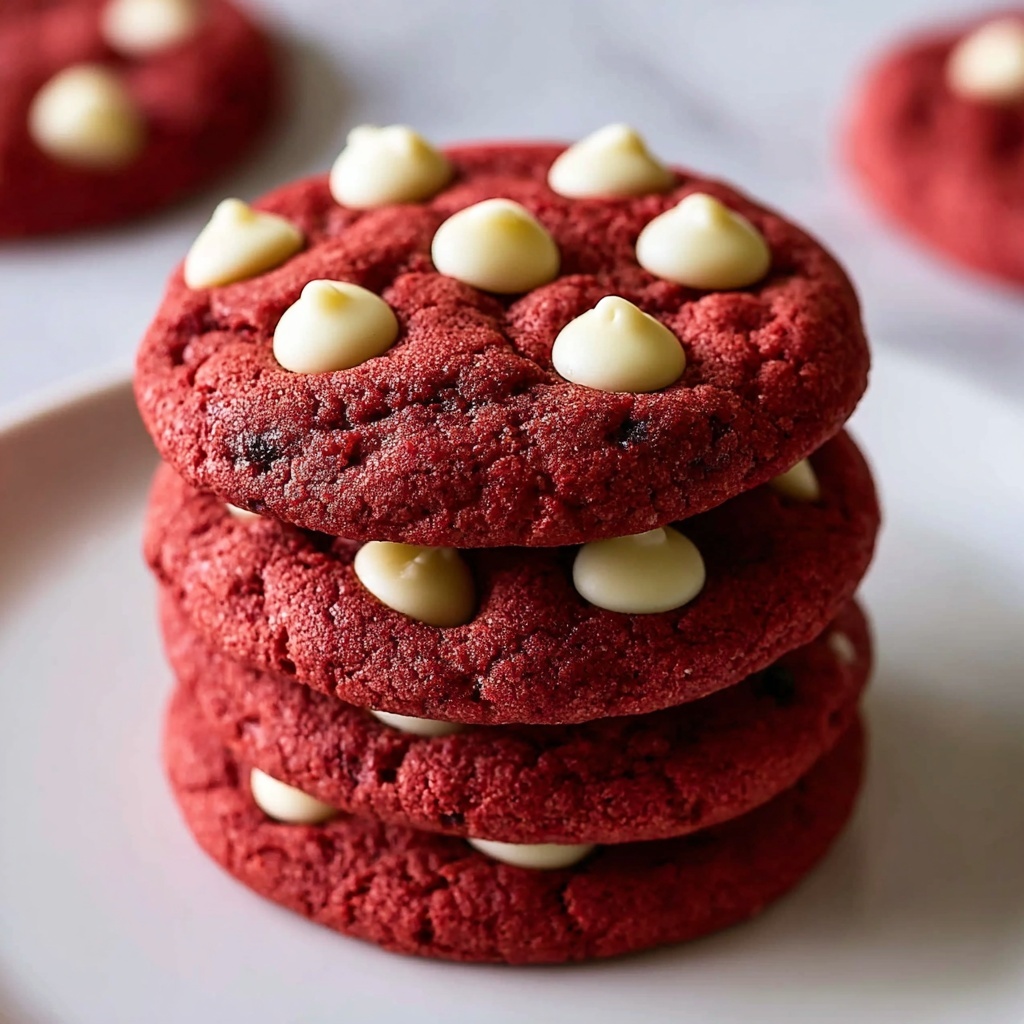
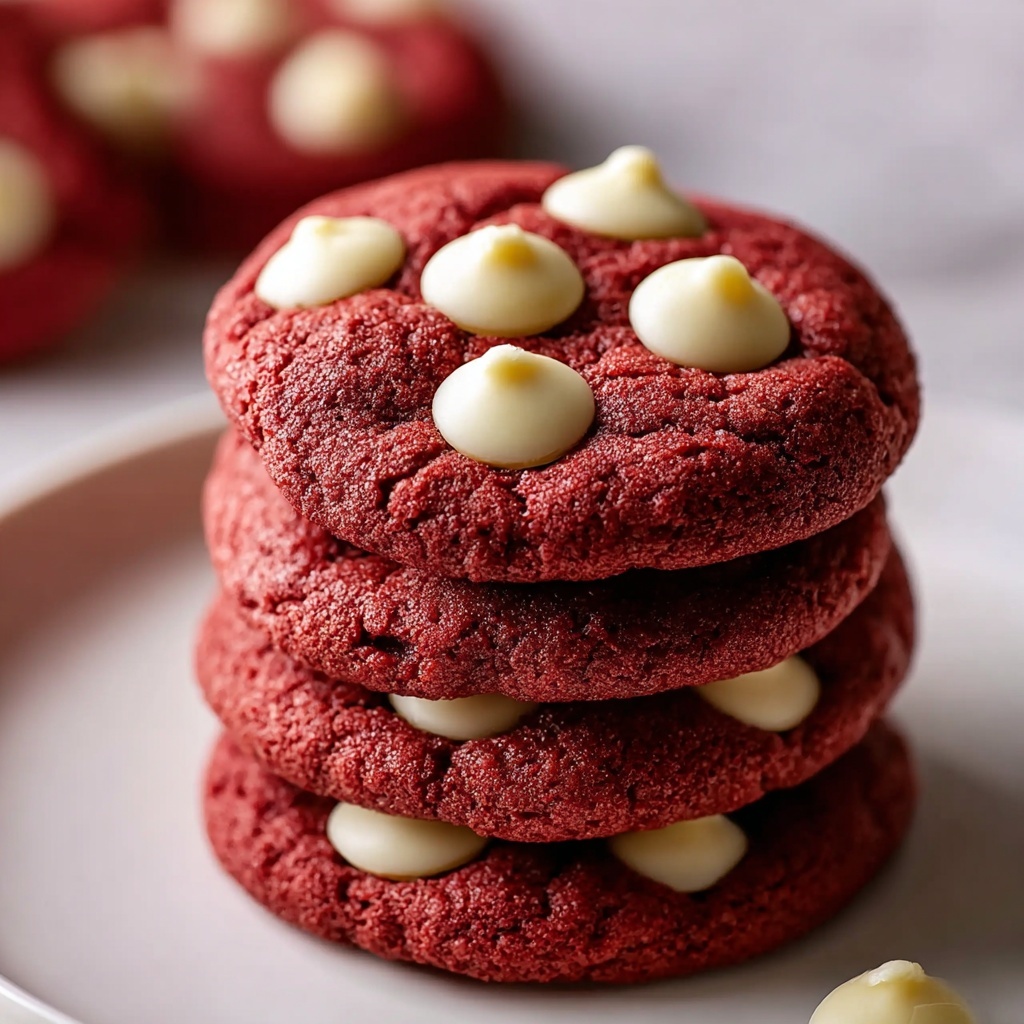
If you have a soft spot for the rich, velvety charm of red velvet cake but want something quicker and delightfully portable, this Red Velvet Cookies Recipe is your next best baking adventure. These cookies capture that classic red velvet flavor in a tender, chewy cookie form packed with just the right hint of cocoa and a gorgeous ruby hue. Easy to make and wonderfully fragrant, this recipe turns simple pantry staples into an impressive treat that’s perfect for sharing, gifting, or just sneaking a few when no one is looking.
Ingredients You’ll Need
Gathering your ingredients for this Red Velvet Cookies Recipe is refreshingly straightforward, yet each one plays a crucial role in building the cookie’s signature texture and color. From the all-purpose flour that creates structure to the red food coloring that gives these cookies their festive flair, every item is essential to delivering that perfect bite.
- All-purpose flour: Provides the sturdy base that holds the cookies together with just the right crumb.
- Granulated sugar: Sweetens the dough and contributes to a slight crispness on the edges.
- Unsalted butter (softened): Adds richness and helps achieve that tender, melt-in-your-mouth feel.
- Unsweetened cocoa powder: Brings a subtle cocoa depth that balances the sweetness beautifully.
- Large egg: Binds the ingredients and adds moisture to the dough.
- Buttermilk: Provides a tangy undertone and keeps the cookies soft and chewy.
- Red food coloring: The secret behind the irresistible red velvet appearance that makes these cookies pop.
- Vanilla extract: Enhances all the flavors with a warm, aromatic note.
- Pinch of salt: Sharpens the sweetness and balances the flavors.
How to Make Red Velvet Cookies Recipe
Step 1: Prepare Your Oven and Baking Sheets
Start by heating your oven to 350°F (175°C) and lining your baking sheets with parchment paper. This simple prep step ensures your cookies will bake evenly and won’t stick, saving you from any tricky clean-ups.
Step 2: Cream Butter and Sugar
In a large bowl, beat the softened butter and granulated sugar together until the mixture is light and fluffy. This aeration is key — it helps your cookies rise and gives them a soft, delicate texture.
Step 3: Add Wet Ingredients
Beat in the egg, buttermilk, vanilla extract, and the vibrant red food coloring until everything is thoroughly combined and your dough glows that signature rich red shade. This step blends the flavors and sets the tone for that classic red velvet taste.
Step 4: Combine Dry Ingredients
In a separate bowl, whisk together the all-purpose flour, cocoa powder, and a pinch of salt. Gradually fold this dry mix into your wet ingredients, careful not to overmix. This ensures the cookies stay tender and not dense.
Step 5: Bake to Perfection
Drop spoonfuls of dough onto the prepared baking sheets, giving each cookie a little space to spread. Bake for 10 to 12 minutes, or until the edges are set but the centers remain soft. Let them cool completely before enjoying to let the texture fully develop.
How to Serve Red Velvet Cookies Recipe
Garnishes
A simple dust of powdered sugar or a drizzle of white chocolate can transform these cookies into bite-sized works of art. For a festive touch, a small dollop of cream cheese frosting on top pairs beautifully with the cookie’s flavor and texture.
Side Dishes
These cookies shine alongside a glass of cold milk or a steaming cup of coffee or hot cocoa. They also make a sweet complement to a scoop of vanilla ice cream if you want to turn dessert into an extra indulgent treat.
Creative Ways to Present
Stack a few of these red velvet cookies and tie them with a festive ribbon for a charming gift. Alternatively, sandwich two cookies with cream cheese frosting or marshmallow fluff in the middle for a fun homemade cookie sandwich that’s sure to impress friends and family.
Make Ahead and Storage
Storing Leftovers
Once cooled, store your Red Velvet Cookies in an airtight container at room temperature. They’ll stay fresh and chewy for up to a week, making them great for prepping ahead for gatherings or just having on hand for a quick sweet bite.
Freezing
You can freeze baked cookies safely by arranging them in a single layer in a freezer-safe container with parchment paper between layers. When you want a treat, thaw at room temperature or warm slightly for that fresh-baked feel.
Reheating
If you prefer your cookies warm, pop one or two in the microwave for about 10 to 15 seconds. This quick step revives the soft, gooey texture, making every bite feel freshly baked.
FAQs
Can I substitute regular milk for buttermilk in this recipe?
You can, but to mimic the tanginess of buttermilk, try adding a teaspoon of lemon juice or vinegar to regular milk and let it sit for 5 minutes before using. This helps keep the cookies soft and tender.
Is it necessary to use red food coloring?
The red food coloring is what gives these cookies their iconic red velvet look, but if you prefer to avoid artificial colors, you can experiment with natural alternatives like beet juice, though results may vary.
How do I prevent my cookies from spreading too much?
Make sure your butter is softened but not melted, and chill the dough slightly before baking to control spread. Also, avoid using too much baking soda or powder if not called for, as that can cause excess spreading.
Can I make this recipe vegan or dairy-free?
With some adjustments, yes! Use plant-based butter, a flax or chia egg in place of the large egg, and a dairy-free milk with a teaspoon of lemon juice as a buttermilk substitute. Keep in mind texture and flavor might shift slightly.
Why do my cookies come out dense instead of soft?
Overmixing the dough or using too much flour can make cookies dense. Be gentle when folding in dry ingredients and measure flour correctly by spooning it into your measuring cup and leveling it off, rather than scooping directly.
Final Thoughts
There is something truly special about this Red Velvet Cookies Recipe that makes it a standout in any cookie lineup. It’s vibrant, flavorful, and easy to whip up on any day you’re craving a little sweet joy. I can’t wait for you to try it and make these gorgeous, tender cookies part of your favorite baking rotation.
Print
Red Velvet Cookies Recipe
- Prep Time: 15 minutes
- Cook Time: 12 minutes
- Total Time: 27 minutes
- Yield: 24 cookies
- Category: Dessert
- Method: Baking
- Cuisine: American
Description
Delight in these soft and colorful Red Velvet Cookies, featuring a perfectly balanced blend of cocoa and a striking red hue, enhanced by a tender crumb thanks to buttermilk and butter. Ideal for festive occasions or an everyday treat, these cookies are easy to make and deliver a rich, classic flavor in a convenient cookie form.
Ingredients
Dry Ingredients
- 2 cups all-purpose flour
- 2 tablespoons unsweetened cocoa powder
- Pinch of salt
Wet Ingredients
- ½ cup unsalted butter (softened)
- 1 cup granulated sugar
- 1 large egg
- ¼ cup buttermilk
- 2 tablespoons red food coloring
- 1 teaspoon vanilla extract
Instructions
- Preheat the oven: Preheat your oven to 350°F (175°C) and line baking sheets with parchment paper to prevent sticking and ensure easy cleanup.
- Cream butter and sugar: In a large bowl, cream together the softened butter and granulated sugar using a mixer or a strong wooden spoon until the mixture is light and fluffy, which helps to create a soft texture in the cookies.
- Add wet ingredients: Beat in the egg, followed by the buttermilk, vanilla extract, and red food coloring. Mix thoroughly until the batter is smooth and homogeneously colored.
- Combine dry ingredients: In a separate bowl, whisk together the all-purpose flour, unsweetened cocoa powder, and salt to evenly distribute the cocoa and salt throughout the flour.
- Mix dry into wet: Gradually fold the dry ingredient mixture into the wet ingredients, stirring just until combined to avoid overmixing which can toughen the cookies.
- Shape cookies: Drop spoonfuls of the dough onto the prepared baking sheets, spacing them appropriately to allow for spreading during baking.
- Bake: Bake in the preheated oven for 10 to 12 minutes, or until the edges are set but the centers remain soft. This ensures a chewy, tender cookie.
- Cool and serve: Allow the cookies to cool on the baking sheet for a few minutes before transferring them to a wire rack to cool completely, which helps them firm up slightly and makes them easier to handle.
Notes
- For best results, use fresh buttermilk and do not overmix the dough to keep the cookies tender.
- Adjust red food coloring quantity depending on desired color intensity.
- These cookies can be stored in an airtight container at room temperature for up to 5 days.
- Optionally, add white chocolate chips or chopped nuts for extra texture and flavor.


