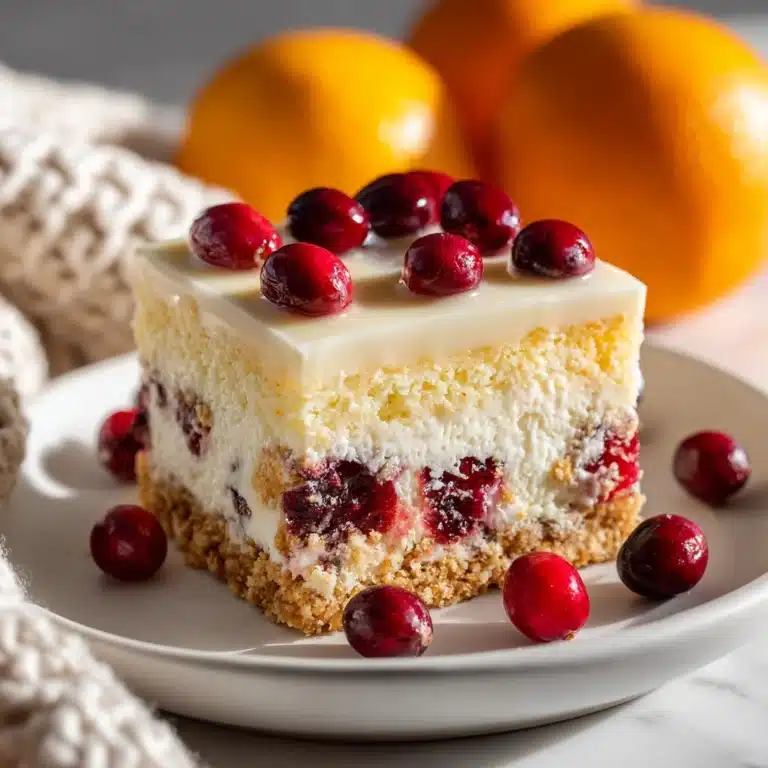
Slice and Bake Heart Cookies Recipe
If you’re looking for a dessert that’s as delightful to make as it is to share, Slice and Bake Heart Cookies are a must-try for your baking repertoire. These buttery, tender cookies are a labor of love with a surprise inside: a charming heart shape revealed in every slice, colored in vibrant pink or red. Perfect for Valentine’s Day or any occasion that calls for a little sweetness, this playful recipe transforms classic slice-and-bake dough into a heartfelt treat that brings smiles before the first bite. You’ll adore how these cookies turn everyday ingredients into eye-catching, joy-sparking confections that everyone will remember.

Ingredients You’ll Need
Each ingredient in Slice and Bake Heart Cookies truly matters—together, they create a vibrant, rich, and irresistibly soft cookie. Here’s how these staples come together to make each slice a little work of cookie art:
- Unsalted butter (¾ cup, softened): The foundation for that classic, tender crumb—use unsalted for better flavor control.
- Granulated sugar (1 cup): Sweetens and helps the cookie maintain a beautiful pale color and crisp edges.
- Vanilla extract (1 teaspoon): Adds unmistakable warm, comforting aroma; don’t skip it!
- Large eggs (2): Provide structure and moisture, making the cookies soft yet sturdy enough for slicing.
- All-purpose flour (2½ cups): The backbone of the cookie, giving just the right chewy bite.
- Baking powder (1 teaspoon): Guarantees gentle lift for a lighter, more tender finished cookie.
- Salt (½ teaspoon): Essential to round out sweetness and really make those heart shapes pop in flavor.
- Red or pink gel food coloring: Gel gives you that striking, vivid heart without changing the dough’s texture—experiment with shades!
How to Make Slice and Bake Heart Cookies
Step 1: Cream the Butter, Sugar, and Vanilla
Start by creaming together the softened unsalted butter, granulated sugar, and vanilla extract in a large mixing bowl. Beat for about three minutes, until the mixture is fluffy and pale—this step ensures your cookies will have that signature melt-in-your-mouth texture. Don’t rush it; air whipped in at this stage equals dreamy cookies later!
Step 2: Add Eggs, One at a Time
Next, add the eggs one at a time, beating just until each is incorporated. This gentle mixing keeps the dough soft and helps the eggs fully blend in, yielding a smooth and cohesive mix. Overbeating can make cookies tough, so just mix until things come together.
Step 3: Combine the Dry Ingredients
In a separate bowl, whisk together the all-purpose flour, baking powder, and salt. Gradually incorporate these dry ingredients into your wet mixture, mixing until you have a pliable, uniform dough. The dough should hold its shape but not be sticky—this will give you the ideal canvas for those gorgeous hearts.
Step 4: Color and Shape the Heart Dough
Remove about one-third of the dough and blend in your red or pink gel food coloring. Knead it just enough to evenly tint—use gloves if you want to keep hands dye-free! Pat the colored dough into a ½-inch thick rectangle, wrap it in plastic, and freeze for 20 minutes. This extra chill makes clean, perfect heart shapes possible.
Step 5: Cut and Stack Heart Centers
Once chilled, cut the colored dough into small heart shapes with a heart cutter. Gather your heart cutouts and carefully stack them into a log, using a dab of water if needed to help them stick together. Pop the heart log back in the freezer for 30 minutes so it’s nice and firm—this keeps the heart crisp and defined after slicing.
Step 6: Wrap Hearts in Plain Dough
When your heart log is fully chilled, take the remaining uncolored dough and roll or press it out. Wrap this plain dough evenly around the heart center, shaping it into a neat cylinder. A little patience here results in those Instagram-worthy slices! Once wrapped, cover with plastic wrap and refrigerate for at least 30 minutes to set the shape.
Step 7: Slice and Bake
Preheat your oven to 350°F (175°C). Using a sharp knife, carefully slice the cookie log into ¼-inch thick rounds. Arrange them on parchment-lined baking sheets, leaving a bit of room to spread. Bake for 10 to 12 minutes—just until the edges set and centers are pale. Let the cookies rest on the sheet for a couple minutes, then transfer to a wire rack to finish cooling. Now comes the best part: each slice reveals a perfect, cheerful heart!
How to Serve Slice and Bake Heart Cookies

Garnishes
The true magic of Slice and Bake Heart Cookies is in their appearance, but you can still gild the lily! Try a dusting of powdered sugar or a drizzle of melted white chocolate for a finishing touch that looks as sweet as it tastes. A sprinkle of edible glitter or colorful nonpareils can add a festive sparkle, making your cookies even more irresistible for special occasions.
Side Dishes
These cookies shine brightest with simple accompaniments. Serve alongside a cold glass of milk, a warm mug of cocoa, or an aromatic cup of tea for the ultimate treat. For a dessert platter, pair with fresh berries or fruit preserves—the cookies’ buttery crumb and hint of vanilla play nicely with tart flavors.
Creative Ways to Present
There’s so much joy in presenting these cookies! Stack them in a clear jar, tie with a bright ribbon, or layer between parchment in a bakery box for heartfelt gifts. Plating them in a circle with a few scattered rose petals transforms them into an edible centerpiece. For parties, nestle each cookie in a cupcake wrapper for a polished touch that highlights every heart.
Make Ahead and Storage
Storing Leftovers
Once cooled, Slice and Bake Heart Cookies keep beautifully in an airtight container at room temperature for up to 5 days. Store layers with parchment between them to preserve their delicate edges and designs. The hearts will stay vibrant, and the cookie texture remains sturdy but tender.
Freezing
These cookies are perfect for making ahead! The unbaked dough log can be wrapped tightly and frozen for up to 2 months. Simply thaw in the fridge until sliceable, then bake as directed—no need to adjust the oven temp. Baked cookies also freeze well; ensure they’re fully cooled and layered with parchment before sealing in freezer-safe bags.
Reheating
For that “just-baked” freshness, pop cookies into a preheated 300°F (150°C) oven for 3 to 4 minutes straight from the freezer. Let them cool slightly before serving; the hearts inside stay crisp and vivid, and the outside regains its tender, buttery bite.
FAQs
Can I use liquid food coloring instead of gel?
Gel food coloring is strongly recommended for Slice and Bake Heart Cookies because it delivers bold, vivid color without altering the dough’s texture. If you do use liquid coloring, you may need a bit more flour to counteract the extra moisture, but the hearts won’t be quite as vibrant.
Why do I need to chill the dough so many times?
Chilling is the secret to maintaining those sharp heart edges through slicing and baking. Well-chilled dough doesn’t spread or blur, so every cookie shows off that perfect heart. Don’t skip these steps—patience during chilling pays off tremendously in the final look!
What can I substitute for the heart cutter?
If you don’t have a heart cutter on hand, don’t worry! You can use any small cookie cutter—stars or trees make these cookies perfect for other holidays, keeping the festive spirit alive beyond Valentine’s Day. You can also craft a heart template from cardboard and use a sharp paring knife in a pinch.
Are Slice and Bake Heart Cookies suitable for gifting?
Absolutely! These cookies are practically made for gifting. Their charming appearance is sure to impress, and they hold up well when stacked and packaged. Tuck them into bakery boxes, clear bags, or tins, and they’ll be just as gorgeous when they arrive at their destination as when they left your kitchen.
Can the dough be made in advance?
Yes, you can prepare both the colored and uncolored layers up to 2 days ahead. Simply store them tightly wrapped in the refrigerator until you’re ready to assemble, slice, and bake. Advance prep makes busy holiday baking a breeze and guarantees fresh, beautiful cookies every time.
Final Thoughts
Sharing a batch of Slice and Bake Heart Cookies is a creative, joy-filled way to show you care—whether for a special someone or to brighten an ordinary day. This recipe transforms simple ingredients into edible works of art, each slice revealing a peek of love inside. Gather your favorite people, put on some music, and create a memory with every cookie you make!
Print
Slice and Bake Heart Cookies Recipe
- Total Time: 1 hour 42 minutes
- Yield: About 24 cookies 1x
- Diet: Vegetarian
Description
These Slice and Bake Heart Cookies are a delightful treat, perfect for Valentine’s Day or any special occasion. The buttery, vanilla-infused dough is shaped into colorful hearts that reveal a beautiful design when sliced. These cookies are not only delicious but also fun to make!
Ingredients
Dough:
- ¾ cup unsalted butter, softened
- 1 cup granulated sugar
- 1 teaspoon vanilla extract
- 2 large eggs
- 2½ cups all-purpose flour
- 1 teaspoon baking powder
- ½ teaspoon salt
Additional:
- Red or pink gel food coloring
Instructions
- Cream Butter and Sugar: In a large mixing bowl, cream butter, sugar, and vanilla until light and fluffy, about 3 minutes.
- Add Eggs: Add eggs one at a time, mixing until just combined.
- Combine Dry Ingredients: In a separate bowl, whisk together flour, baking powder, and salt.
- Form Dough: Gradually add dry ingredients to wet ingredients until a dough forms.
- Color Dough: Remove one-third of the dough and mix in food coloring until evenly tinted.
- Shape and Freeze: Shape colored dough into a rectangle, freeze, cut into hearts, stack, and freeze again.
- Wrap and Chill: Wrap colored hearts with remaining dough, chill, slice, bake, and cool.
Notes
- Gel food coloring gives the most vibrant results.
- Keep dough well-chilled at every stage to preserve the heart design.
- Swap heart cutter for seasonal shapes for different occasions.
- Prep Time: 1 hour 30 minutes (including chilling)
- Cook Time: 12 minutes
- Category: Dessert, Cookies
- Method: Slice-and-Bake
- Cuisine: American
Nutrition
- Serving Size: 2 cookies
- Calories: 275
- Sugar: 17g
- Sodium: 112mg
- Fat: 13g
- Saturated Fat: 8g
- Unsaturated Fat: 5g
- Trans Fat: 0g
- Carbohydrates: 37g
- Fiber: 1g
- Protein: 4g
- Cholesterol: 56mg
