Stenciled Halloween Sprinkle Cake Recipe
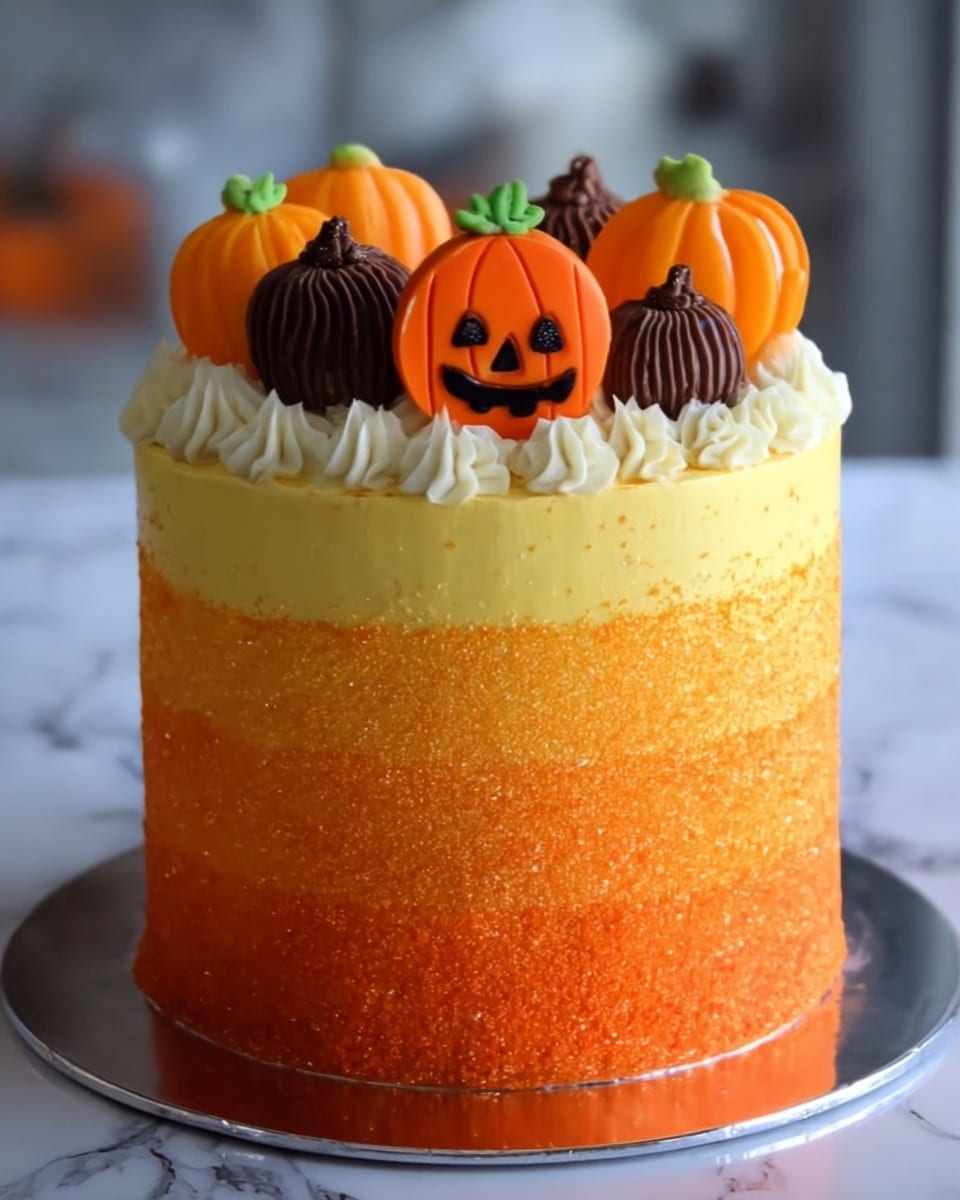
Nothing says festive and fun like a Stenciled Halloween Sprinkle Cake Recipe that brings the perfect blend of sweet, colorful, and playful to your Halloween celebrations. This vibrant layered cake is not only a feast for the eyes but also delightfully fluffy and creamy, thanks to the rich buttercream tinted in electric shades of yellow and orange. Whether you’re throwing a spooky party or simply want to impress your friends with a creative twist on classic baking, this cake is bound to become a beloved centerpiece that everyone will rave about.
Ingredients You’ll Need
This recipe combines simple, reliable ingredients that come together to create a show-stopping dessert. Each component plays a crucial role, from the tender cake layers to the luscious, smooth buttercream, and finally to the festive sprinkles and candies that deliver that magical Halloween touch.
- Unsalted butter: Using room temperature butter ensures your cake and frosting blend smoothly and achieve the perfect creamy texture.
- Granulated sugar: Provides the necessary sweetness and helps with the lightness in the cake batter.
- Large eggs: These add structure, richness, and moisture to the cake layers.
- All-purpose flour: The backbone of the cake, ensuring a tender crumb that holds up well for layering and decorating.
- Salt: Elevates the overall flavor, balancing the sweetness.
- Baking powder: The essential leavening agent that creates a fluffy, risen texture.
- Milk: Adds moisture and helps achieve a tender crumb, especially when it’s at room temperature.
- Vanilla extract: Infuses the cake with a warm, welcoming aroma and depth of flavor.
- Pasteurized liquid egg whites: Used in the buttercream for a light and silky finish.
- Powdered sugar: Sweetens and stabilizes the buttercream to a smooth, spreadable consistency.
- Assorted gel food coloring: Choose yellows and oranges that bring the Halloween vibe to life with vibrant shades.
- Sanding sugar: Adds sparkle and texture with colors like white, gold, yellow, and orange for that perfect ombre effect.
- Parchment paper: Used to create detailed stencils for decorating the cake’s surface beautifully.
- Round candies (orange and yellow): The final adorable touch that’s great for decorating the cake base and adding extra sweetness and color.
How to Make Stenciled Halloween Sprinkle Cake Recipe
Step 1: Preheat Oven and Prepare Pans
Start by preheating your oven to 350°F and lining four 9-inch cake pans with parchment paper. Don’t forget to spray the pans with nonstick cooking spray so your cake layers release easily after baking.
Step 2: Cream Butter and Sugar
Cream the unsalted butter and granulated sugar on medium speed for about 5-6 minutes until the mixture is light and fluffy. This step is crucial because a well-creamed butter and sugar base helps trap air, making the cake tender and soft.
Step 3: Add Eggs One at a Time
Incorporate each egg individually, beating thoroughly after each addition. This ensures the eggs fully combine and create a well-emulsified batter that will rise evenly in the oven.
Step 4: Mix Dry Ingredients and Liquids
Gradually add the flour, salt, and baking powder while mixing on low speed. Then slowly pour in the milk and vanilla extract, blending until just combined. Be careful not to overmix to keep the cake tender.
Step 5: Bake the Cake Layers
Divide the batter evenly among the prepared pans and bake for 25-30 minutes. You’ll know they’re done when the tops spring back gently after being pressed. Allow the cakes to cool completely before frosting.
Step 6: Make the Buttercream
Mix the pasteurized liquid egg whites, powdered sugar, and salt on low speed until combined. Gradually beat in the softened butter on medium speed until the frosting becomes light, fluffy, and spreadable. Finish with vanilla extract for that sweet, classic flavor.
Step 7: Assemble the Cake
Cut each cooled cake round in half to create eight layers. Tint the buttercream in various shades of yellow and orange to create an ombre effect between the layers. Stack and spread frosting between each, building a stunning gradient inside the cake.
Step 8: Crumb Coat and Chill
Apply a thin layer of white buttercream over the entire cake to seal in crumbs, then refrigerate it for an hour to set. This makes decorating easier and keeps the cake looking clean.
Step 9: Stencil and Decorate
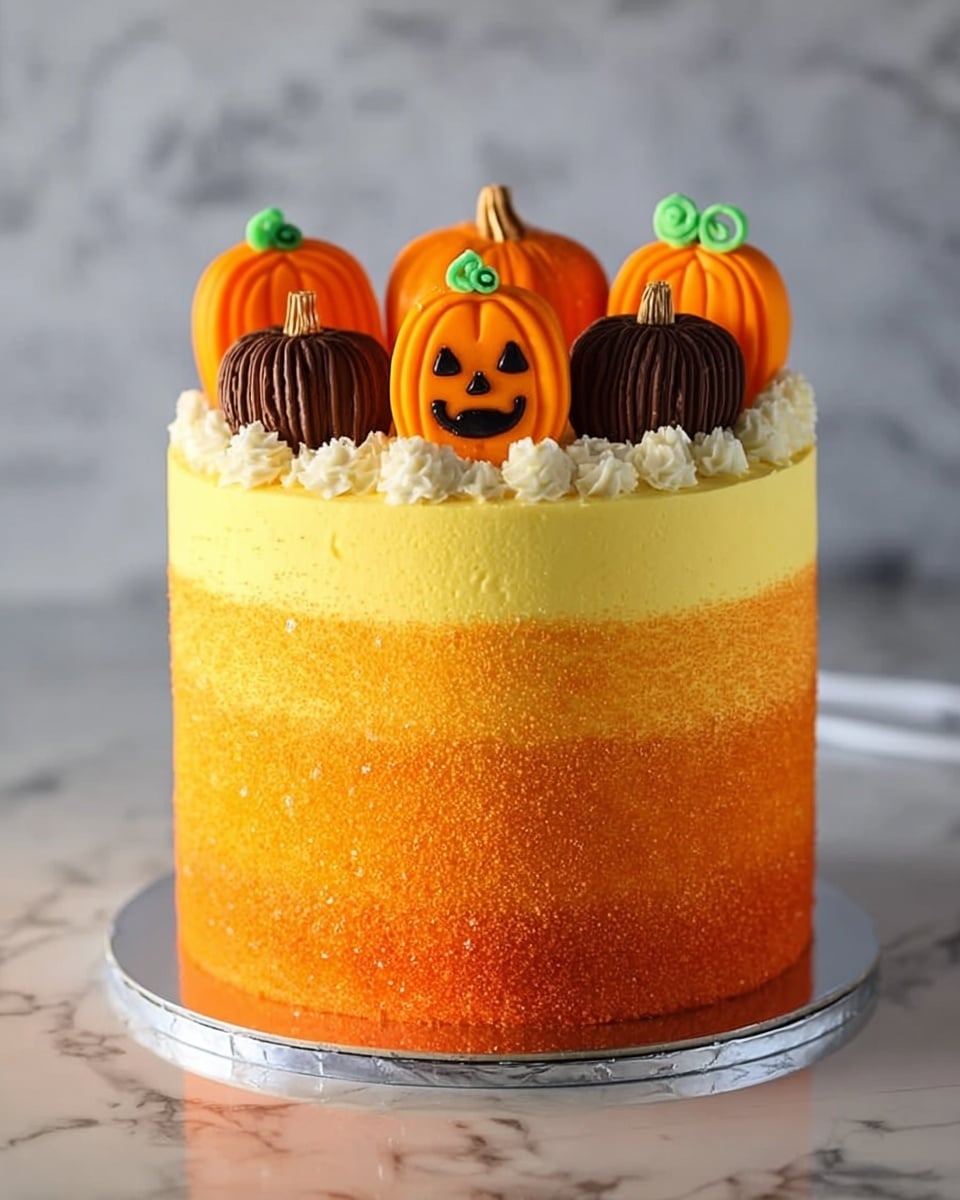
Place a parchment stencil onto the chilled cake, then carefully sprinkle ombre sanding sugars over it, finishing with bright orange sugar on top. Remove the stencil gently and surround the cake base with orange and yellow round candies for a fun, festive finish.
How to Serve Stenciled Halloween Sprinkle Cake Recipe
Garnishes
The addition of sanding sugar and the colorful candies around the cake bring texture and sparkle, but you can also add edible glitter or small Halloween-themed toppers for extra pizzazz. These garnishes make your cake look like a magical celebration on a plate.
Side Dishes
Pair this sweet treat with a light, refreshing accompaniment like spiced apple cider or a citrusy punch. These drinks complement the cake’s sweetness perfectly and keep the party vibe lively and seasonal.
Creative Ways to Present
Place the cake on a rustic wooden board or a glass cake stand to elevate its look. You can also scatter autumn leaves or mini pumpkins around the base for a full-on Halloween presentation. Personalizing the setup makes the Stenciled Halloween Sprinkle Cake Recipe feel that much more special.
Make Ahead and Storage
Storing Leftovers
Once assembled and frosted, store leftover cake covered loosely with plastic wrap or in an airtight container at room temperature for up to two days, or in the fridge for up to five days. Keep the cake away from strong odors to maintain its fresh flavor.
Freezing
You can freeze the unfrosted baked cake layers wrapped tightly in plastic wrap and foil for up to three months. For the assembled and frosted cake, flash freeze uncovered to set the frosting, then wrap securely before freezing. Thaw in the fridge overnight before serving.
Reheating
This cake is best enjoyed chilled or at room temperature. If you prefer your cake slightly warmed, slice just one serving and microwave for 15-20 seconds, but avoid heating the entire cake, as the buttercream may lose its texture.
FAQs
Can I use regular eggs instead of pasteurized liquid egg whites in the buttercream?
While liquid egg whites are ideal for a smooth, stable buttercream, you can substitute with fresh egg whites if you whip them properly and ensure freshness. Just be cautious with raw eggs and consider pasteurizing them at home for safety.
What other colors of gel food coloring can I use for this cake?
For a Halloween twist, you could also incorporate black or purple accents, but stay mindful of gel colors that might affect the buttercream texture. Yellow and orange provide that warm autumnal glow that’s perfect for this Stenciled Halloween Sprinkle Cake Recipe.
Can I make this cake gluten-free?
Yes! You can replace the all-purpose flour with a gluten-free 1:1 baking flour blend. Just make sure it contains xanthan gum if your blend doesn’t have it, to maintain the cake’s structure and moisture.
How long does it take to stencil the cake?
Stenciling may take about 15-20 minutes once your cake is chilled and crumb coated. Using parchment paper for your stencil makes the process straightforward and precise, allowing you to create those lovely layered sugar designs.
Is this cake suitable for kids’ Halloween parties?
Absolutely! This cake is colorful, fun, and not too scary, making it perfect for kids. Plus, the candies and sparkly sanding sugar add layers of excitement that children love during Halloween festivities.
Final Thoughts
Making the Stenciled Halloween Sprinkle Cake Recipe is truly a delightful adventure that combines skillful baking with playful decorations. This cake brings people together with its vibrant colors, delicious layers, and festive spirit. Whether you’re an experienced baker or just starting, this recipe invites you to embrace the charm of Halloween while crafting a dessert that tastes as good as it looks. Give it a try and watch your friends and family swoon with every bite!
Print
Stenciled Halloween Sprinkle Cake Recipe
- Total Time: 1 hour 15 minutes
- Yield: 12 servings 1x
Description
This Stenciled Halloween Sprinkle Cake is a festive and colorful layered cake perfect for celebrating Halloween. Featuring soft, fluffy vanilla cake layers tinted with vibrant yellow and orange buttercream, it is decorated with an ombre sanding sugar pattern using a stencil and topped off with bright round candies for a playful and spooky look. It yields 12 servings and combines classic flavors with stunning seasonal decoration.
Ingredients
Cake Layers
- 8 oz unsalted butter, at room temperature
- 3 cups granulated sugar (21 oz)
- 6 large eggs, at room temperature
- 4 1/2 cups all-purpose flour (20.25 oz)
- 2 tsp salt
- 2 tbsp + 1 tsp baking powder (7 tsp)
- 2 1/2 cups milk, at room temperature
- 1 tbsp vanilla extract
Buttercream Frosting
- 8 fl oz pasteurized liquid egg whites (1 cup)
- 8 cups powdered sugar (32 oz)
- 3/4 tsp salt
- 4 cups unsalted butter (32 oz), at room temperature
- 2 1/2 tbsp vanilla extract
- Assorted gel food coloring (yellow, orange, and electric orange)
Decoration
- Sanding sugar in white, gold, yellow, and orange
- Parchment paper (for stenciling)
- Orange and yellow round candies, like Sixlets
Instructions
- Preheat the Oven: Preheat your oven to 350°F (175°C). Prepare four 9-inch cake pans by lining them with parchment paper rounds and spraying them with nonstick cooking spray to ensure effortless cake removal.
- Cream Butter and Sugar: In a large mixing bowl, cream 8 oz of unsalted butter and 3 cups of granulated sugar together using a mixer on medium speed for 5-6 minutes, or until the mixture becomes light and fluffy, indicating air has been incorporated for a tender crumb.
- Add Eggs: Add the 6 large eggs one at a time, beating well after each addition to fully incorporate them and create a smooth batter.
- Combine Dry Ingredients & Liquids: On low speed, gradually add the 4 1/2 cups flour, 2 teaspoons salt, 7 teaspoons baking powder, followed by 2 1/2 cups of milk and 1 tablespoon vanilla extract. Mix until the batter is smooth and all ingredients are well combined.
- Bake the Cake Layers: Divide the batter evenly among the prepared pans. Bake in the preheated oven for 25-30 minutes, or until the tops spring back when lightly pressed and a toothpick inserted in the center comes out clean. Remove from oven and cool completely on wire racks before decorating.
- Make the Buttercream Frosting – Combine Ingredients: In a mixing bowl, combine 1 cup pasteurized liquid egg whites, 8 cups powdered sugar, and 3/4 teaspoon salt. Mix on low speed until ingredients are incorporated.
- Add Butter: Gradually beat in 4 cups unsalted butter at room temperature on medium speed until the buttercream becomes light, fluffy, and smooth.
- Flavor the Frosting: Add 2 1/2 tablespoons vanilla extract and mix for an additional minute to incorporate flavor evenly throughout the frosting.
- Cut Cake Rounds: Once cooled, carefully slice each cake round horizontally in half to create 8 thin layers total.
- Layer and Tint Buttercream: Tint portions of buttercream using gel food coloring in shades of yellow, orange, and electric orange to create a beautiful ombre effect inside the layers. Spread a layer of colored frosting between each cake layer as you stack the cake.
- Apply Crumb Coat: Cover the stacked cake with a thin layer of white buttercream to seal in crumbs. Refrigerate the cake for 1 hour to set the crumb coat firmly.
- Stencil Decoration: After chilling, place a parchment paper stencil on the cake surface. Apply sanding sugar in an ombre pattern from white to gold, yellow, and orange hues. Cover the top of the cake with orange sanding sugar to create a Halloween-inspired colorful finish.
- Finish Decoration: Carefully remove the stencil from the cake. Decorate the base of the cake with orange and yellow round candies such as Sixlets to add a festive, playful touch to your Halloween cake.
Notes
- Ensure all ingredients, especially eggs and milk, are at room temperature for better batter consistency.
- For best results and safety, use pasteurized liquid egg whites in the frosting.
- You can substitute granulated sugar for sanding sugars if unavailable, but the decorative sparkle may be less pronounced.
- Adjust the intensity of gel food coloring to achieve your desired ombre shade depth.
- Refrigerate the cake after crumb coating to make decorating easier and reduce crumb mixing in the final frosting layer.
- Use a light hand when applying sanding sugar over the stencil to avoid shifting the design.
- Store leftovers covered in the refrigerator; bring to room temperature before serving for best flavor.
- Prep Time: 45 minutes
- Cook Time: 30 minutes
- Category: Dessert
- Method: Baking
- Cuisine: American
